A300 Attachments
Bumper
The A300 can have bumpers. By default, we have two bumpers, on the front and rear of the robot.
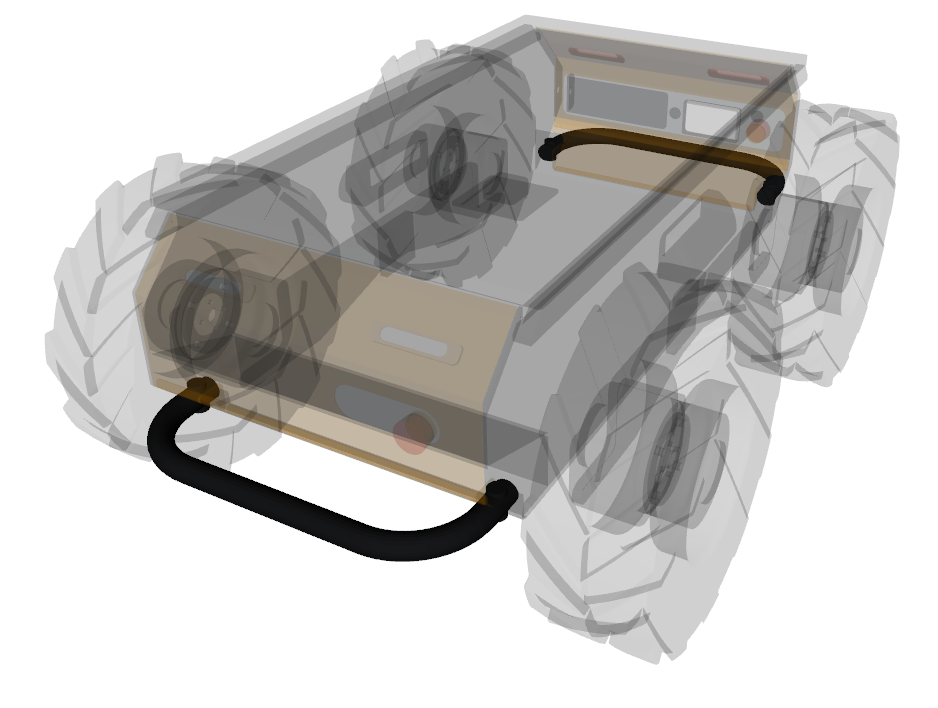 | |
The bumpers can be extended by setting the extension parameter.
Top Plate
The A300 description supports two types of top plates that modify the mounting links of the robot.
Default
The default top plate is mounted on top of the robot.
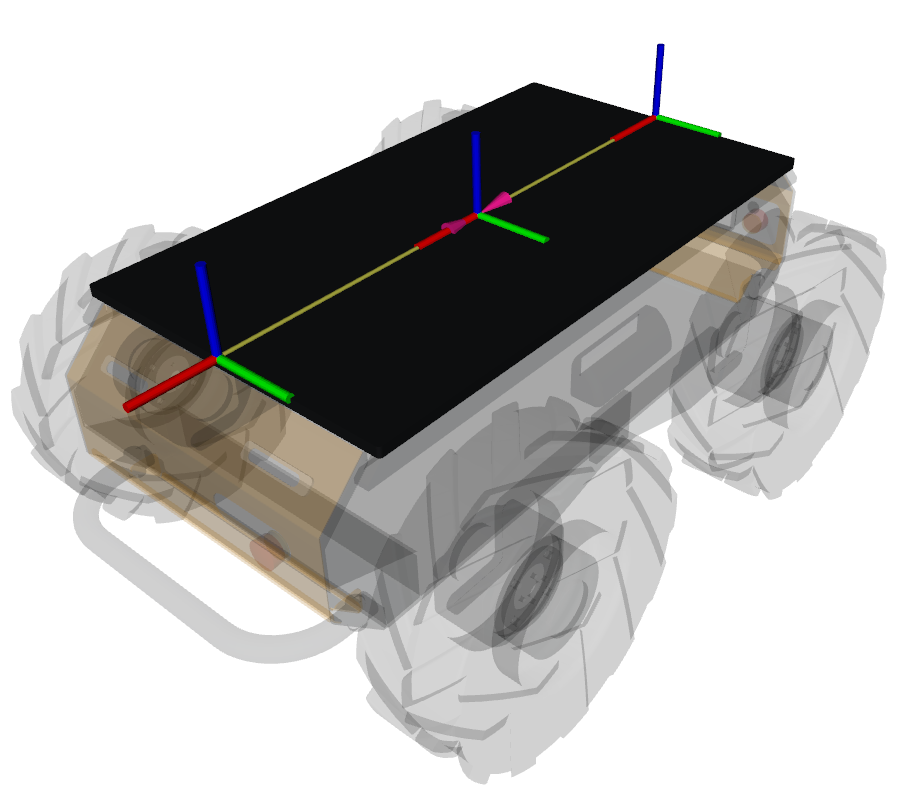 | |
The default top plate has 3 mounting locations that can be used as the parent_link for sensors and other
attachments:
${name}_front_mountat the front edge of the plate,${name}_rear_mountat the rear edge of the plate, and${name}_default_mountlocated in the centre of the plate.
PACS
The PACS top is physically identical to the default plate, but adds PACS-compatible mounting links.
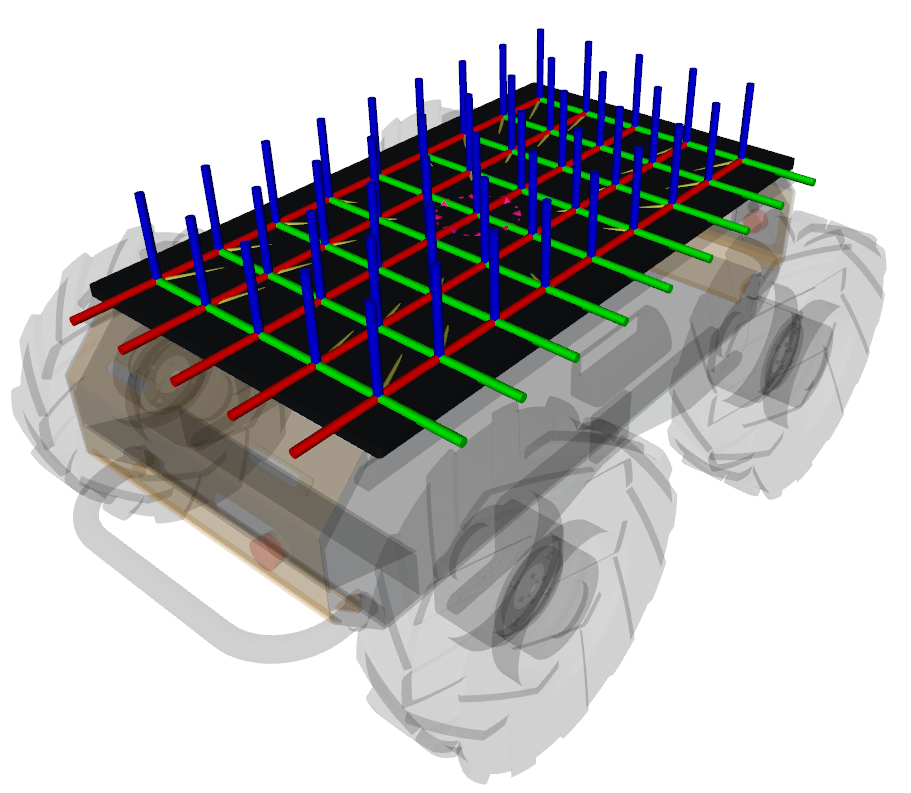 | |
Attach accessories to the top plate mounts by setting the accessory's parent parameter to one of the grid mounting
locations displayed above. The grid mounting locations span from ${name}_mount_a1 to ${name}_mount_e9, where the
front left-most location is the a1 mount and the rear right-most location is the e9 mount. The letters correspond
to the columns and the number to the rows.
Wireless Charger
In order to enable the ROS driver for the wireless charger, you must also add a charger sensor.
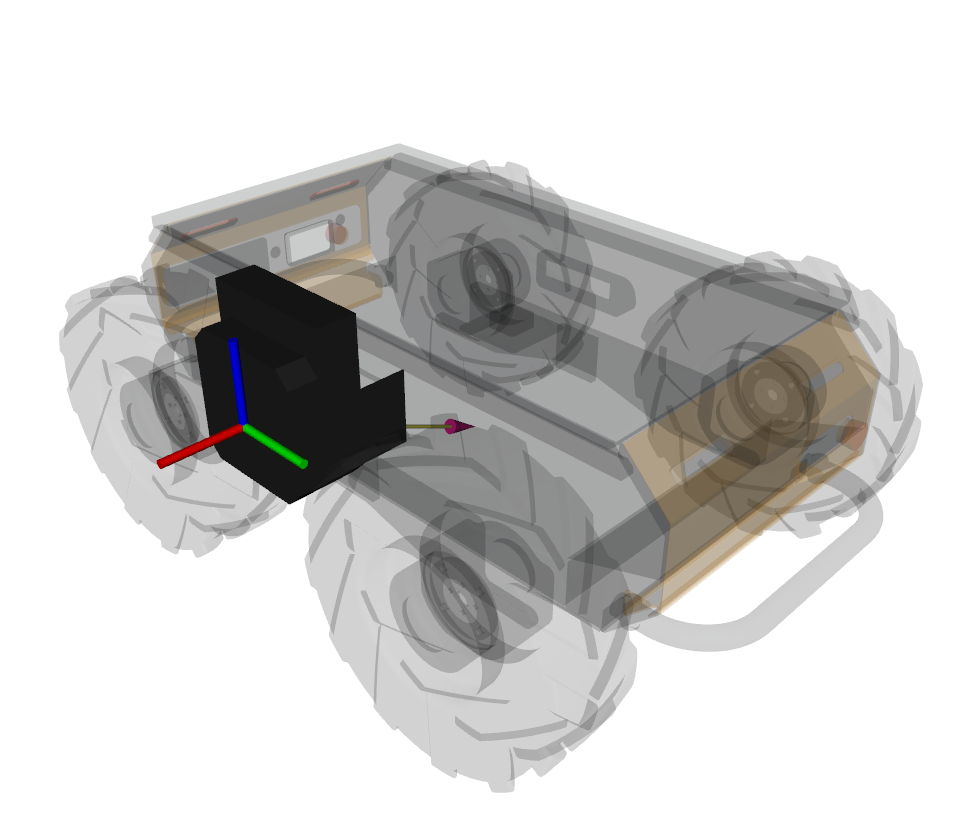 | |
The A300 can optionally be equipped with a wireless charging coil, mounted to the right side of the robot.
The ${name}_face link is located in the centre of the charging coil's face, with the X axis pointing outwards.
AMP Attachments
The Husky AMP (Autonomous Mobile Platform) has large enclosure on top to contain additional computers, sensors, and power-distribution equipment and an arch to support additional sensors. These attachments can be added to the A300 just like any other attachment.
AMP Enclosure
If the AMP Enclosure is used, the top plate should be omitted.
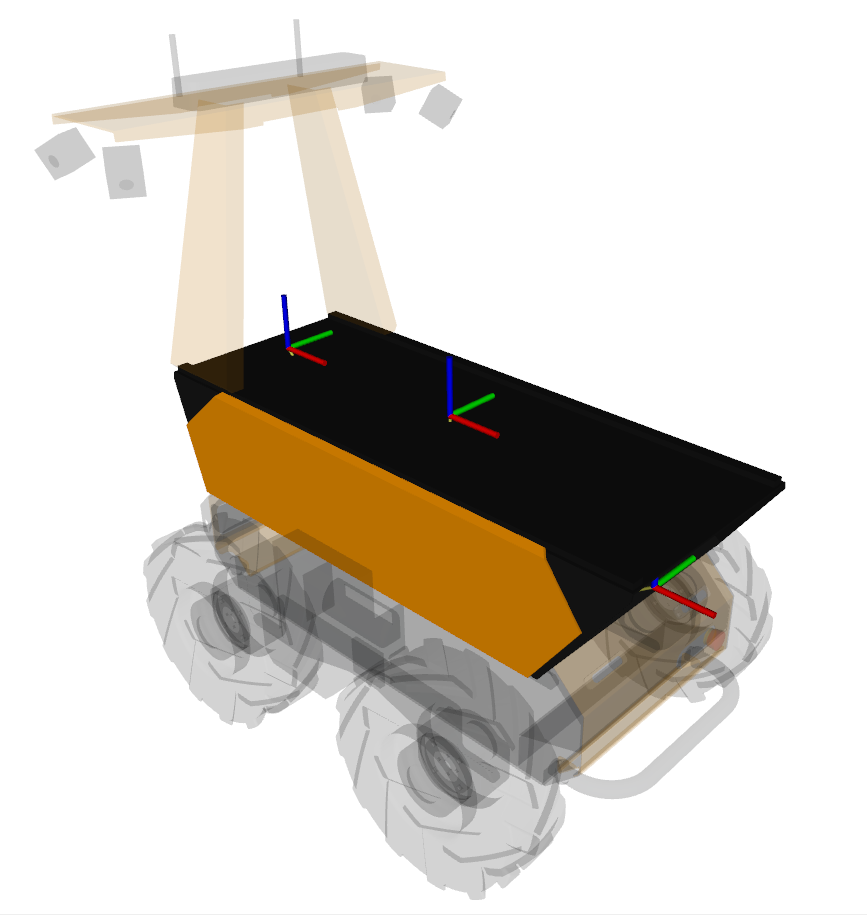 | |
The top of the enclosure features user rails running down the full length, to allow easy mounting
of additional payloads. The a300.amp_enclosure URDF includes the following links that can be set
as the parent_link of other attachments:
${name}_center_mount: the centre of the upper surface of the enclosure. Items mounted to the user rails should measure from this point.${name}_antenna_mount: the standard parent for the AMP Sensor Arch, located at the rear of the user rails${name}_front_lidar_mount: located on the front face of the enclosure, this is the default location for the AMP's front-facing 3D lidar${name}_ins_mount: located on the rear face of the enclosure, this is the default location for the AMP's INS sensor
AMP Sensor Arch
The AMP sensor arch is used to attach additional sensors and antennas.
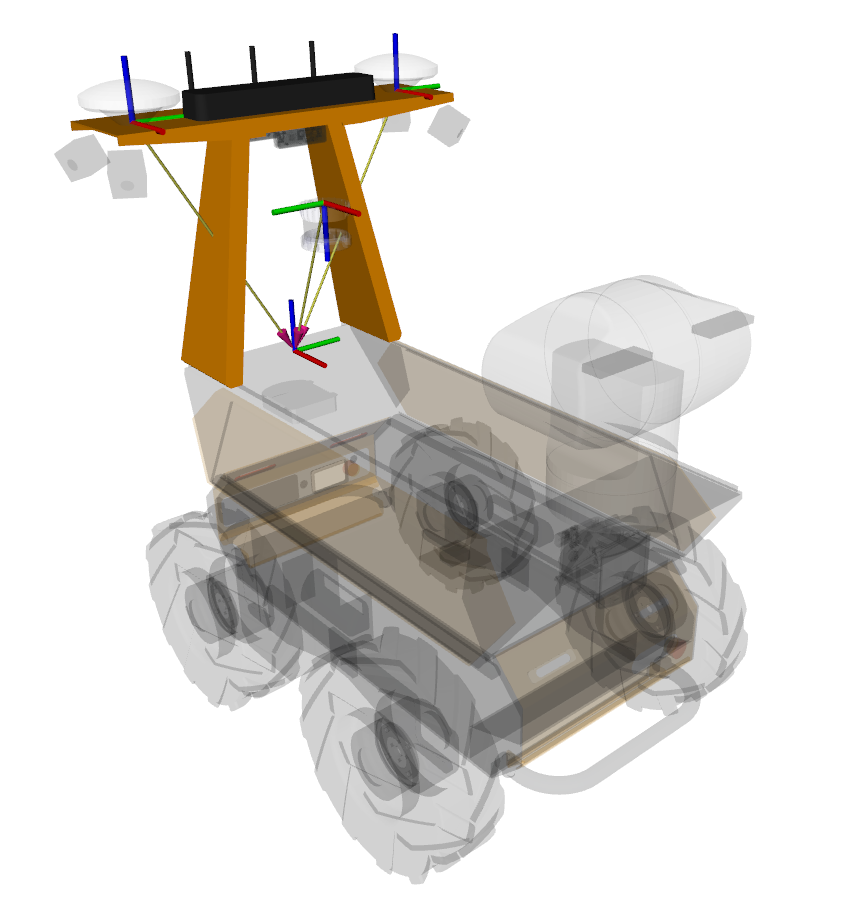 | |
The AMP sensor arch includes the following links to attach sensors and other accessories:
${name}_front_camera_mount: located under the centre-top of the arch, this is the default location for the front-facing teleoperation camera${name}_rear_camera_mount: located under the centre-top of the arch, this is the default location for the rear-facing teleoperation camera${name}_lidar_mount: default mounting location for a secondary 3D lidar. This mount is only usable when an additional bracket is physically installed on the arch.${name}_left_antenna_mount: the default mounting location for the GNSS/INS sensor's left antenna${name}_right_antenna_mount: the default mounting location for the GNSS/INS sensor's right antenna
Spotlights
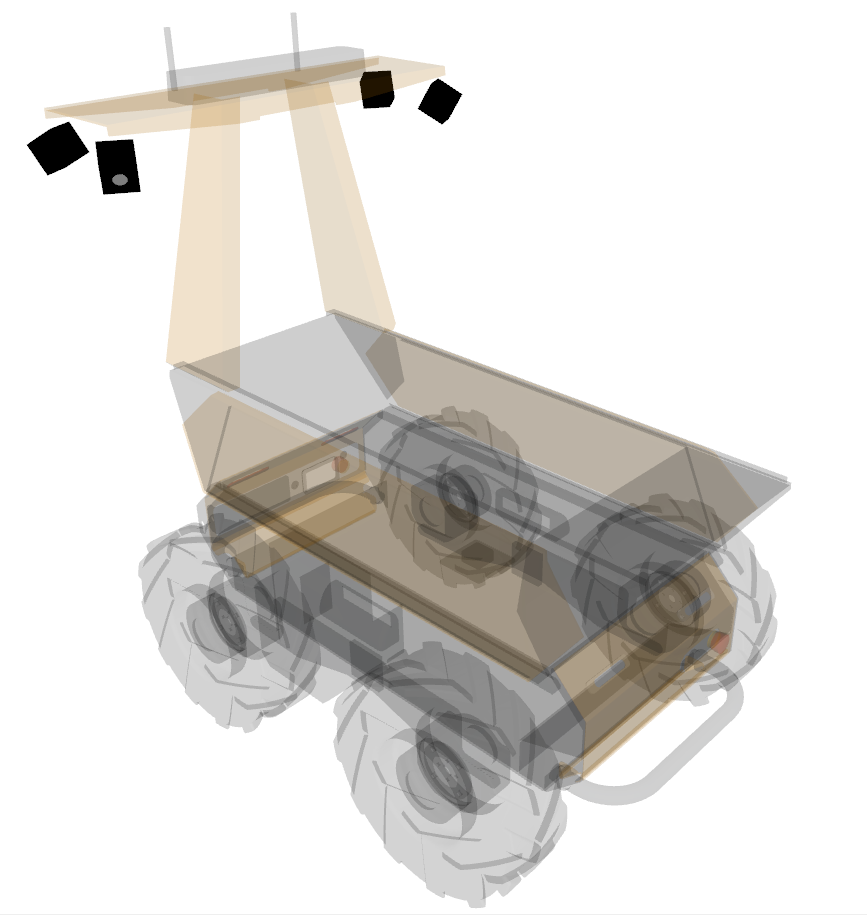
The AMP is equipped with multiple spotlights to assist in teleoperation in dark environments. The models also include simulated light sources when used with Gazebo
 | |