Platform
Every robot platform has unique structures such as versatile sensor mounting solutions, wireless charging receivers, and waterproofing enclosures; we refer to these as attachments. Each robot also supports specific batteries and battery configurations.
Joystick Controller
We support two types of controllers:
- ps4: standard Playstation4 controller.
- logitech: Logitech F710
controller: ps4 # or logitech
Batteries
Each robot platform can support different types of batteries, and in different configurations. The configuration is how many batteries the robot has in series and parallel.A configuration of S2P1 indicates that there is one row of two batteries in series. S4P3 indicates that there are 3 parallel rows of 4 batteries in series, for a total of 12 batteries.
Some robots support "smart" batteries which have built in battery management system (BMS). If these batteries are specified, a corresponding driver node will be launched as part of the platform service. For batteries without a BMS, the battery state estimator node will be launched. This node will interpolate the state of charge of the robot from measured battery voltages.
The battery state of the platform is available on the platform/bms/state topic.
For systems without a BMS, the state of charge should be treated as a rough estimate. This is especially true with Lead Acid batteries.
- A200
- J100
- W200
| Battery | Chemistry | Nominal Voltage (V) | Capacity (Ah) | Configurations |
|---|---|---|---|---|
ES20_12C | Lead Acid | 12.0 | 20.0 | S2P1 |
HE2613 | Lithium Ion | 25.9 | 12.8 | S1P3 S1P4 |
| Battery | Chemistry | Nominal Voltage (V) | Capacity (Ah) | Configurations |
|---|---|---|---|---|
HE2613 | Lithium Ion | 25.9 | 12.8 | S1P1 |
| Battery | Chemistry | Nominal Voltage (V) | Capacity (Ah) | Configurations |
|---|---|---|---|---|
U1_35 | Lead Acid | 12.0 | 35.0 | S4P3 |
NEC_ALM12V35 | Lithium Ion | 13.2 | 35.0 | S4P3 |
VALENCE_U24_12XP | Lithium Ion | 12.8 | 118.0 | S4P1 |
VALENCE_U27_12XP | Lithium Ion | 12.8 | 144.0 | S4P1 |
For example for an A200:
battery:
  model: ES20_12C
  configuration: S2P1
Attachments
Each robot platform has its own unique set of attachments. To facilitate customization, any attachment from any robot platform can be added on any other robot platform.
There is a default parent links at which these attachments are added; however, the parent link can be change to wherever you'd want the attachment to be placed.
Additionally, all attachments can be moved around using the xyz parameter to translate and the rpy parameter to rotate.
Each attachment requires two parameters. The name parameter that will define the name of the links and joints added to URDF, and the type parameter which defines which type of attachment is to be added.
Some attachment types will have the same type parameter across different platforms. In that case, if you'd like to use the attachment that belongs to a specific platform, you will need to prefix the type parameter with the platform that it belongs to. For example, top_plate would become a200.top_plate. If no prefix is set, then the platform defined in the serial_number will be used.
Husky A200
Bumper
The A200 can have bumpers of a variable length. By setting the extension parameter, the bumper can be extended if required.
By default, we have two bumpers, on the front and rear of the robot.
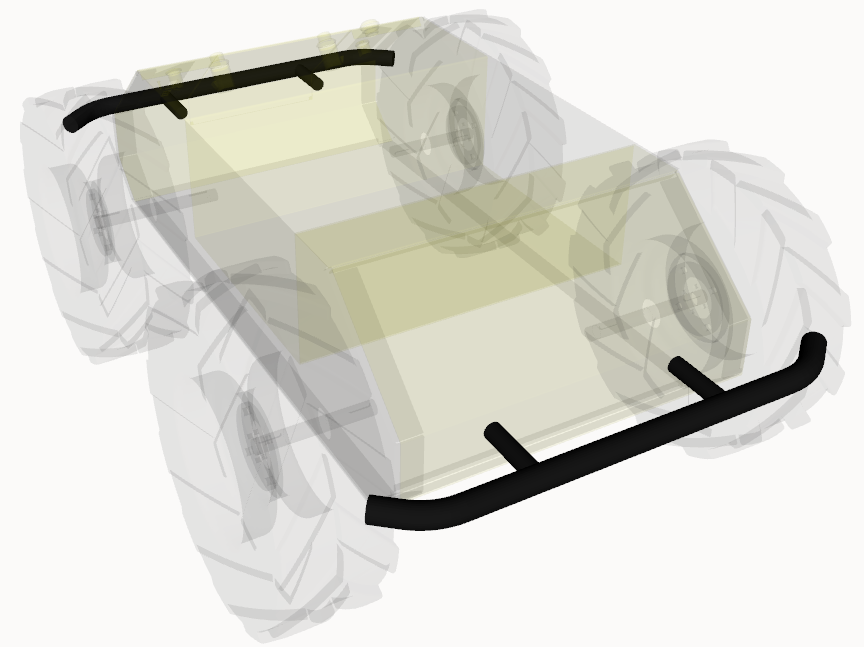 | |
The bumpers can be extended by setting the extension parameter.
Top Plate
The A200 has three types of top plates that modify the mounting surface of the robot.
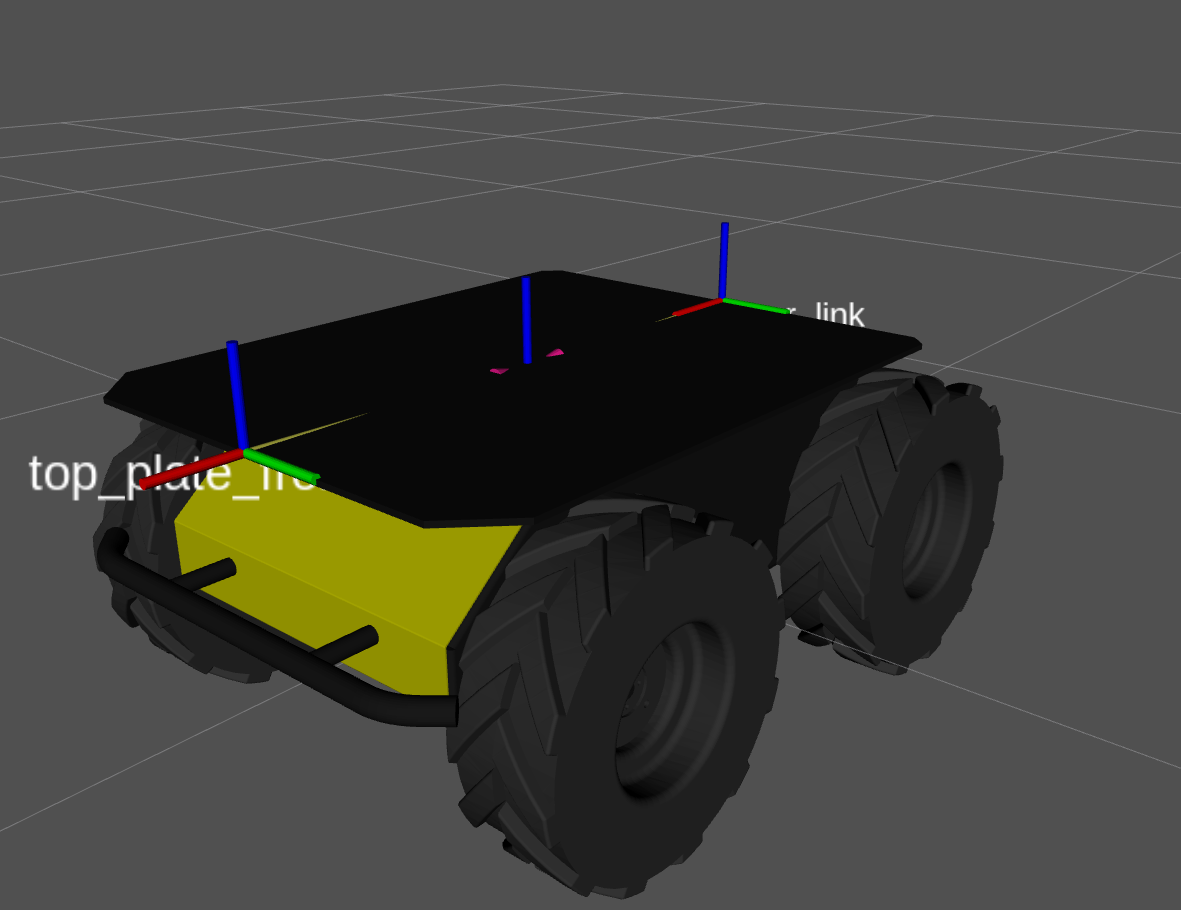
Default
The default top plate is mounted atop a user rail that can be used to mount certain payload inside the chassis and right below the top plate.
 | |
Attach accessories to the top plate mounts by setting the accessory's parent parameter to either top_plate_rear_mount, top_plate_default_mount, or top_plate_front_mount. The mounts are displayed as axes in the image above.
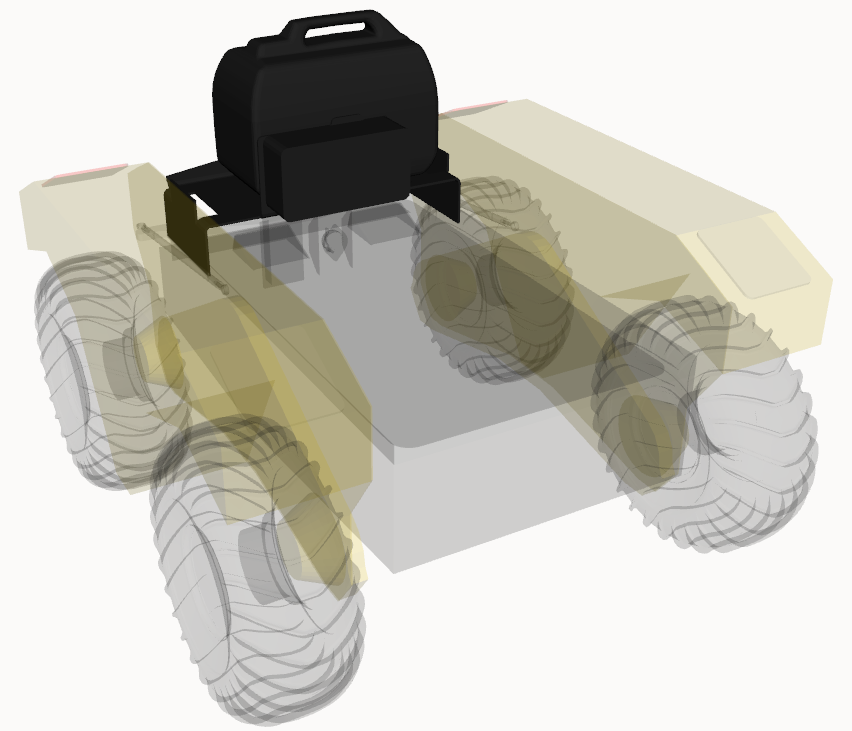
Large
The large top plate does not have a user rail and is primarily used to mount larger payloads such as manipulators on the robot.
 | |
Attach accessories to the top plate mounts by setting the accessory's parent parameter to either top_plate_rear_mount, top_plate_default_mount, or top_plate_front_mount. The mounts are displayed as axes in the image above.
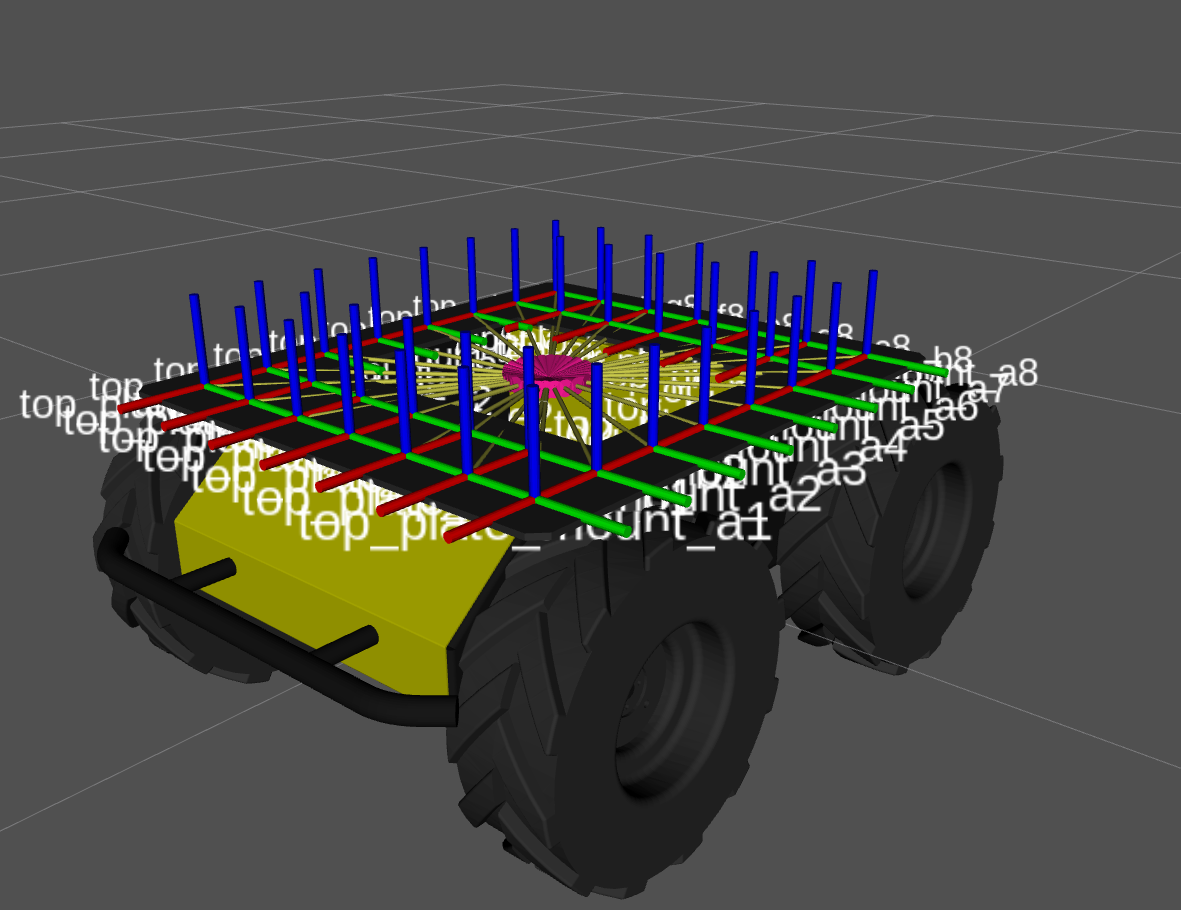
PACS
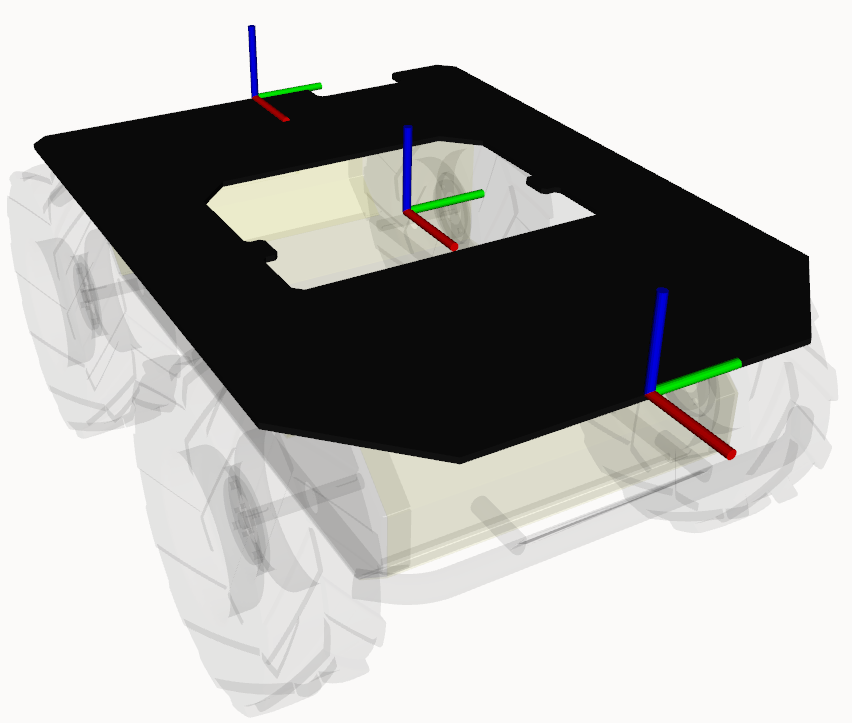
The pacs top plate does not have a user rail. It has an opening to access the user bay within the chassis. It comes with the grid of mounting holes of the PACS™ 80mm x 80mm grid.
 | |
Attach accessories to the top plate mounts by setting the accessory's parent parameter to one of the grid mounting locations displayed above. The grid mounting locations span from top_plate_mount_a1 to top_plate_mount_g8, where the front left-most location is the a1 mount and the bottom right-most location is the g8 mount. The letters correspond to the columns and the number to the rows.
Sensor Arch
The A200 has two types of sensor archs which are used to mount sensors from a vantage point.
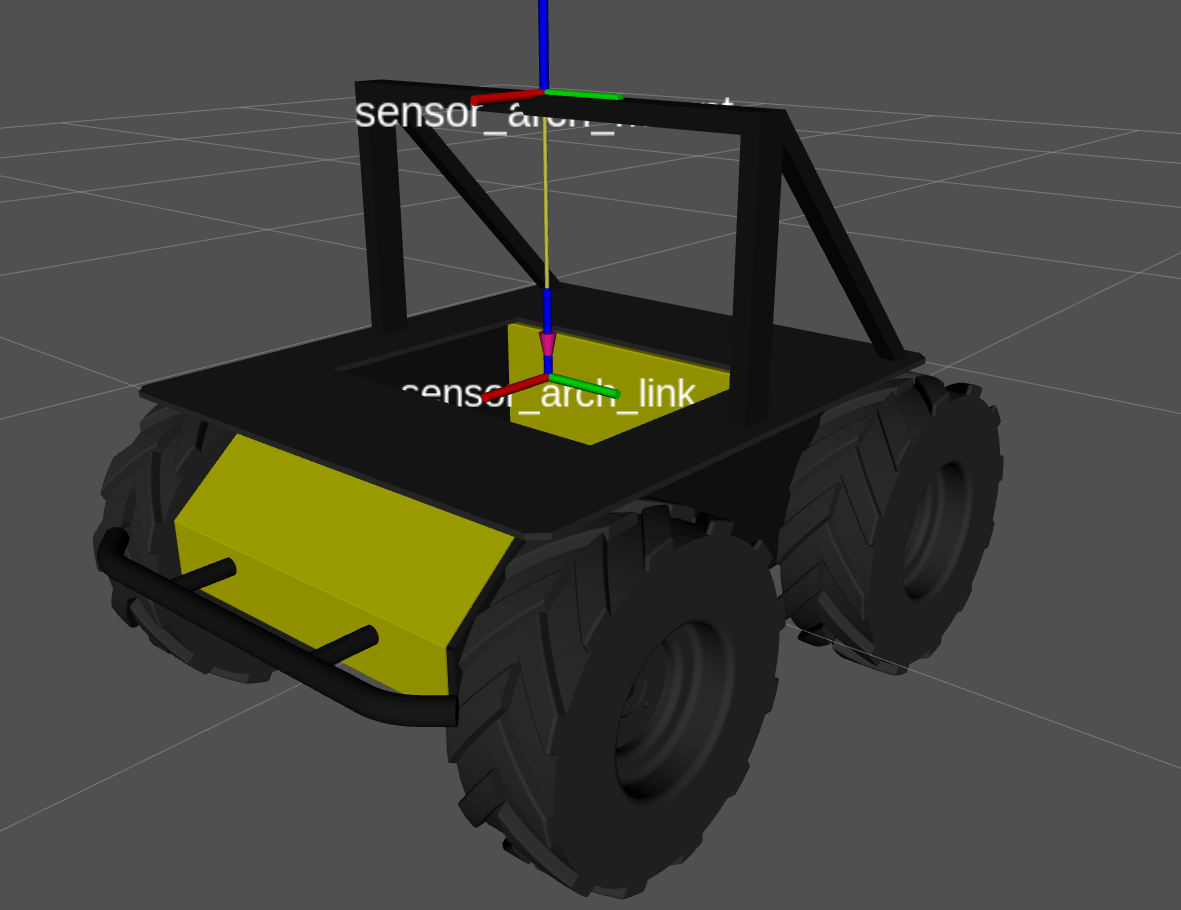
Sensor Arch 300
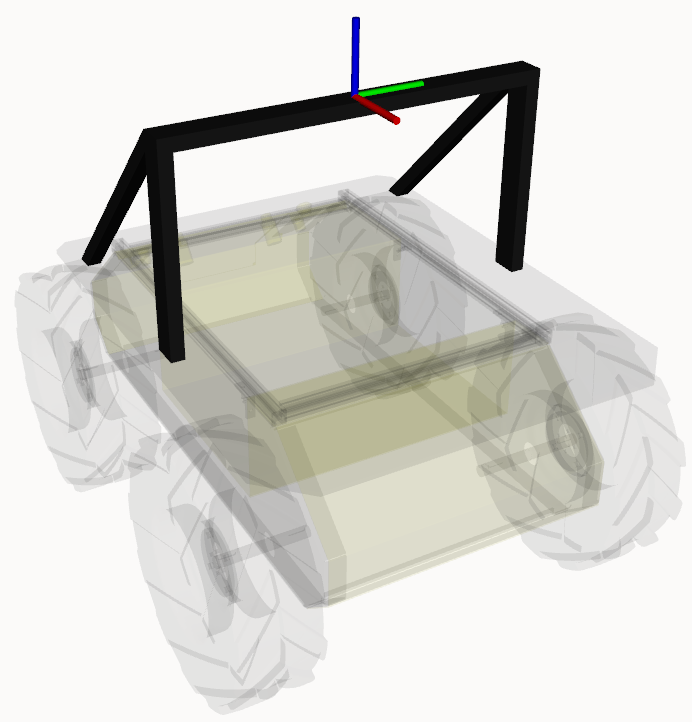 | |
Attach accessories to the sensor arch mount by setting the accessory's parent parameter to arch_sensor_mount.
Sensor Arch 510
 | |
Attach accessories to the sensor arch mount by setting the accessory's parent parameter to arch_sensor_mount.
Jackal J100
Fenders
There are two types of fenders that can be equipped on the J100 platform.
Default Fenders
The default fenders are the standard fenders that come with every J100.
The front and rear fender entries are indepenent from each other such that they can be modified independently.
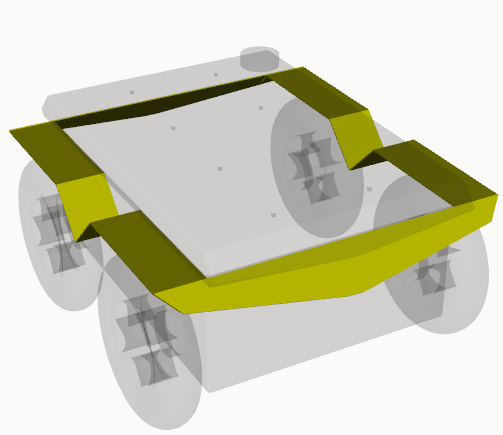 | |
Sensor Fenders
The default fenders are the standard fenders that come with every J100.
The front and rear fender entries are indepenent from each other such that they can be modified independently.
 | |
Attach accessories to the front and rear fender mounts by setting the accessory's parent parameter to front_fender_mount or rear_fender_mount. The mounts are displayed as axes in the image above.
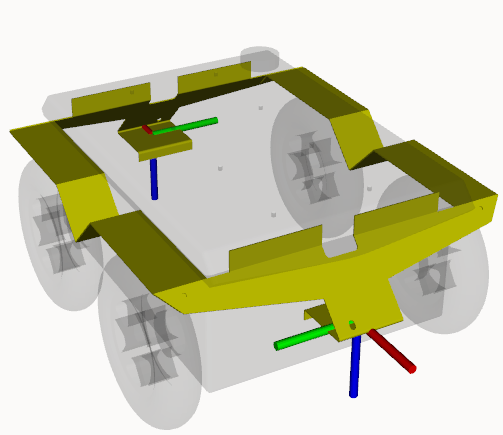
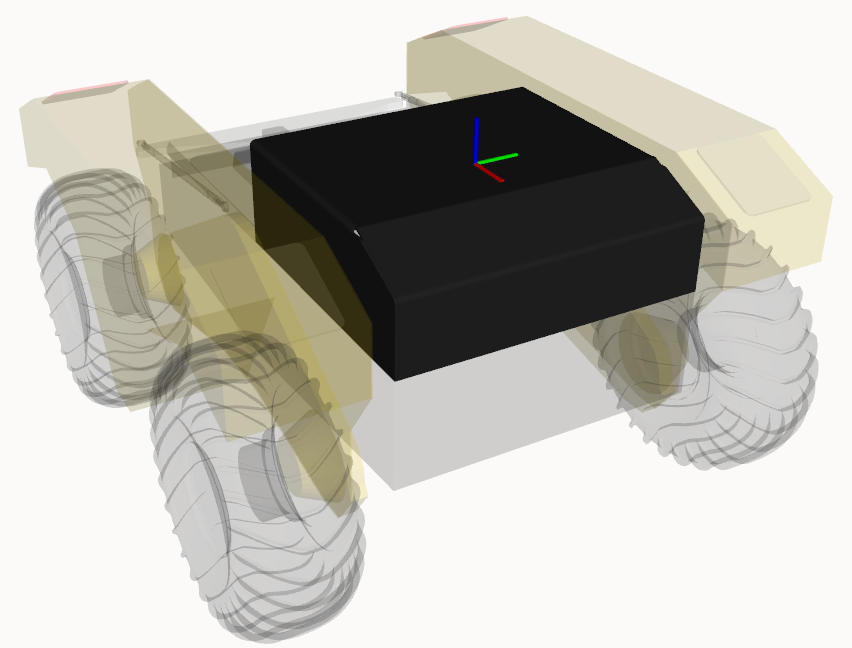
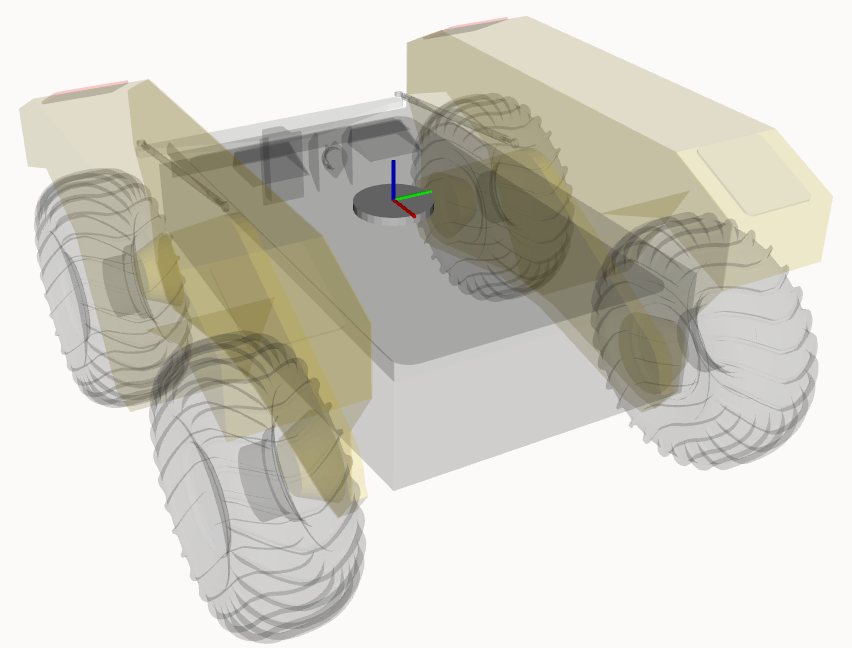
Top Plate
The Jackal only has one type of top plate. The ark enclosure.
Ark Enclosure
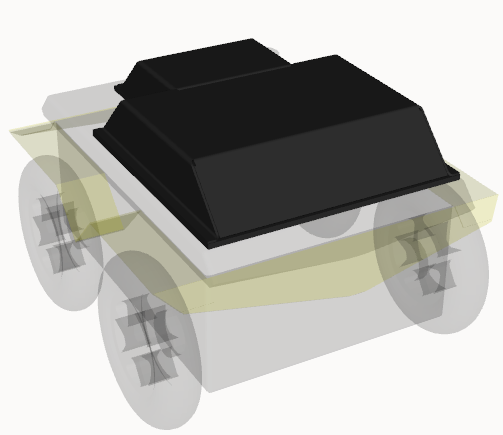 | |
Warthog W200
Bulkhead
The Warthog bulkhead is used to cover payloads and to add a second surface to which to attach more payloads.
Default
 | |
Attach accessories to the bulkhead by setting the accessory's parent parameter to bulkhead_mount. The mount is displayed as an axis in the image above.
Arm Mount
 | |
Attach accessories to the arm plate mount by setting the accessory's parent parameter to arm_plate_mount. The mount is displayed as an axis in the image above.
Arm Mount
If instead of using the bulkhead to add an arm mount. We can add the arm mount independently using the following entry.
 | |
Attach accessories to the arm plate mount by setting the accessory's parent parameter to arm_plate_mount. The mount is displayed as an axis in the image above.
Generators
 | |
Extras
Despite all current customization options, we still would like our users to be able to add-in their existing custom URDF to the robot platform URDF and pass in and overwrite parameters to all platform nodes. Extras have the following entries:
- urdf:
- package: name of the ROS 2 package that contains the extras URDF (optional).
- path: relative path within the package or absolute path to robot extras URDF
- ros_parameters: in YAML to pass in parameters to platform nodes. This is useful to change parameters such as the robot's velocity and acceleration.
extras:
  urdf:
    package: package_name
    path: relative/path/to/urdf/in/package.urdf.xacro # or can contain /absolute/path/to/urdf.urdf.xacro
  ros_parameters: {} # node parameters, see below
Remember, absolute paths start with / and relative paths do not.
ROS Parameters
A common use case is to set and update the parameters to the platform_velocity_controller node. These can be used to modify the linear and angular velocity and acceleratation.
These can be passed in as follows:
- A200
- J100
- W200
A200 Husky Controller Defaults:
platform:
  extras:
    ros_parameters:
      platform_velocity_controller:
        wheel_radius: 0.1651
        linear.x.max_velocity: 1.0
        linear.x.min_velocity: -1.0
        linear.x.max_acceleration: 3.0
        linear.x.min_acceleration: -3.0
        angular.z.max_velocity: 2.0
        angular.z.min_velocity: -2.0
        angular.z.max_acceleration: 6.0
        angular.z.min_acceleration: -6.0
J100 Jackal Controller Defaults:
platform:
  extras:
    ros_parameters:
      platform_velocity_controller:
        wheel_radius: 0.098
        linear.x.max_velocity: 2.0
        linear.x.min_velocity: -2.0
        linear.x.max_acceleration: 20.0
        linear.x.min_acceleration: -20.0
        angular.z.max_velocity: 4.0
        angular.z.min_velocity: -4.0
        angular.z.max_acceleration: 25.0
        angular.z.min_acceleration: -25.0
W200 Warthog Controller Defaults:
platform:
  extras:
    ros_parameters:
      platform_velocity_controller:
        wheel_radius: 0.3
        linear.x.max_velocity: 5.0
        linear.x.min_velocity: -5.0
        linear.x.max_acceleration: 50.0
        linear.x.min_acceleration: -50.0
        angular.z.max_velocity: 4.0
        angular.z.min_velocity: -4.0
        angular.z.max_acceleration: 40.0
        angular.z.min_acceleration: -40.0
Sample
Sample A200 Platform Section
In this sample, we swapped the top plate from the default model to the pacs model. Notice all the links added by the pacs plate below, compared to the default plate above.
  - name: top_plate
    type: a200.top_plate
    model: pacs # switched from 'default' to 'pacs'
    parent: mid_mount
    xyz: [0.0, 0.0, 0.0]
    rpy: [0.0, 0.0, 0.0]
    enabled: true
Then, we added a sensor arch to add our sample sensors to. We can do this by adding the attachment, sensor_arch and setting the model to sensor_arch_300.
  - name: sensor_arch
    type: a200.sensor_arch
    model: sensor_arch_300
    parent: mid_mount
    xyz: [0.0, 0.0, 0.0]
    rpy: [0.0, 0.0, 0.0]
    enabled: true
In terms of the front_bumper and rear_bumper, we left these as defaults. And, since we are not including any customization URDF or launch parameters; the resulting platform section look like this:
platform:
  controller: ps4
  battery:
    model: ES20_12C
    configuration: S2P1
  attachments:
    - name: front_bumper
      type: a200.bumper
      model: default
      parent: front_bumper_mount
      xyz: [0.0, 0.0, 0.0]
      rpy: [0.0, 0.0, 0.0]
      enabled: true
      extension: 0.0
    - name: rear_bumper
      type: a200.bumper
      model: default
      parent: rear_bumper_mount
      xyz: [0.0, 0.0, 0.0]
      rpy: [0.0, 0.0, 0.0]
      enabled: true
      extension: 0.0
    - name: top_plate
      type: a200.top_plate
      model: pacs
      parent: mid_mount
      xyz: [0.0, 0.0, 0.0]
      rpy: [0.0, 0.0, 0.0]
      enabled: true
    - name: sensor_arch
      type: a200.sensor_arch
      model: sensor_arch_300
      parent: mid_mount
      xyz: [0.0, 0.0, 0.0]
      rpy: [0.0, 0.0, 0.0]
      enabled: true
  extras:
    urdf: {}
    ros_parameters: {}