Cameras
Cameras are sensors that publish:
- Messages of type
sensor_msgs/Imageto the/sensors/camera_#/color/imagetopic. - Messages of type
sensor_msgs/CameraInfoto the/sensors/camera_#/color/CameraInfotopic.
This broad definition allows us to label a variety of different cameras under a single banner. Stereo cameras, for example, could publish multiple images, disparity maps, and even pointclouds. Other cameras have in built inertial measurement units that publish sensor_msgs/Imu. Ultimately, all imaging devices fall into this category.
For further details on how to work with large camera data, see Camera Data Compression
Supported Cameras
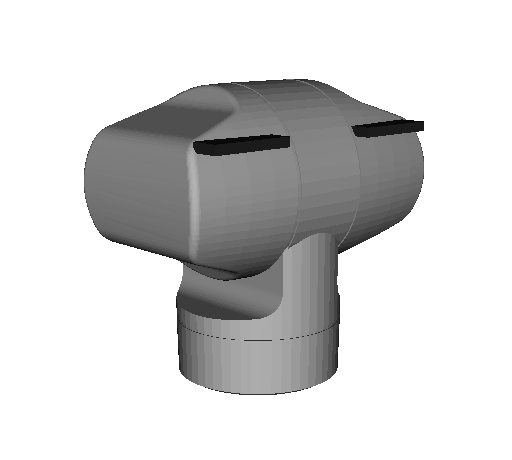
Axis Camera
 | |
Package and Setup
The Axis cameras use the axis_camera ROS 2 driver. The driver is open source, maintained by the ROS Drivers community, and hosted on GitHub.
For specifics on the way Clearpath's configuration system launches the camera, see the Axis Camera launch file and the default parameter file in clearpath_sensors.
Device Type
The device_type parameter must be set accurately to successfully launch the node. Supported device_type values are:
q62: the Axis Q62 cameradome_ptz: any Axis PTZ dome cameradome_fixed: any fixed-position dome camera
Network Connection
Axis cameras communicate over HTTP. The hostname parameter specifies either the resolvable hostname or IP address of the camera. By default Axis cameras use port 80 for their HTTP interface, but if this has been reconfigured on the camera the http_port parameter should be used to specify the port.
The username and password parameters should be set to allow the ROS node to authenticate to the camera. The specified user must have permission to control the camera's PTZ position. Refer to the Axis camera's web setup tool for information on creating and configuring users on the camera.
Some newer Axis cameras require the use of encrypted passwords for authentication. If this is required, set use_encrypted_password to True. Some older Axis cameras do not support encrypted passwords.
The camera parameter is an integer in the range 1-4, used to specify which camera at the given IP address/hostname is being controlled. This is only necessary if a multi-camera controller is being used, such as the Axis F34.
ROS Image and TF configuration
The resolution and framerate of the images published by the driver can be specified with the height, width, and fps parameters.
The tf_prefix parameter specifies the prefix added to the camera model's frames in the URDF. The camera model's root link is ${tf_prefix}_base_link, and the optical frame is ${tf_prefix}_camera_link. If multiple cameras are specified in robot.yaml the tf_prefix parameter must be unique to each camera.
PTZ Configuration
Pan and tilt limits can be specified in radians by using the max_pan, min_pan, max_tilt and min_tilt parameters. Pan and tilt speed are expressed in rad/s.
Zoom range is expressed in zoon factors. For example, a camera with a 24x optical zoom should specify min_zoom as 1 and max_zoom as 24.
If the camera is a fixed-lens camera, set ptz to False. All PTZ and PTZ teleop parameters will be ignored if ptz is False.
PTZ Teleop Configuration
If ptz_teleop is True the axis_camera driver will subscribe to the robot's joy controller input, allowing the camera to be controlled via the game controller. The default parameters are configured for a Playstation 4/Dualshock family controller:
- Right thumbstick controls pan & tilt (
axis_panandaxis_tilt). The pitch axis may be inverted by settinginvert_tilttoTrue - Left analogue trigger zooms out (
axis_zoom_in) - Right analogue trigger zooms in (
axis_zoom_out)
For additional details on configuring PTZ teleoperation, please refer to the axis_camera package on github.
Q62-Specific Features
The Axis Q62 camera features a wiper, infrared/night-vision mode, and a defogger. Services to control these features can be enabled by setting the wiper, ir, and defog parameters to True.
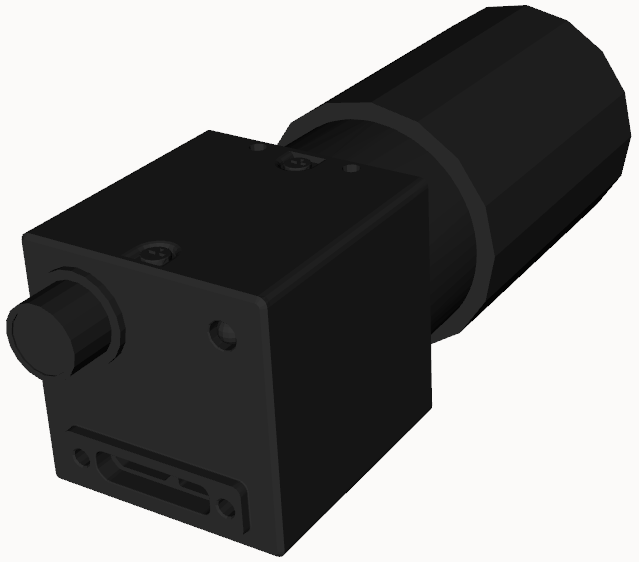
Intel Realsense
 | |
Package and Setup
The Intel Realsense cameras use the realsense_ros ROS 2 driver. The driver is open source, maintained by Intel, and hosted on GitHub. The realsense_ros nodes depends on the the librealsense2 SDK. Both packages will be installed alongside the clearpath_sensors package.
For specifics on the way Clearpath's configuration system launches the camera, see the Intel Realsense launch file and the default parameter file in clearpath_sensors.
Device Type and Serial Number
The device_type and serial_no parameters must be set accurately to successfully launch the node. Both of these values can be found using the SDK utility.
Use the following command to see a list of connected Intel Realsense devices:
rs-fw-update
When ran without any arguments, the rs-fw-update will return information about the connected devices, as is shown below:
Nothing to do, run again with -h for help

Connected devices:
1) Name: Intel RealSense D435, serial number: 045322073417, update serial number: 041323020523, firmware version: 5.12.13.50, USB type: 3.2
The device_type is the alpha-numerical sequence in the name. In the example above, set device_type to d435.
The serial_no is the string following the serial number entry. In the example above, set serial_no to "045322073417". Make sure to use quotes to ensure that the serial number is interpreted as a string.
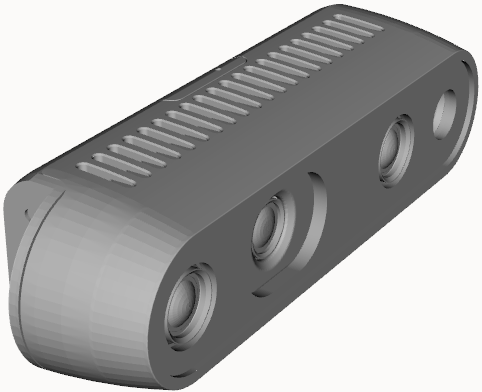
Luxonis OAK-D
 | |
Package and Setup
Luxonis OAK-D cameras use the depthai_ros_driver ROS 2 driver. The driver is open-source,
maintained by Luxonis, and hosted on GitHub. This
package and its dependencies are installed alongside the clearpath_sensors package.
For specifics on the way Clearpath's configuration system launches the camera, see the Luxonis OAK-D
launch file
and the default parameter file
in clearpath_sensors.
Device Type
The device_type parameter specifies what specific model of OAK-D camera is used. Supported types are:
pro: the OAK-D Pro (default);lite: the OAK-D Lite; andpro_w_poe: the OAK-D Pro W PoE
Pipeline Types
The camera.i_pipeline_type parameter controls what data the camera produces. The following pipeline types are supported:
| Pipeline Type | Description |
|---|---|
RGB | RGB camera only (no depth or stereo output) |
RGBD | RGB camera with stereo depth (default) |
RGBStereo | RGB camera with stereo pair |
Stereo | Stereo pair only (no RGB) |
Depth | Depth output only |
DepthToF | Depth output using Time-of-Flight |
StereoToF | Stereo pair using Time-of-Flight |
Point Clouds
When using a depth-capable pipeline type (RGBD, RGBStereo, Stereo, Depth, DepthToF, or StereoToF),
a PointCloudXyzNode from the depth_image_proc package is automatically launched alongside the camera driver.
This node converts the stereo depth image into a sensor_msgs/msg/PointCloud2 message.
The point cloud is generated from the stereo/image and stereo/camera_info topics and is published
on the points topic under the camera's namespace.
To enable point clouds, set the pipeline type to RGBD (or another depth pipeline) in your robot configuration:
camera:
- model: luxonis_oakd
  urdf_enabled: true
  launch_enabled: true
  parent: top_plate_front_mount
  xyz: [0.0, 0.0, 0.0]
  rpy: [0.0, 0.0, 0.0]
  ros_parameters:
    luxonis_oakd:
      device_type: pro_w_poe
      camera:
        i_pipeline_type: RGBD
      stereo:
        i_fps: 30.0
        i_height: 720
        i_width: 1280
If you do not need point clouds and only require an RGB image stream, set i_pipeline_type to RGB.
Point clouds are not generated when using the RGB pipeline type.
Multiple Cameras
If you have multiple OAK-D cameras configured, you must specify either the camera.i_mx_id
(for USB cameras) or the camera.i_ip parameter (for ethernet/PoE cameras).
See Luxonis' documentation for instructions on how to determine your camera's IP address or MxId.
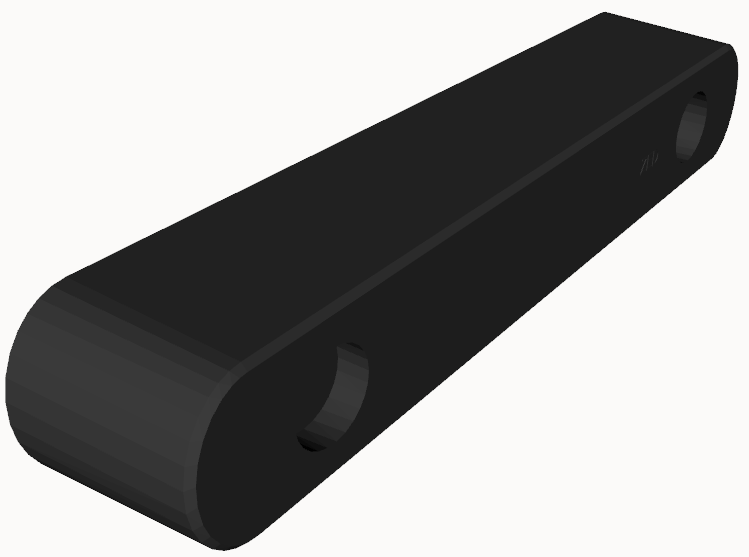
Flir BlackflyS
 | |
Package and Setup
The Flir Blackfly cameras use the spinnaker_camera_driver ROS 2 package. The driver is open source, maintained by the ROS community, and hosted on GitHub. The spinnaker_camera_driver depends on the Spinnaker SDK, which is installed automatically alongside the package.
Before using the camera, the computer needs further setup. The setup can be done automatically using the linux setup script:
ros2 run spinnaker_camera_driver linux_setup_flir
Or, manually by following the instructions on GitHub.
For specifics on the way Clearpath's configuration system launches the camera, see the Flir Blackfly launch file and the default parameter file in clearpath_sensors.
Serial Number
The serial_number parameter must be set to successfully launch the node. The serial number can be found on the label on the camera. However, if this label is not available and the camera is a USB camera, connect the camera to the computer and use lsusb to its three digit Bus and Device number. Then, find the serial number using the following command, replacing BUS and DEV with the three digit numbers found in the previous step:
udevadm info --attribute-walk /dev/bus/usb/BUS/DEV | grep -i serial
The resulting output of the command should appear as:
ATTR{serial}=="013686A9"
Then, convert attribute serial hexadecimal value to decimal representation and set it to the serial_number parameter. Convert values from hexadecimal to decimal representation using the following terminal command, where HEX needs to be swapped with the hexadecimal value:
echo $((16#HEX))
For the example above, the hexadecimal serial number 013686A9 would be converted to 20350633. Use the decimal representation to set the parameter: serial_number: 20350633.
Resolution
The image_height and image_width parameters define the area of the raw image to crop. It does not downsample the image. Use the offset_x and offset_y parameters to change the origin of the cropped area. These parameters would be best used to define an area of interest.
To reduce the size of the image using downsampling, use the binning_x and binning_y parameters. These parameters define the number of pixels that will be binned together in each axis. If both binning_x and binning_y are set to 2, then the resolution of the image will be quartered.
Reducing the resolution of the image improves the performance of the camera driver and network transit of image packets.
Image Compression
By default, the camera feed is also available in compressed formats including compressed (JPEG) and ffmpeg (H.264). Each of these topics is made available by an image transport plugin. Which plugins are active can be controlled by adding the following ROS parameters to the Blackfly section of the robot.yaml:
    ros_parameters:
      flir_blackfly:
        serial_number: ''
      image_debayer:
        image_mono:
          enable_pub_plugins:
            - image_transport/compressed
            - image_transport/ffmpeg
            - image_transport/raw
        image_color:
          enable_pub_plugins:
            - image_transport/compressed
            - image_transport/ffmpeg
            - image_transport/raw
FFMPEG Compression Settings
To modify the FFMPEG compression settings, add the following ROS parameters to the Blackfly section of the robot.yaml:
    ros_parameters:
      flir_blackfly:
        serial_number: ''
      image_debayer:
        ffmpeg_image_transport:
          qmax: 40
          preset: superfast
          tune: zerolatency
          bit_rate: 1000000
          gop_size: 15
For documentation on these parameters see the ffmpeg_image_transport GitHub repo.
Stereolabs Zed
 | |
Package and Setup
The Stereolabs Zed cameras use the zed-ros2-wrapper ROS 2 driver. The driver is open source, maintained by Stereolabs, and hosted on GitHub. The zed_wrapper nodes depend on the ZED SDK. The zed-ros2-wrapper ROS packages and the ZED SDK are not installed by ROS dependencies because the SDK and the wrapper depend on CUDA and need to be built against the specific version installed on your computer. Therefore, **you will have to install these manually by following the instructions in the zed-ros2-wrapper repository.
For specifics on the way Clearpath's configuration system launches the camera, see the Stereolabs Zed launch file and the default parameter file in clearpath_sensors.
Camera Model
The general.camera_model parameter must be modified to the match the type of Zed camera being used. See the list below for all models:
zedzedmzed2zed2izedxzedxmvirtual
Serial Number
The general.serial_number parameter can be left at 0 if only one camera is connected to that computer. If multiple cameras are connected, make sure to define a serial number for each.
Resolution
The general.grab_resolution parameter can be modified to change the resolution preset of the camera. Not all cameras support all presets. See the list below for all presets:
AUTOHD2KHD1080HD720VGA
Post Processing Republishers
All cameras publish to the color/image topic of type sensor_msgs/Image. However, we understand that sometimes this image may require downsampling, rectification, or cropping. To facilitate post processing images, we have included a method to easily add image processing nodes, leveraging composable nodes to maximize efficiency.
For more information on the image processing nodes see the ROS wiki.
Adding a republisher is simple.
- Add a
republisherstag under thecameraentry. - Specify the
typeof republisher:rectifyorresize. - Specify the
inputtopic namespace. By default, it iscolorbecause the standard image topic will becolor/image. - Specify the
outputtopic namespace. By default, it is the type of the republisher:{type}/image.
Configuring a republisher can be done by setting its node parameters using the ros_parameters section.
- Under
ros_parametersadd an entry for the nodeimage_TYPE_INPUT. Note, the node name depends on thetypeof republisher and theinputname. - Add any parameter key, value pair to configure the node. Otherwise, it can be left empty to use defaults.
Rectify
The rectify node takes the camera_info topic as a source of calibration parameters and applies an interpolation to rectify the raw images.
To add a rectify republisher, add the following entries to the camera entry and its corresponding ros_parameters section.
cameras:
  - model: CAMERA_MODEL
    republishers:
      - type: rectify
        input: color
        output: rectify
    ros_parameters:
      CAMERA_NODE:
        CAMERA_PARAMETER_KEY: CAMERA_PARAMETER_VALUE
      image_rectify_color:
        interpolation: 0
The interpolation parameter must be one of the following:
- 0: Nearest-neighbour.
- 1: Linear.
- 2: Cubic.
- 3: Area. Resampling using pixel area relation.
- 4: Lanczos4. Lanczos interpolation over 8x8 neighbourhood.
All UPPERCASE entries must be replaced based on the specific camera being used.
Resize
The resize node uses the input image and resizes it.
To add a resize republisher, add the following entries to the camera entry and its corresponding ros_parameters section.
cameras:
  - model: CAMERA_MODEL
    republishers:
      - type: resize
        input: color
        output: resize
    ros_parameters:
      CAMERA_NODE:
        CAMERA_PARAMETER_KEY: CAMERA_PARAMETER_VALUE
      image_resize_color:
        interpolation: 1
        use_scale: True
        scale_height: 1.0
        scale_width: 1.0
        height: -1
        width: -1
If use_scale is set to true, then the scale_height and scale_width parameters will be used to resize the image. To reduce the size of the image by half, set scale_height: 0.5 and scale_width: 0.5.
If use_scale is set to false, then the height and width parameters will be used to resize the image. In this case, the exact pixel values of the desired image size can be passed.
The scale_height and scale_width parameters must be floating point values.
The height and width parameters must be integer values.
The interpolation parameters must be one of the following:
- 0: Nearest-neighbour.
- 1: Linear.
- 2: Cubic.
- 3: Area. Resampling using pixel area relation.
- 4: Lanczos4. Lanczos interpolation over 8x8 neighbourhood.