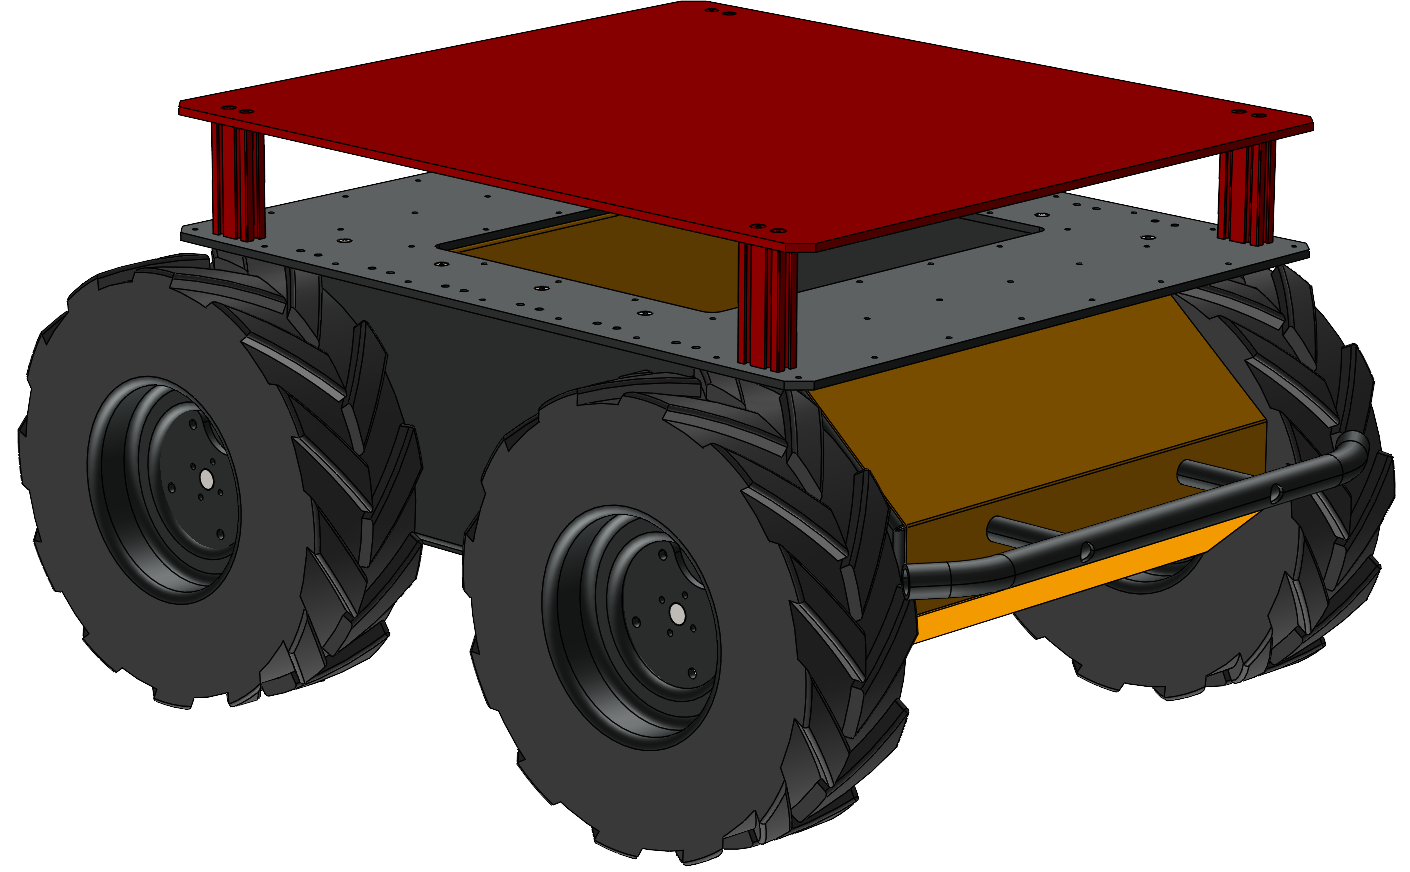
Full Riser

Sales Kits
note
These kits require a Husky with a Top Plate. Refer to the Top Plate page for further details.
| Description | Sales Kit | Installation Kit, With Fasteners |
|---|---|---|
| Installation, Kit, Riser Full, With Holes—Husky, 100 | 027676 | 027677 |
| Installation, Kit, Riser Full, With Holes—Husky, 200 | 027678 | 027679 |
| Installation, Kit, Riser Full, With Holes—Husky, 300 | 027680 | 027681 |
| Installation, Kit, Riser Full—Husky, 100 | 026948 | 027229 |
| Installation, Kit, Riser Full—Husky, 200 | 026949 | 027230 |
| Installation, Kit, Riser Full—Husky, 300 | 026950 | 027231 |
Parts List
| ID | Description | CPR item | Quantity |
|---|---|---|---|
| 1A | Plate—Integration, 670 X 590, With Holes | 027675 | 1 |
| 1B | Plate—Integration, 670 X 590, Without Holes | 026888 | 1 |
| 2A | Beam—93.5 X 20 X 40, T-slot, 4X M5×0.8, Aluminum, Black | 026921 | 4 |
| 2B | Beam—193.5 X 20 X 40, T-slot, 4X M5×0.8, Aluminum, Black | 026922 | 4 |
| 2C | Beam—293.5 X 20 X 40, T-slot, 4X M5×0.8, Aluminum, Black | 026923 | 4 |
| 2D | Beam—393.5 X 20 X 40, T-slot, 4X M5×0.8, Aluminum, Black | 026924 | 4 |
| 2E | Beam—493.5 X 20 X 40, T-slot, 4X M5×0.8, Aluminum, Black | 026925 | 4 |
| 2F | Beam—593.5 X 20 X 40, T-slot, 4X M5×0.8, Aluminum, Black | 026926 | 4 |
| 2G | Beam—693.5 X 20 X 40, T-slot, 4X M5×0.8, Aluminum, Black | 026927 | 4 |
| 2H | Beam—793.5 X 20 X 40, T-slot, 4X M5×0.8, Aluminum, Black | 026928 | 4 |
| 2I | Beam—893.5 X 20 X 40, T-slot, 4X M5×0.8, Aluminum, Black | 026929 | 4 |
| 2J | Beam—993.5 X 20 X 40, T-slot, 4X M5×0.8, Aluminum, Black | 026930 | 4 |
| 3 | Screw, Cap, Round Head—M5×0.8 X 14, Stainless Steel | 023319 | 8 |
| 4 | Screw, Cap, Flat Head—M5×0.8 X 14, Stainless Steel | 023472 | 8 |
Tools
- Hex Key, 3 mm
- Torque wrench (optional, for safety applications)
- Loctite 243 (optional, for high vibration applications)
Installation
Step 1
Fasten a Beam (ID2) to the Husky's top plate using 2 screws (ID3). Torque these screws to 5 N·m.
note
You may add a small amount of thread locker to these screws if you are concerned about them loosening from high vibration applications.
Step 2
Repeat this for the 3 remaining Beams.
Step 3
Place the Riser's Plate on top of the Beams. The top of this Plate has the countersink features. The plate is symmetrical, so there is not a front / back side.
Step 4
Fasten the Plate using 8 screws (ID4) Torque these screws to 5 N·m.
note
You may add a small amount of thread locker to these screws if you are concerned about them loosening from high vibration applications.