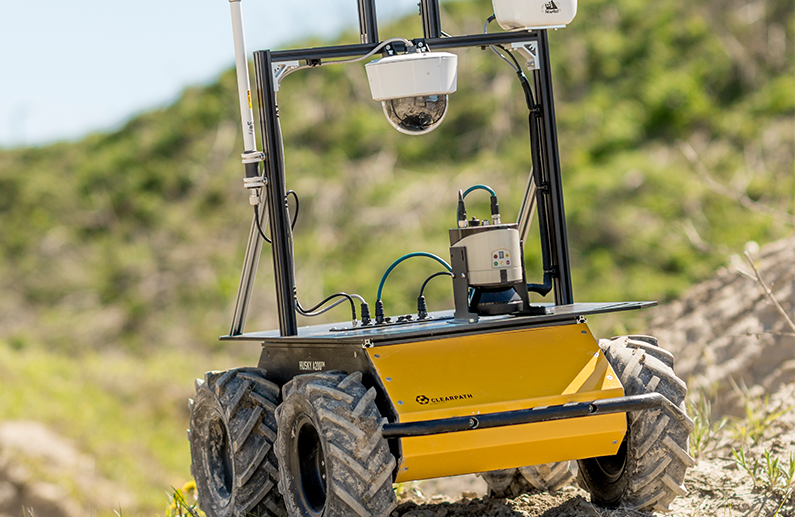
Husky A200 Maintenance
Common Replacement Items
This does not cover the full bill-of-materials for your robot. These items are things we consider critical, so you may want to keep spares on hand. You can get any replacement part by contacting <support@clearpathrobotics.com>, including parts not listed here.
| Description | CPR Item | Manufacturer | Manufacturer Item | Distributor | Distributor Item |
|---|---|---|---|---|---|
| Battery | 005670 | Clearpath Robotics | - | - | - |
| Battery Charger | 000597 | Clearpath Robotics | - | - | - |
| Connector, Mini-fit-jr | 022207 | Molex | 39-01-2065 | Digi-Key | WM23702-ND |
| Contact Crimp, Mini-fit-jr | 022207 | Molex | 40-13-0852 | Digi-Key | WM24935-ND |
| Fuse, 3 A | 020411 | Littelfuse | 0287003.PXCN | Digi-Key | F4193-ND |
| Fuse, 5 A | 006745 | Littlefuse | 0287005.PXCN | Digi-Key | F4197-ND |
| Fuse, 7.5 A | 025899 | Littelfuse | 028707.5PXCN | Digi-Key | F4198-ND |
| Fuse, 20 A | 025898 | Littelfuse | 0287020.PXCN | Digi-Key | F4201-ND |
| Fuse, 30 A | 025896 | Littelfuse | 0299030.ZXNV | Digi-Key | F1036-ND |
| MCU circuit board | 027104 | Clearpath Robotics | - | - | - |
| Motor, standard | 005063 | Midwest Motion Products | S22-346F-24V GP52-079 | - | - |
| Motor, high torque | 007449 | Midwest Motion Products | S22-346F-24V GP52-150 | - | - |
| Tire | 000269 | Carlisle | 5100201 | - | - |
| Tire's inner tube | 000435 | Carlisle | 323790 | - | - |
Chassis
Husky is an all-terrain robot, but it is not waterproof. Care should be taken that no part of the main chassis is ever submerged in water. When the chassis becomes wet or dirty, wipe it down with a damp cloth and dry with a towel.
If water is suspected to have entered the Husky A200 chassis, remove the battery and allow Husky to fully dry for a minimum of 24 hours.
Clearpath Robotics offers a Waterproofing Kit for Husky. This includes a top cover for the user bay, sealed drivetrain bearings, and rubber foam tape on all the panel seams.
Checking Drivetrain Health
Depending on the environment in which the robot is used in and duty cycle, the robot drivetrain may require maintenance during its life. Maintenance activities can include gearhead replacement, tire tread replacement, motor brush replacement, belt replacement, bearing replacement, etc.
It is recommended that the user perform an auditory inspection of the robot drivetrain once per month. Take note of any clicking, grinding or irregular skipping sounds while the robot is moving. Note that some clicking in the gearheads is normal during stops and starts, due to backlash between the gears.
Wheels
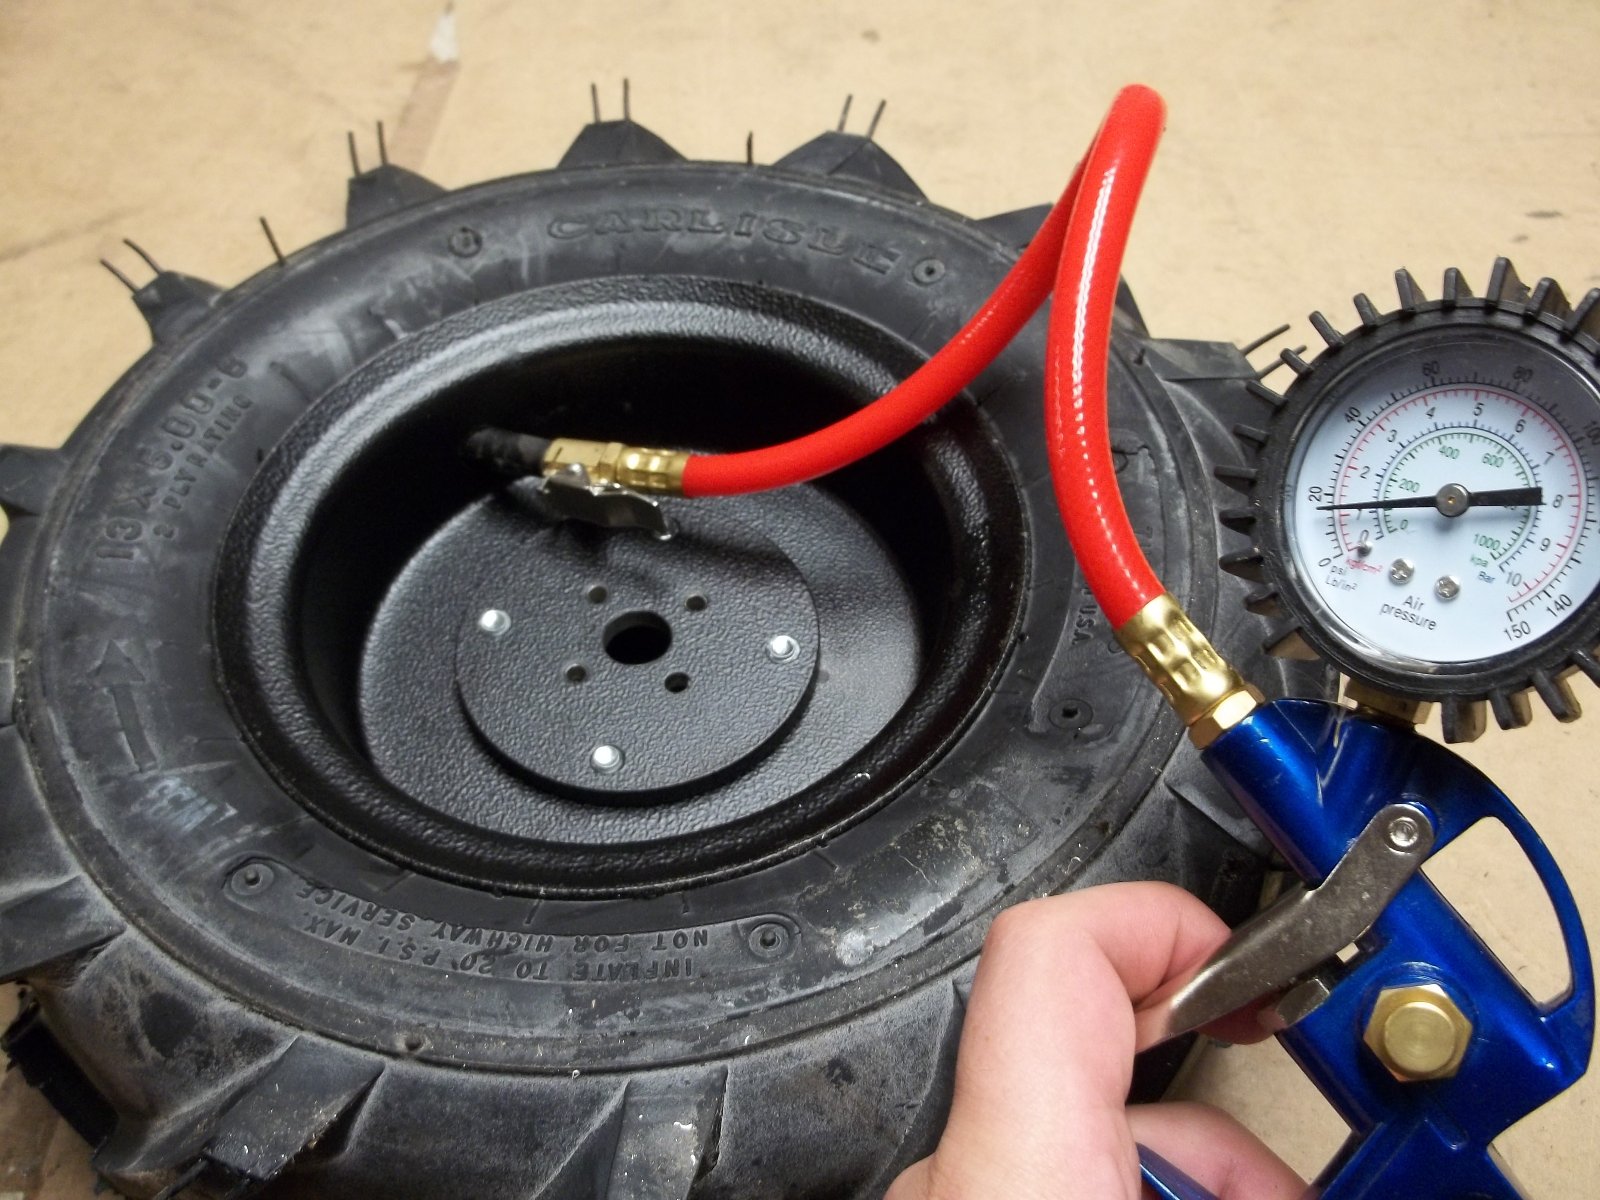
Tire pressure may change with temperature and should be checked monthly with a pressure gauge. Inspecting tires, releasing pressure, and inflating tires are completed through the tire's inflation stem. Tire pressure should not exceed 137 kPa (20 psi), and lower pressure may be desired based on terrain requirements. A monthly visual inspection of the tire treads is also recommended. Replacement wheel assemblies can be purchased from Clearpath Robotics and can be installed by the user.
Husky's wheels can handle a range of different terrains, but work best when inflated to the proper pressure. Lower tire pressures, for example 68.5 kPa (10 psi), ensure better traction in rough and varied terrain, where rocks or other obstacles may be encountered. This has the adverse effect of lowering drivetrain efficiency and decreasing battery charge, so high pressures up to a maximum of 137 kPa (20 psi) should be used when driving on flat surfaces.
Lower tire pressuses also reduce the effective diameter of the wheel, and will impact your odometry readings. Odometry is calculated using the average diameter of a tire inflated to 137 kPa (20 psi).
Replacing Tire or Inner Tube
Click to expand
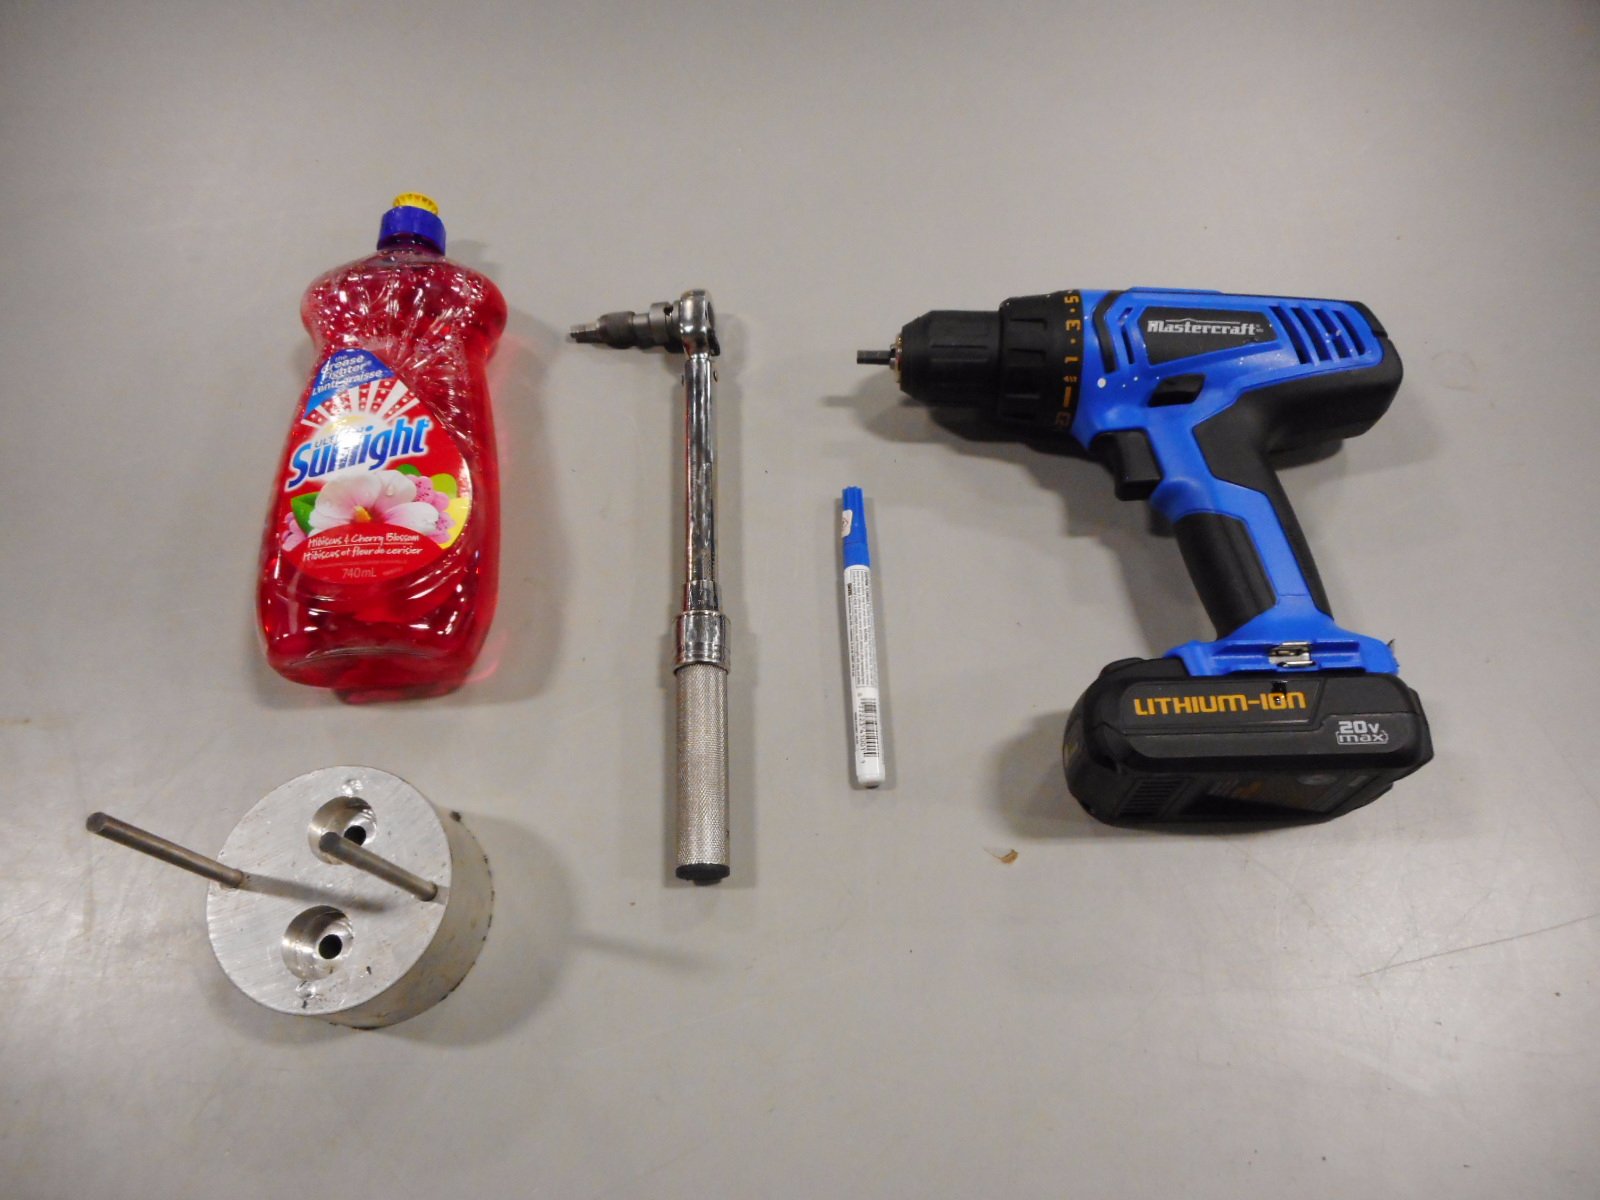
1. Tools required:
- Dish soap, as a lubricant between the tire and inner tube.
- Torque wrench with a 6 mm hex bit.
- Paint pen or similar fastener marking pen.
- Drill or ratchet with 6 mm hex bit.
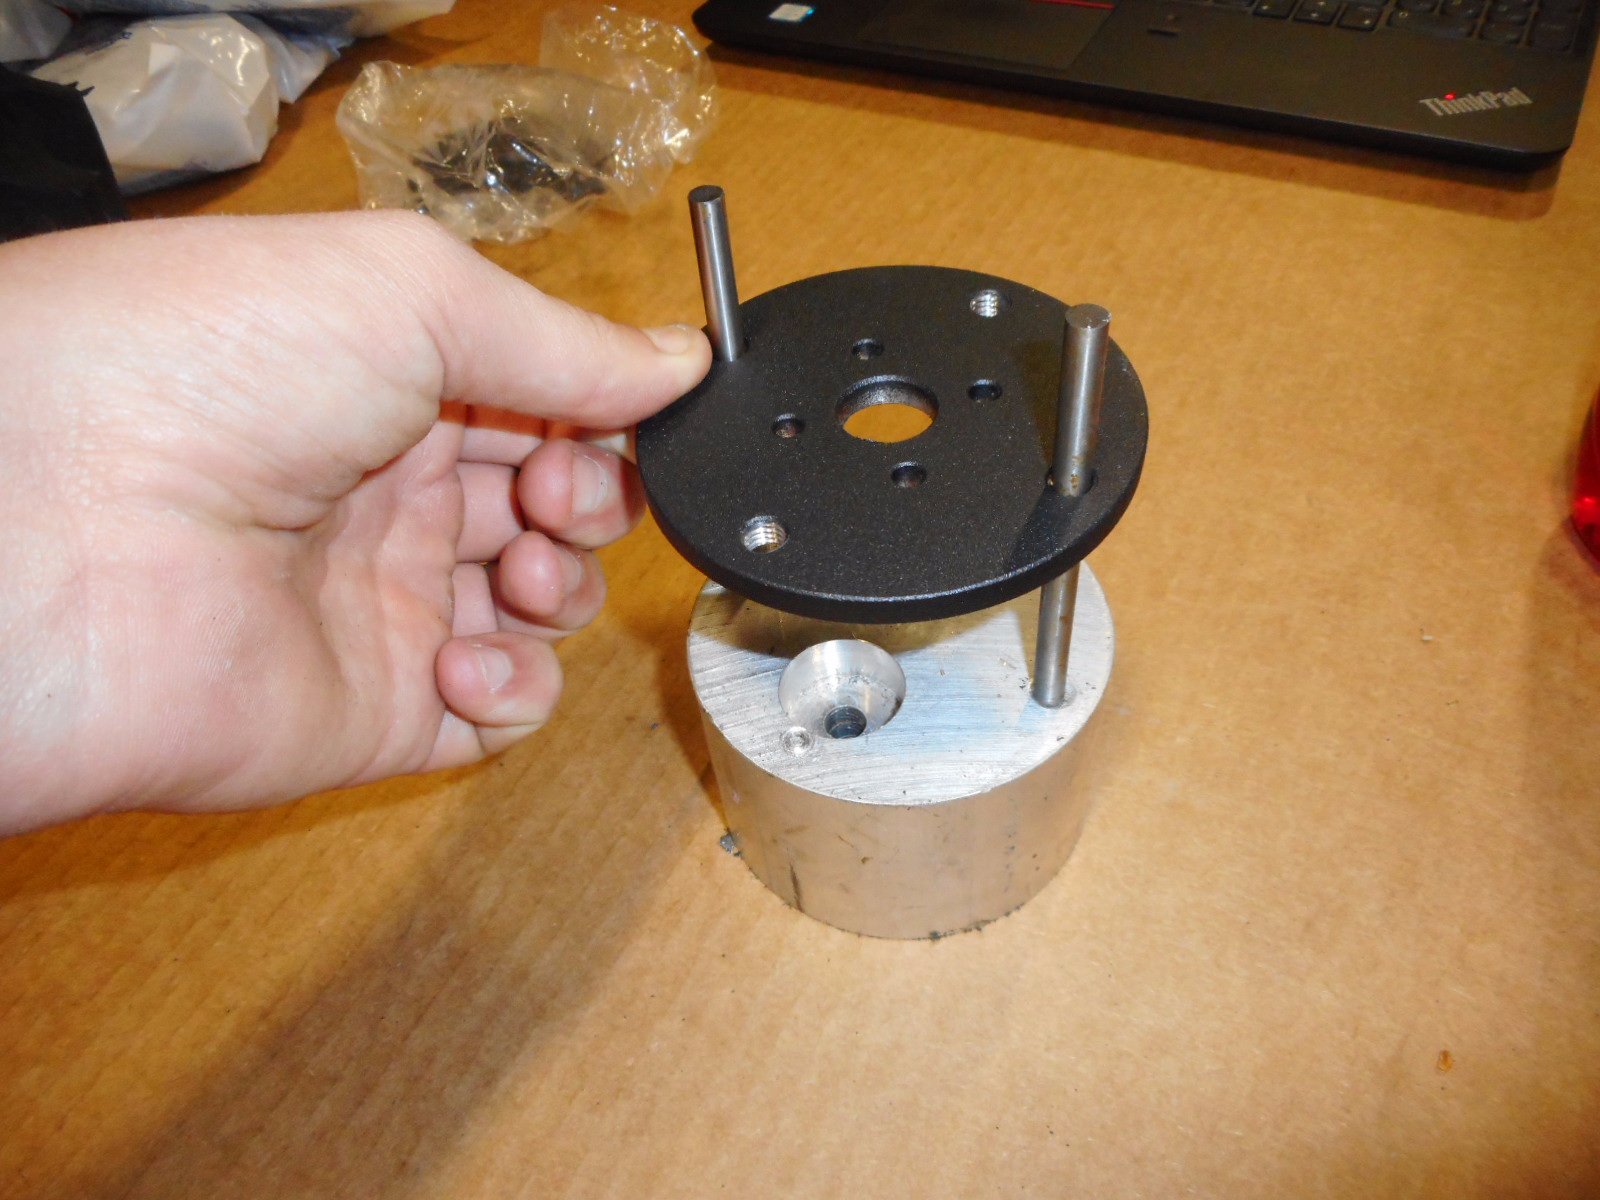
- A Clearpath wheel installation tool, or two M8×1.25 X 35 fully threaded socket head screws.
- Tire inflation pump or compressor, with a pressure gauge (not shown in the image).
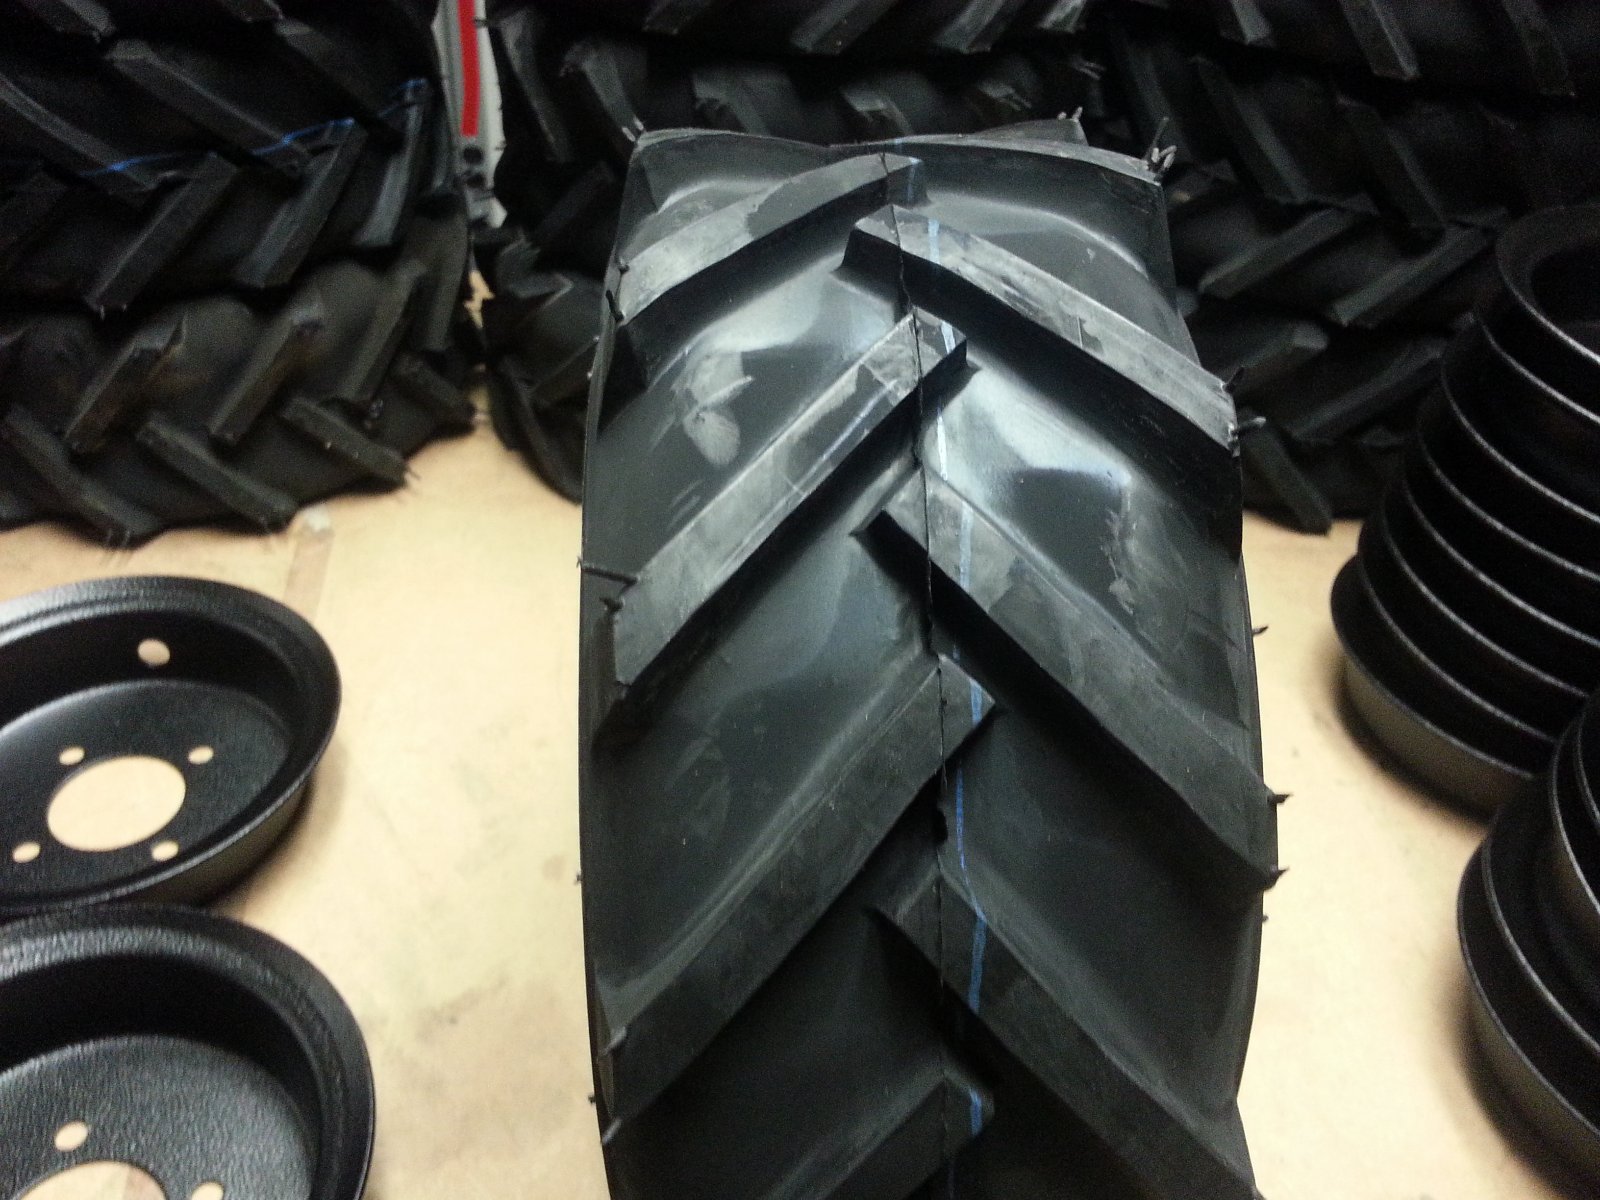
2. Note the direction of travel.
You will need to face the tread chevrons pointing towards the forward travel of the robot. This will impact which side the tire air-fill stem is installed on.
- Right side wheel, with stem on the right side
- Left side wheel, with stem on the left side.
This is not critical, but improves access to filling the tire with air when it is installed on the robot.
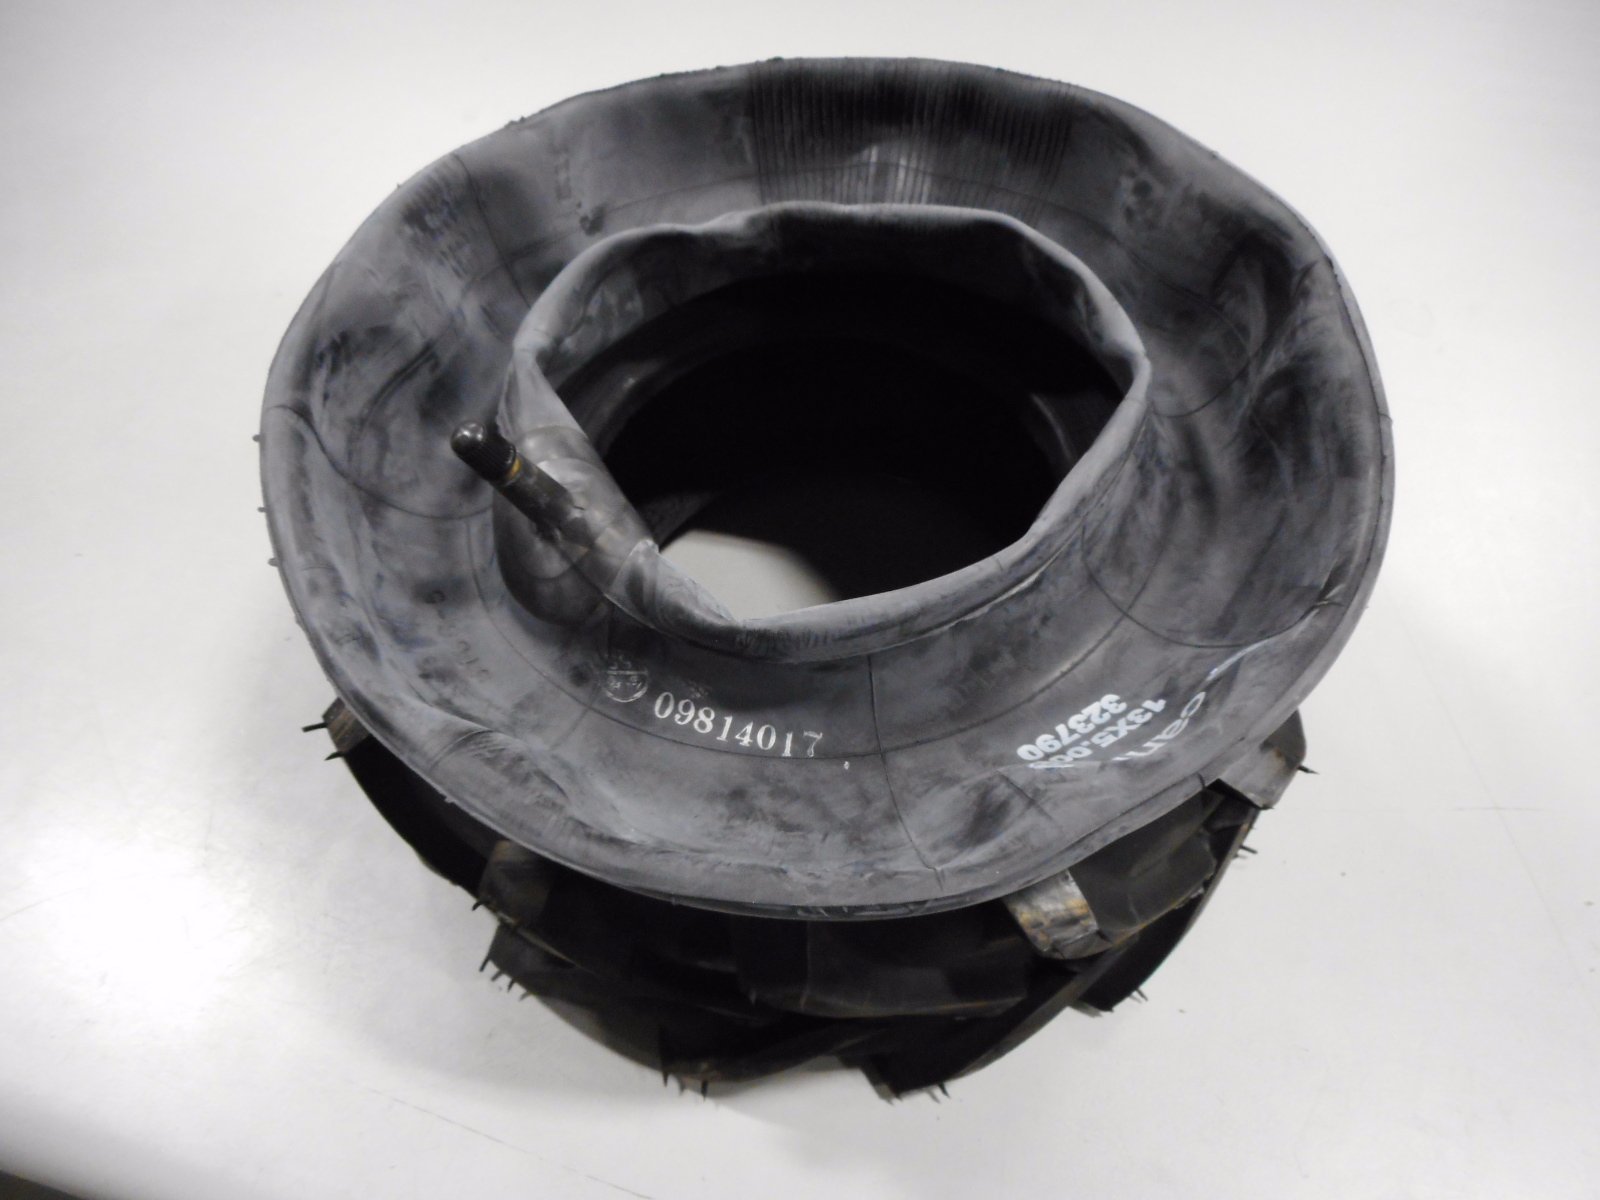
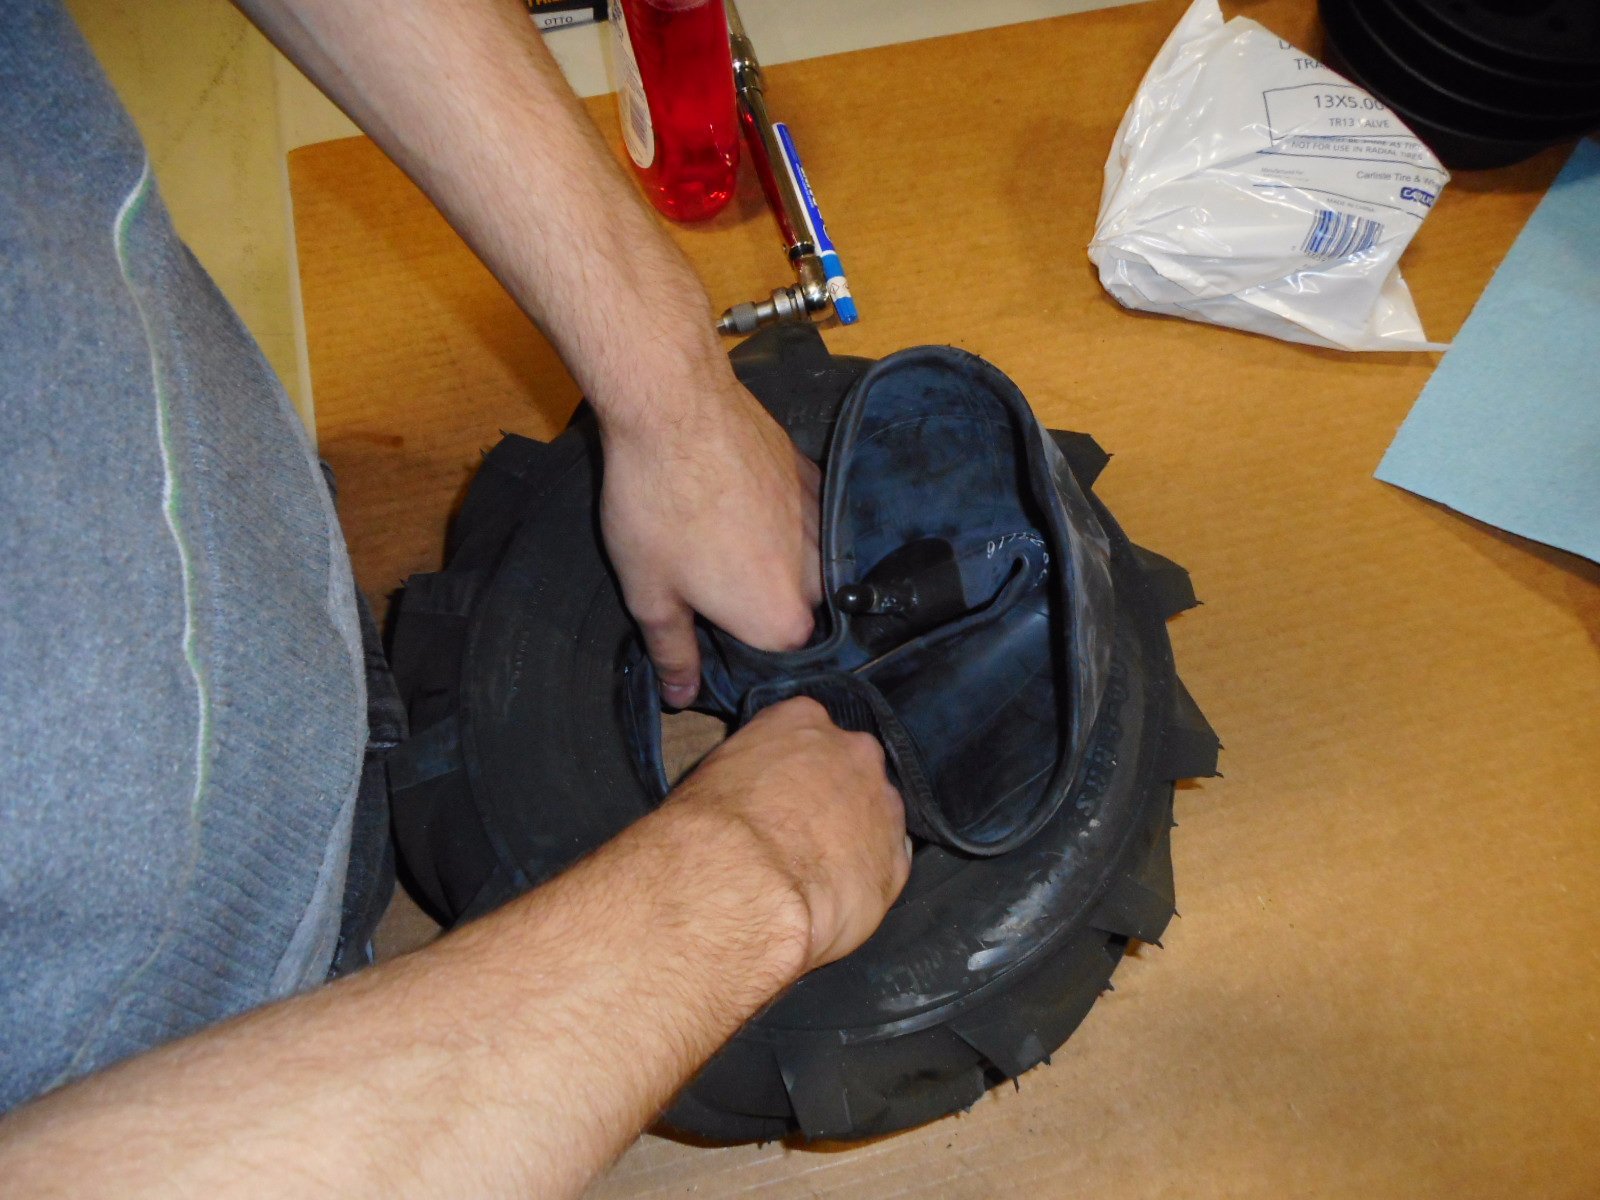
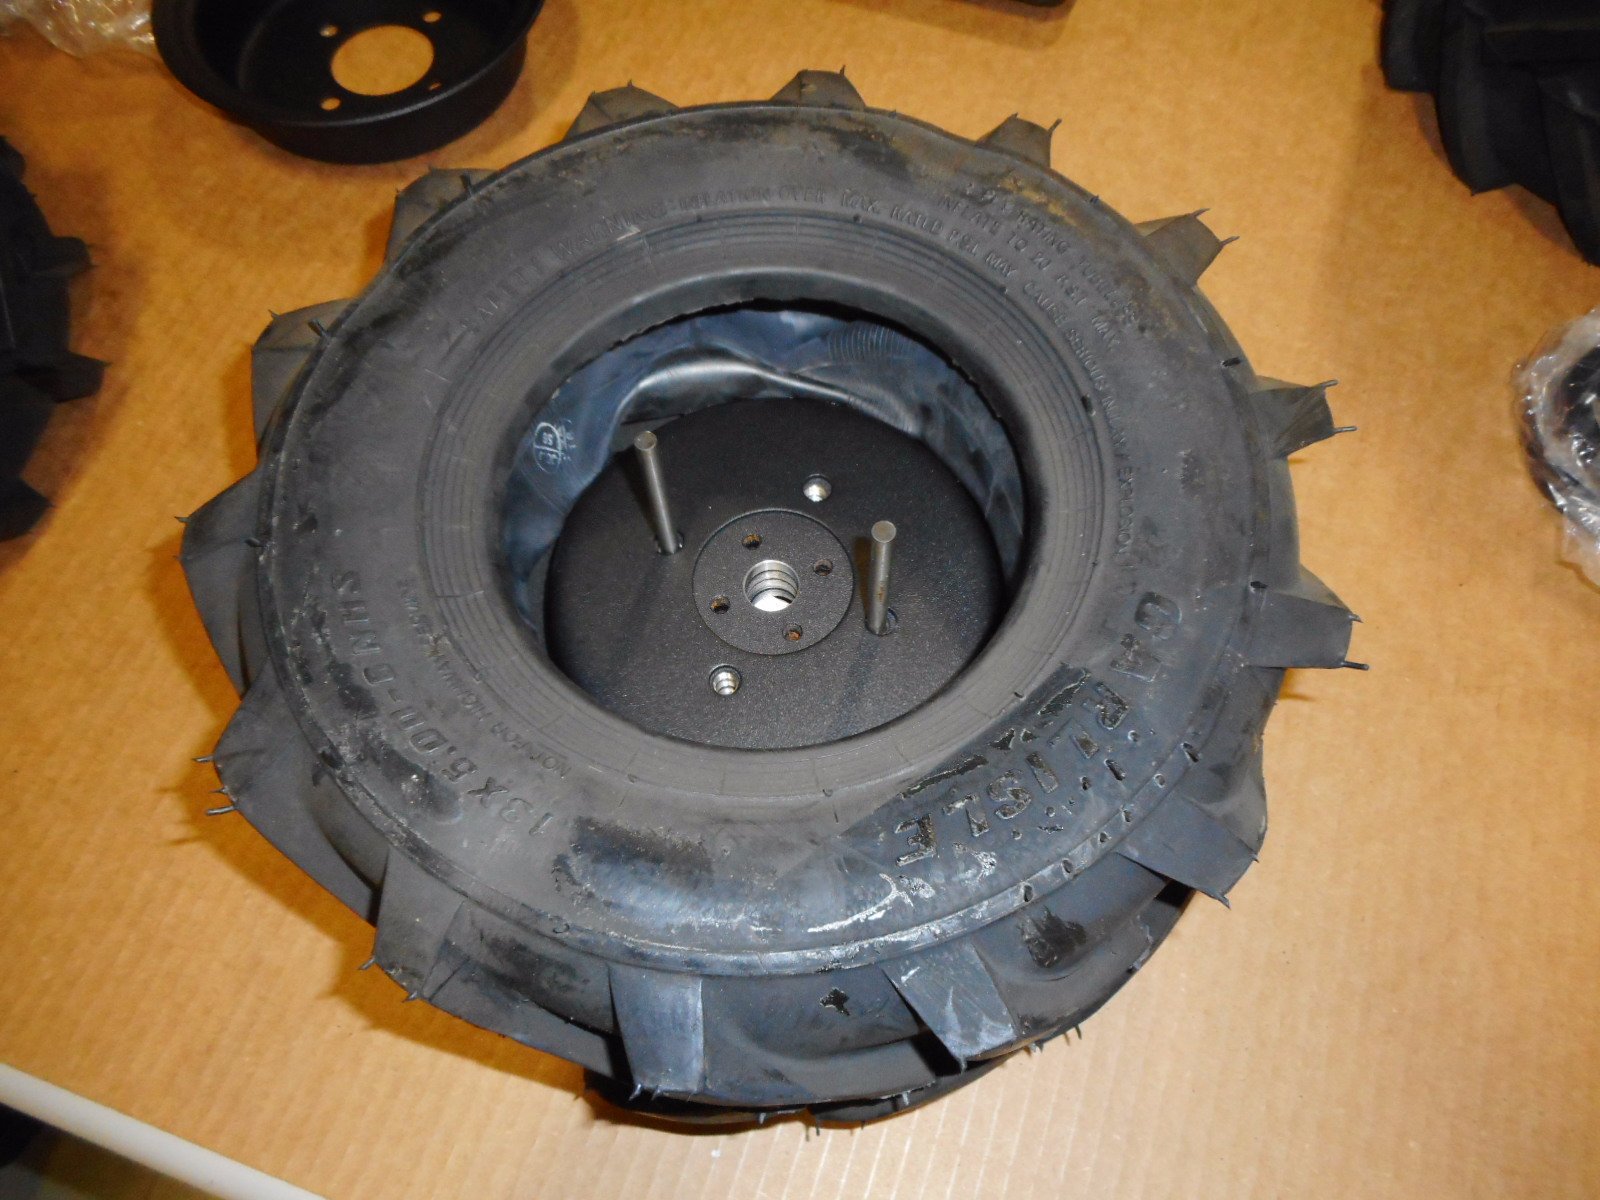
3. Place inner tube on tire, with a half-doughnut shape.
Place this on side of the tire where you want the air-fill stem to be. The picture shown is for a wheel on the left side of the Husky.
4. Push the inner tube into the tire.
Try to keep the half-doughnut shape.
5. Spread dish soap on the outside curved section of both halves of the split-rim.
6. Spread dish soap on the edge of the tire, where it will touch the rim.
Do this for both sides of the tire.
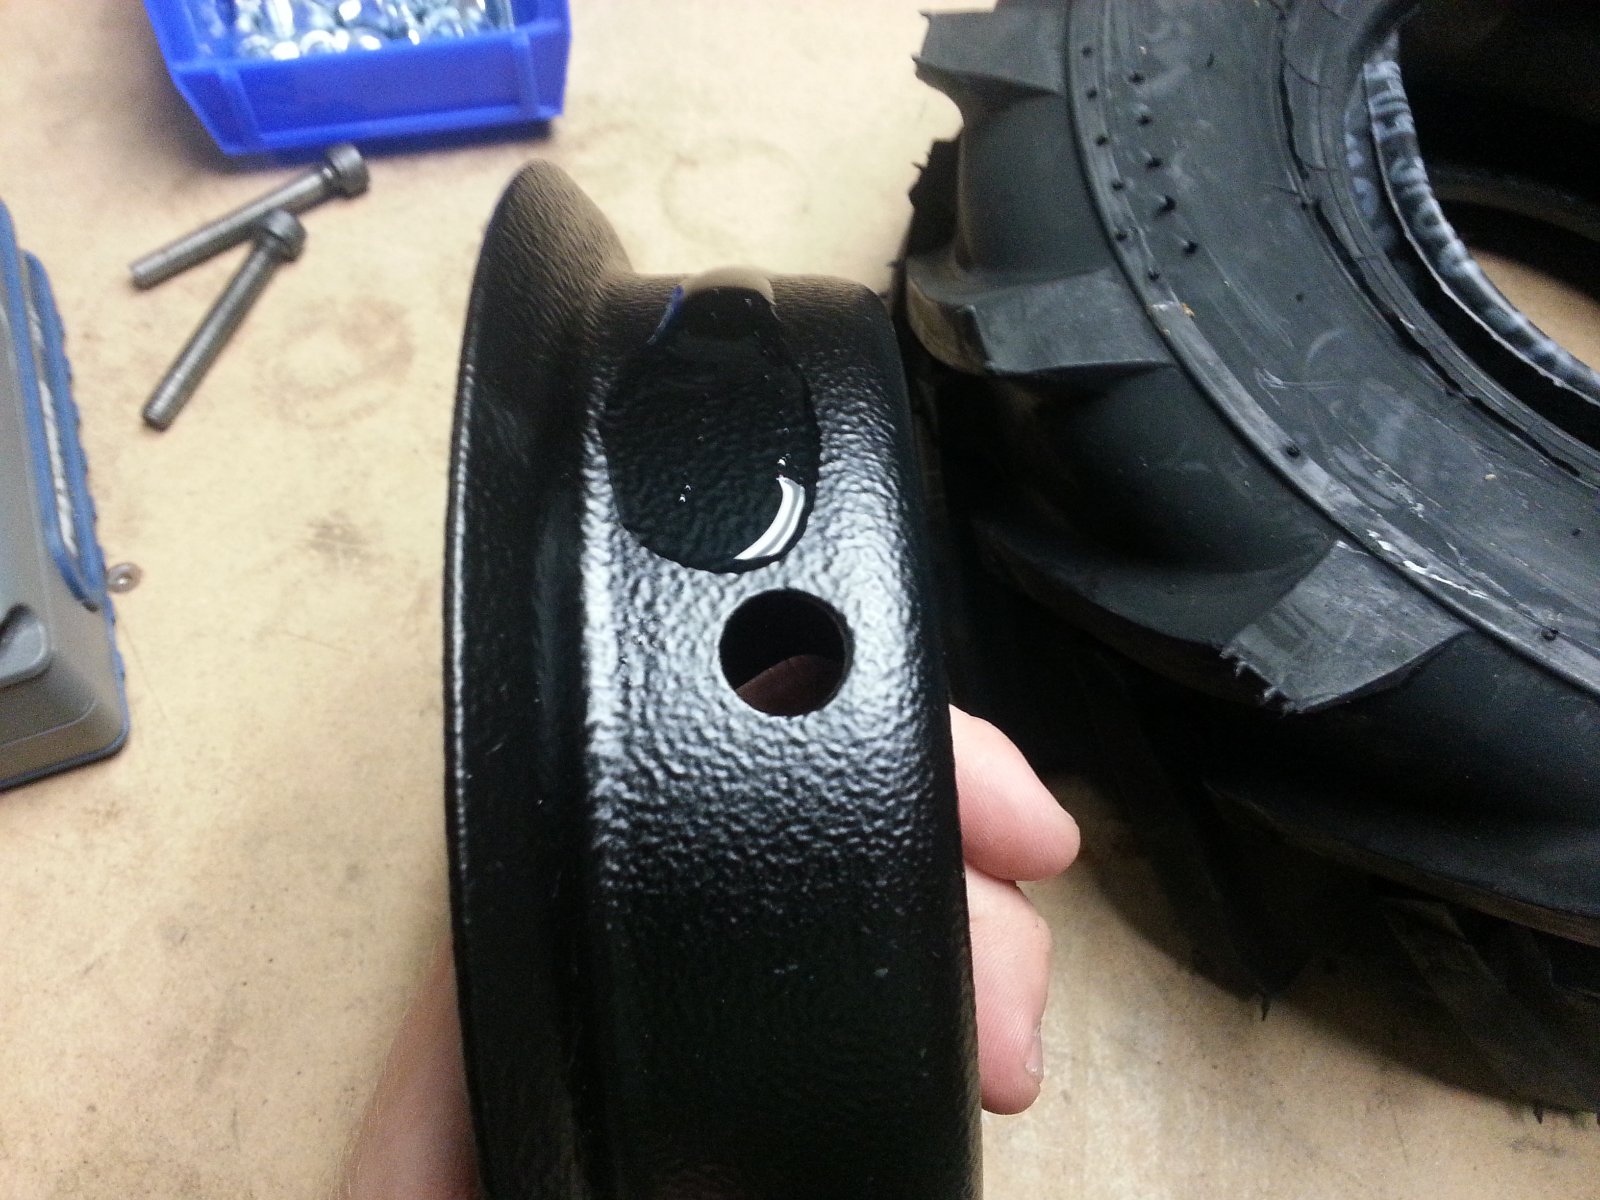
7. Slide the air-fill stem through the rim.
Then push the rim onto the tire's face.

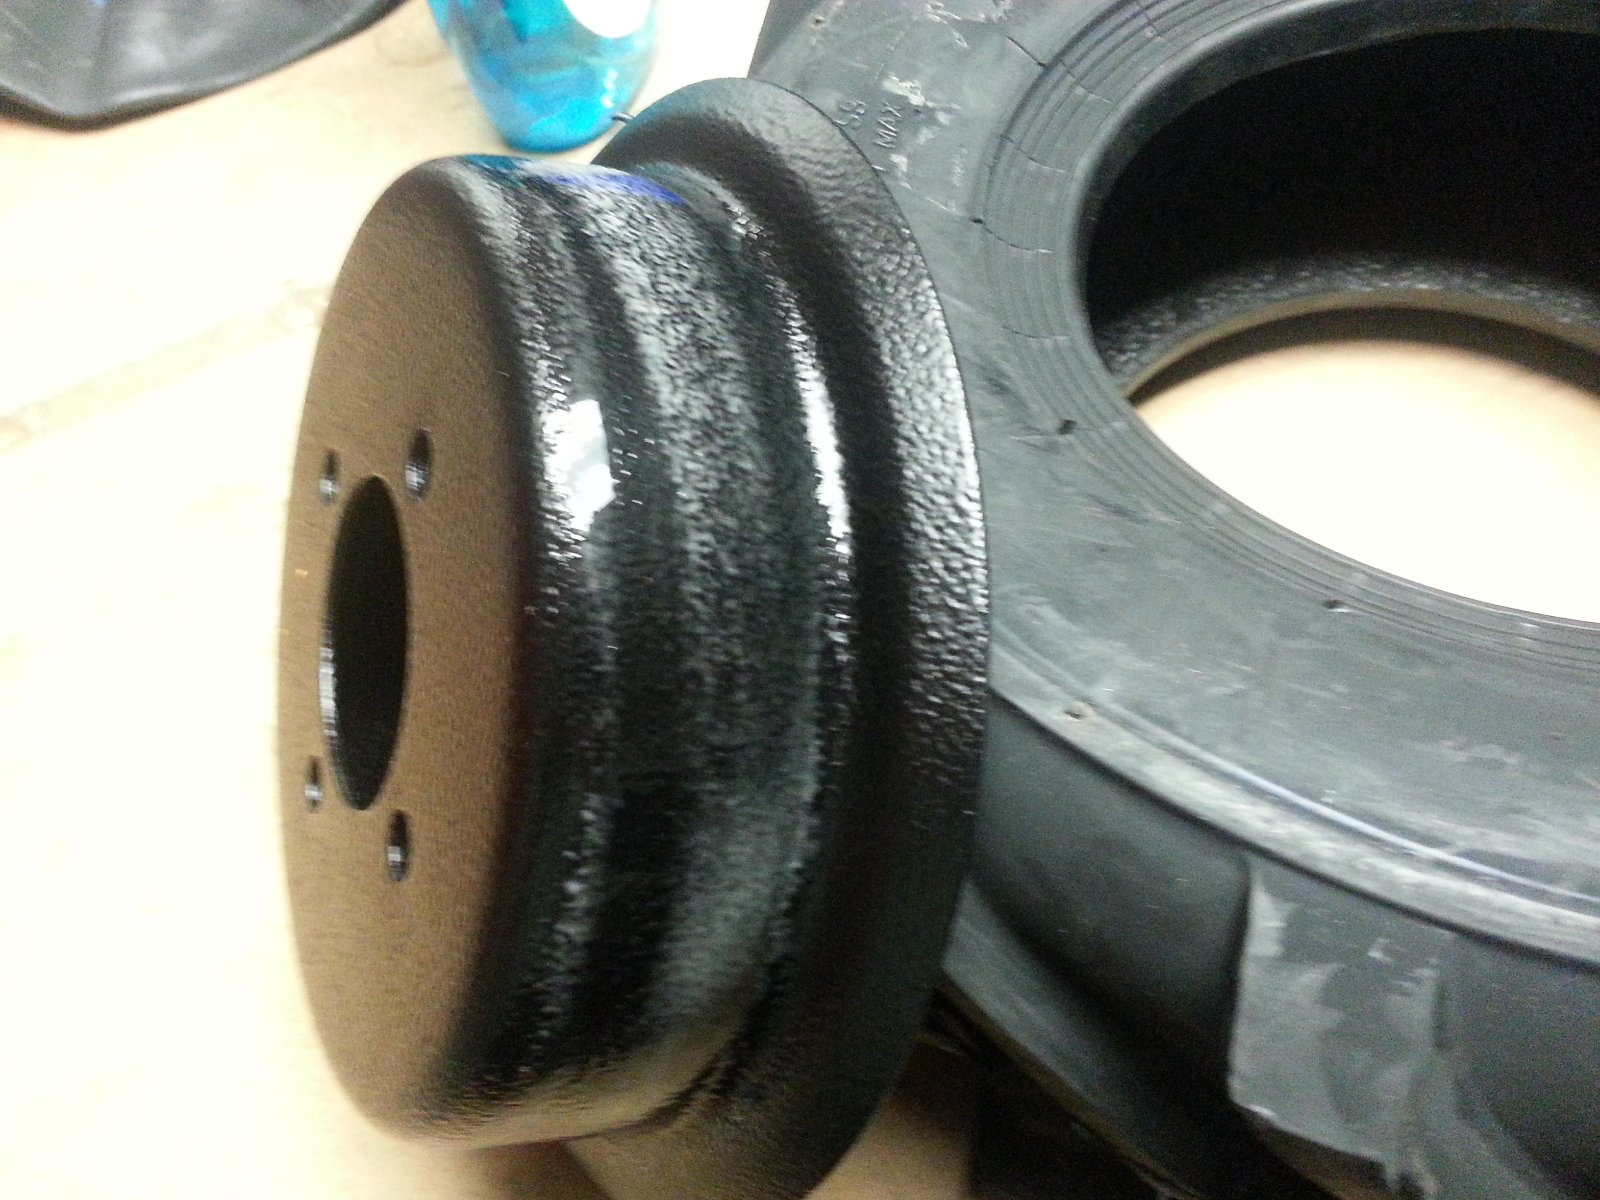
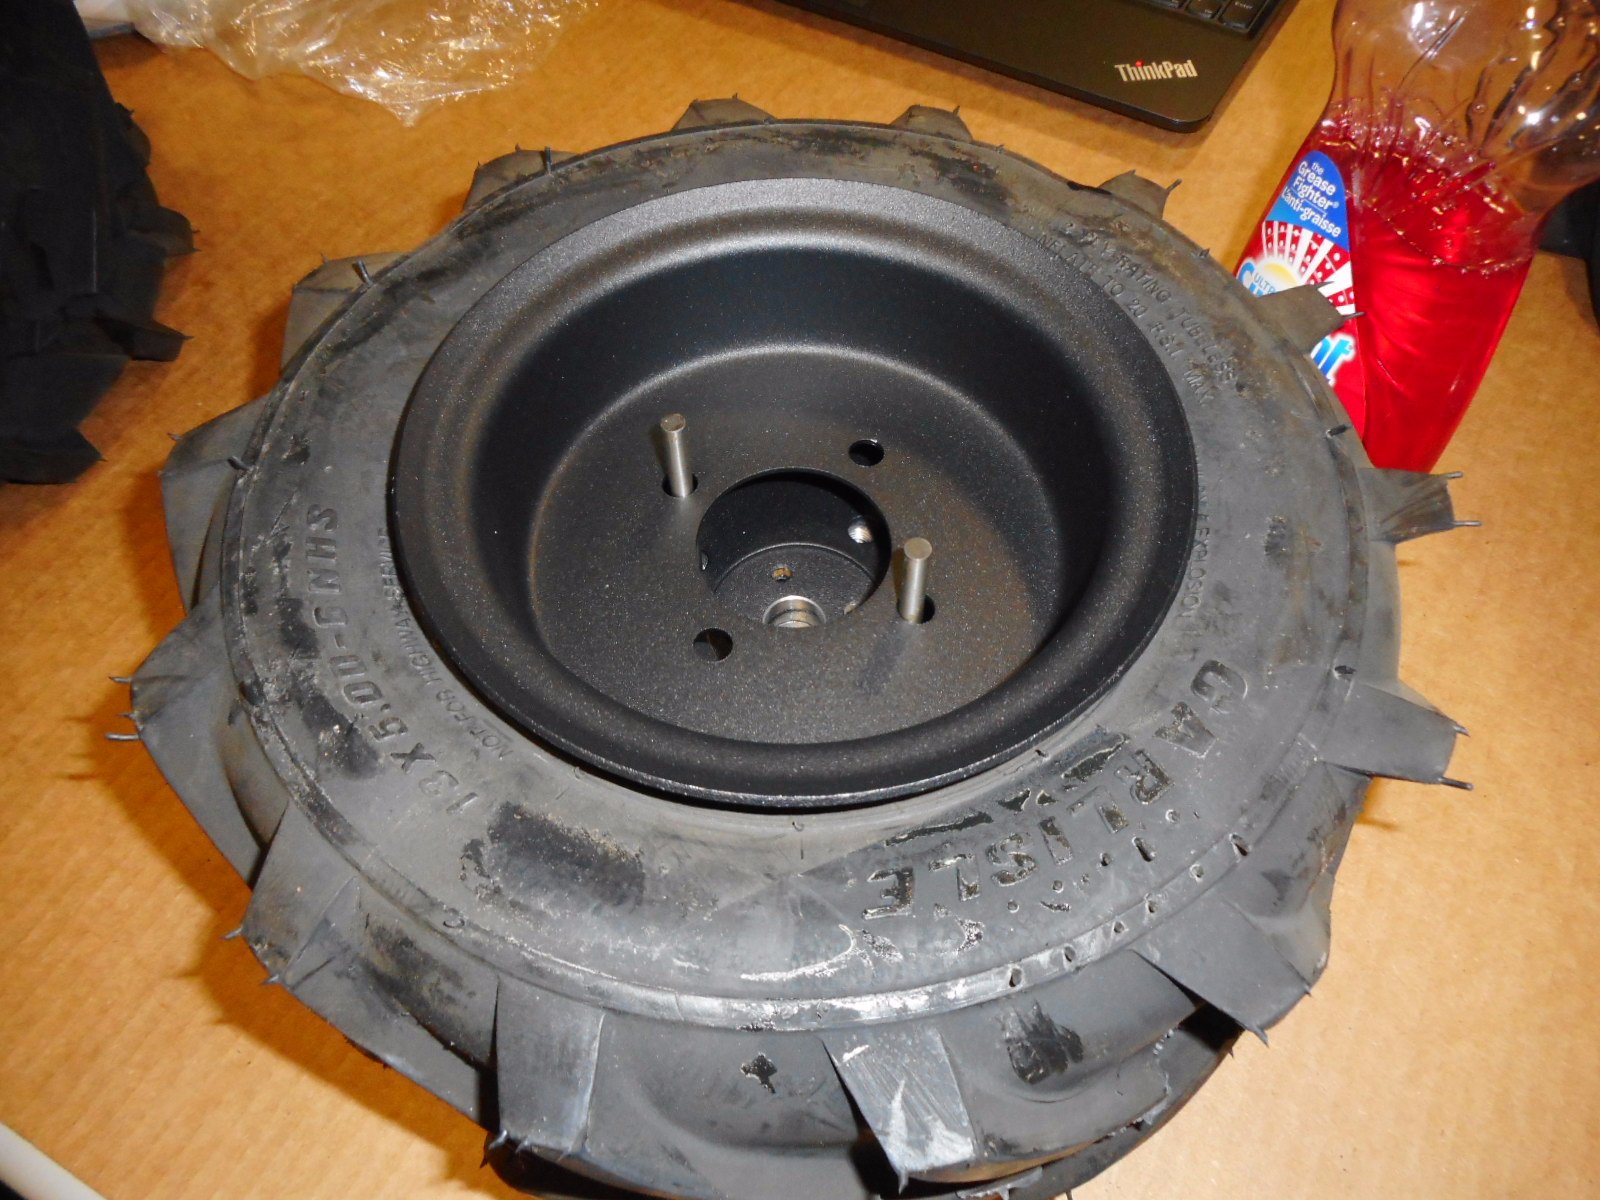
8. Flip the wheel over.
Adjust the inner tube so it is sitting around the perimeter of the rim. You want to make sure the inner tube does not get pinched between the two rims in the following steps.
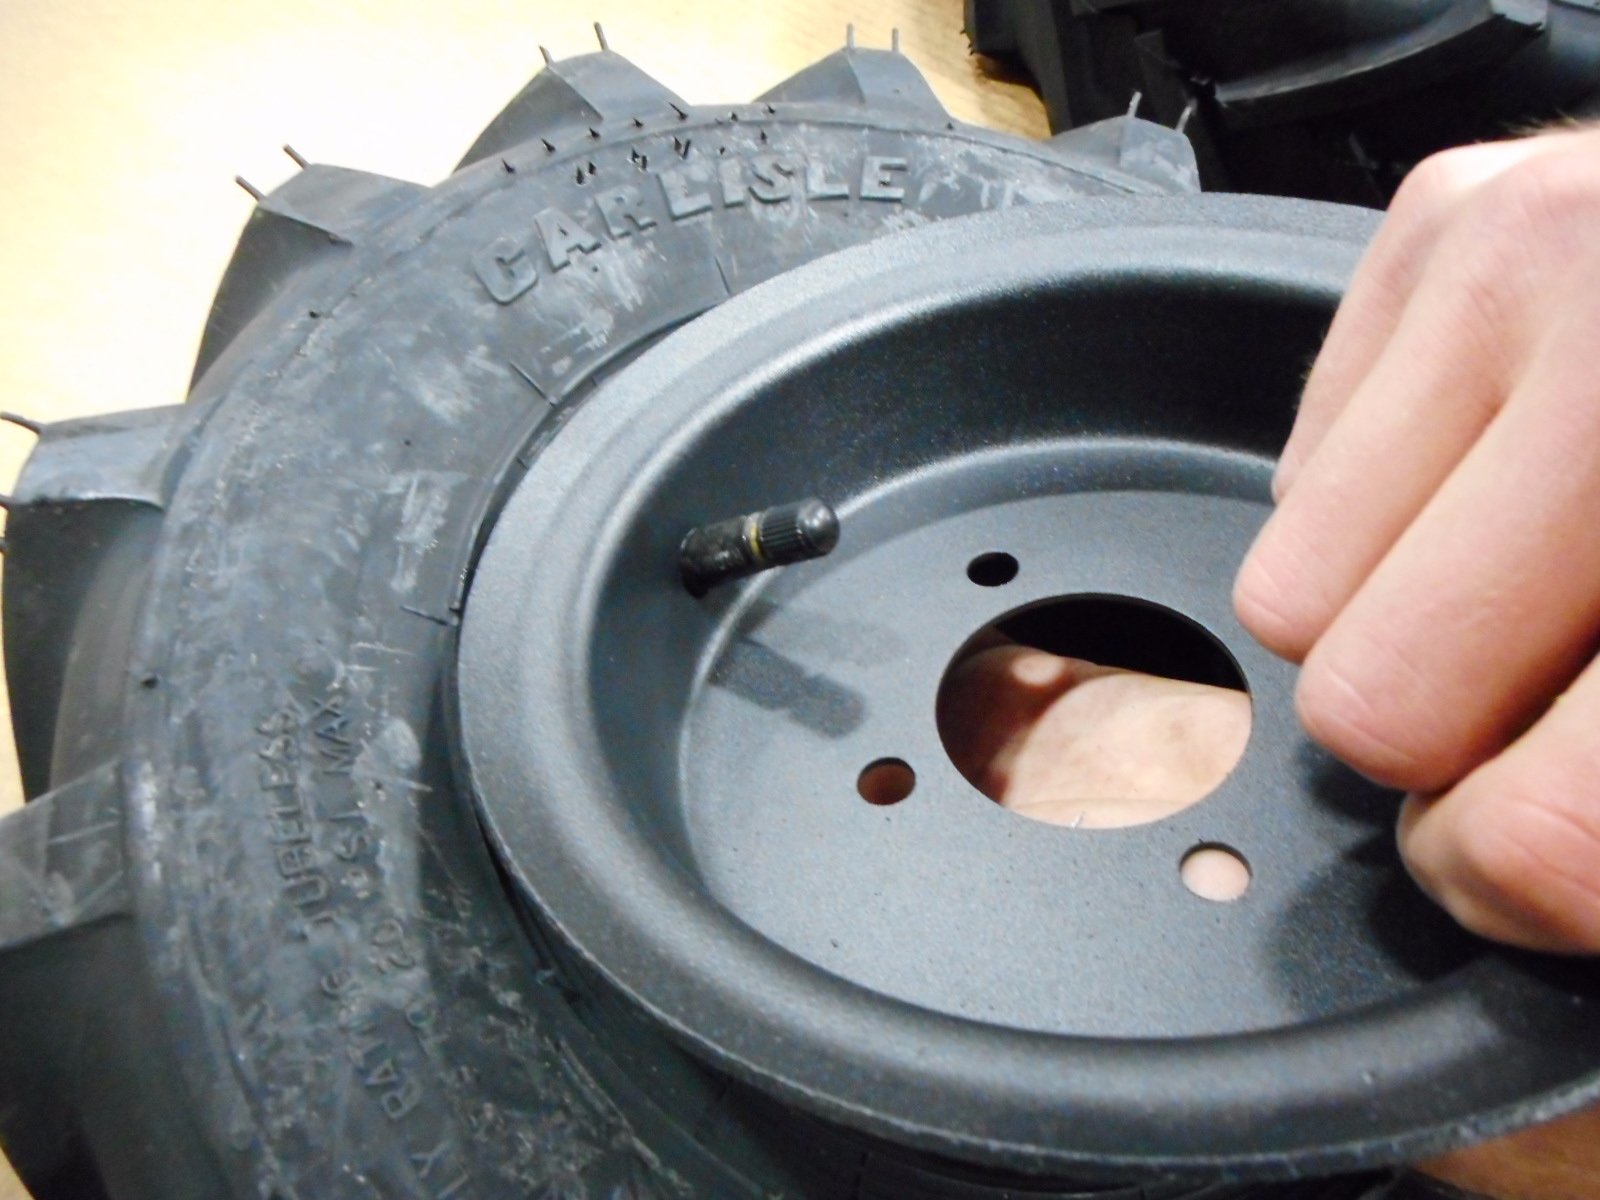
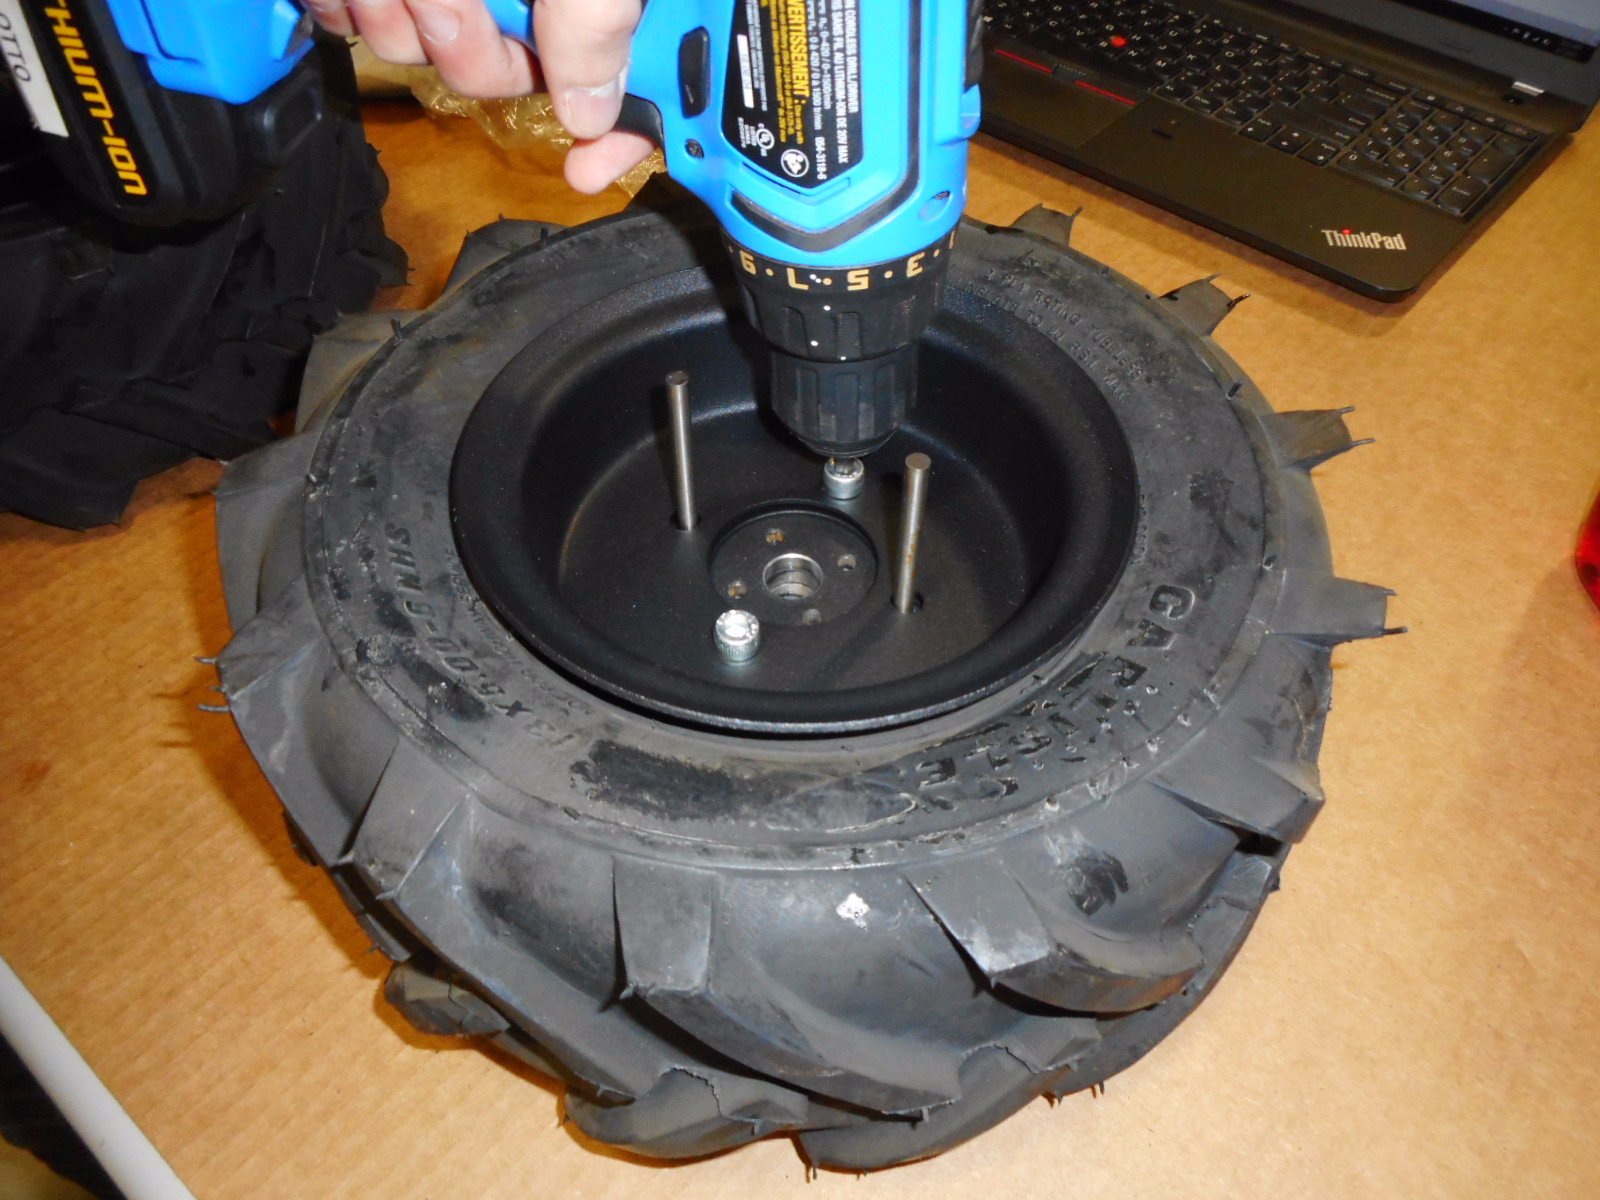
9. Connect the two halves of the split-rim using the installation tool or two bolts.
Note that the threaded adaper plate does on the side of the rim with the air-fill-stem. This adapter plate will be visible on the outside of the robot.
10. Clamp the two halves together using M8×1.25 X 12 screws.
You will need to remove the installation tool to access two of the four screw locations.
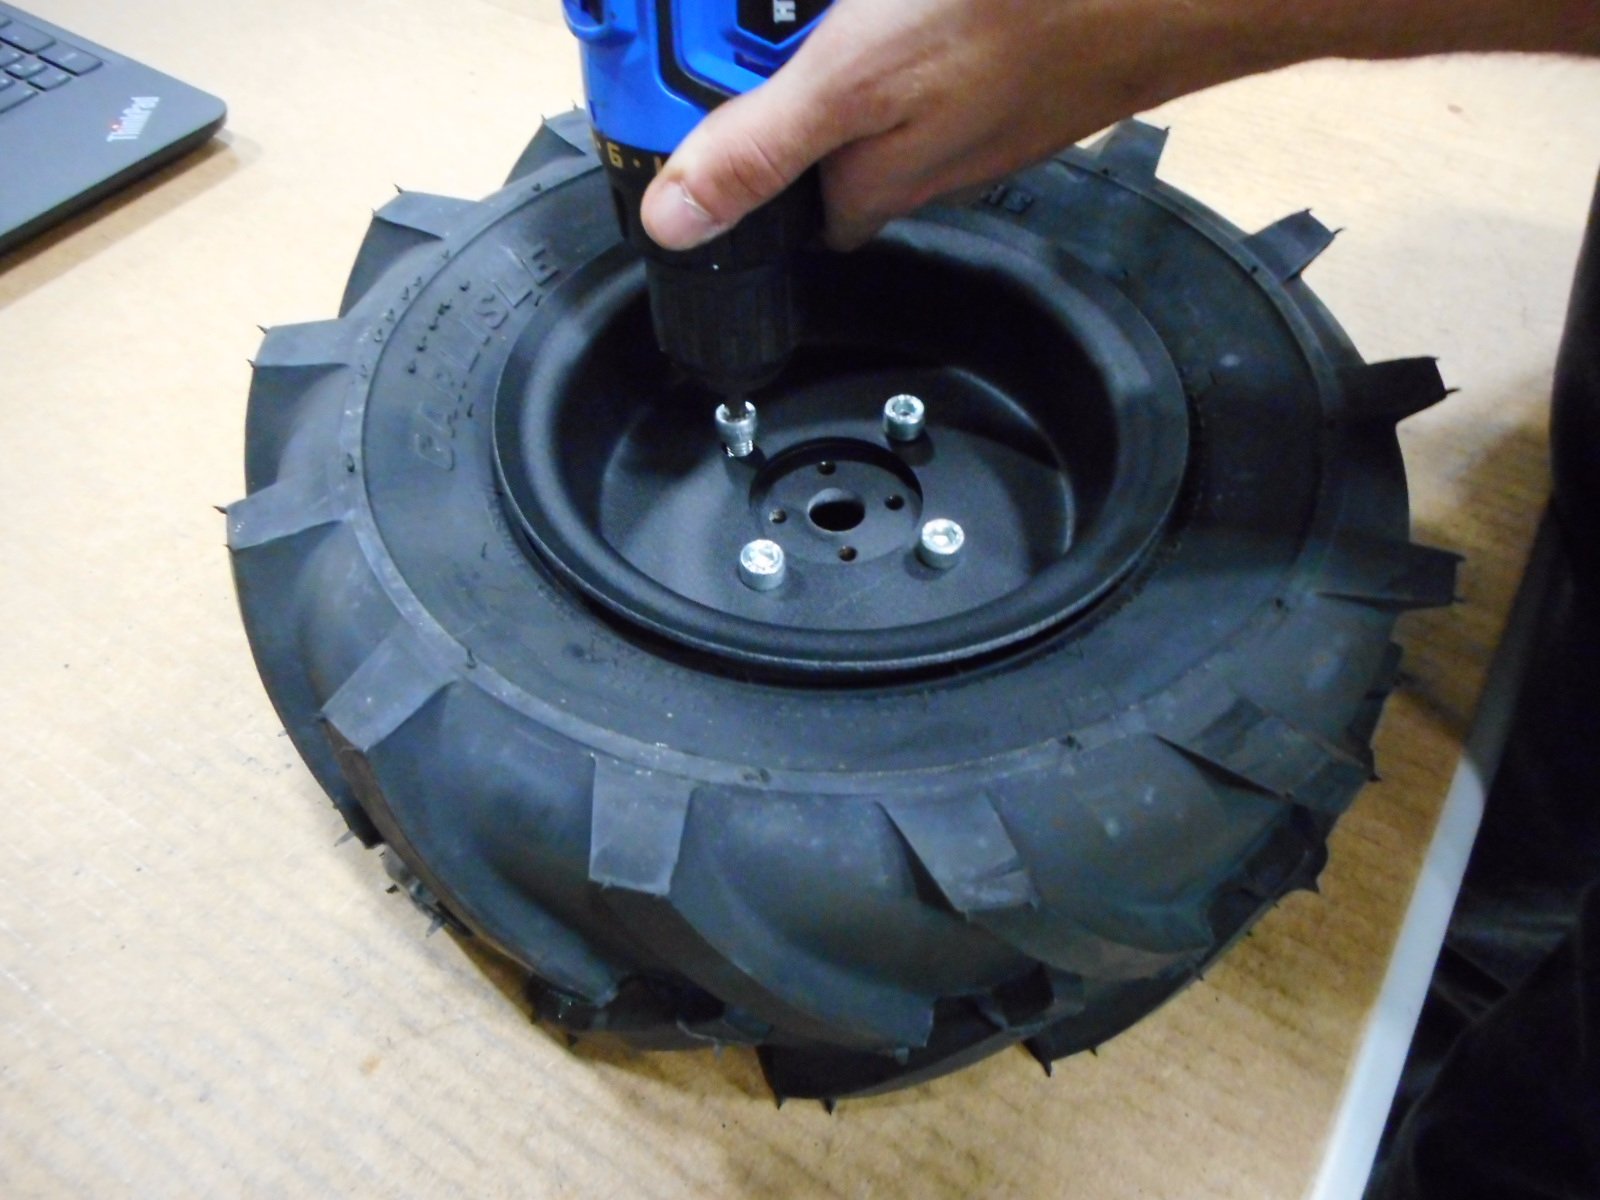
11. Torque all four screws to 13 N·m.
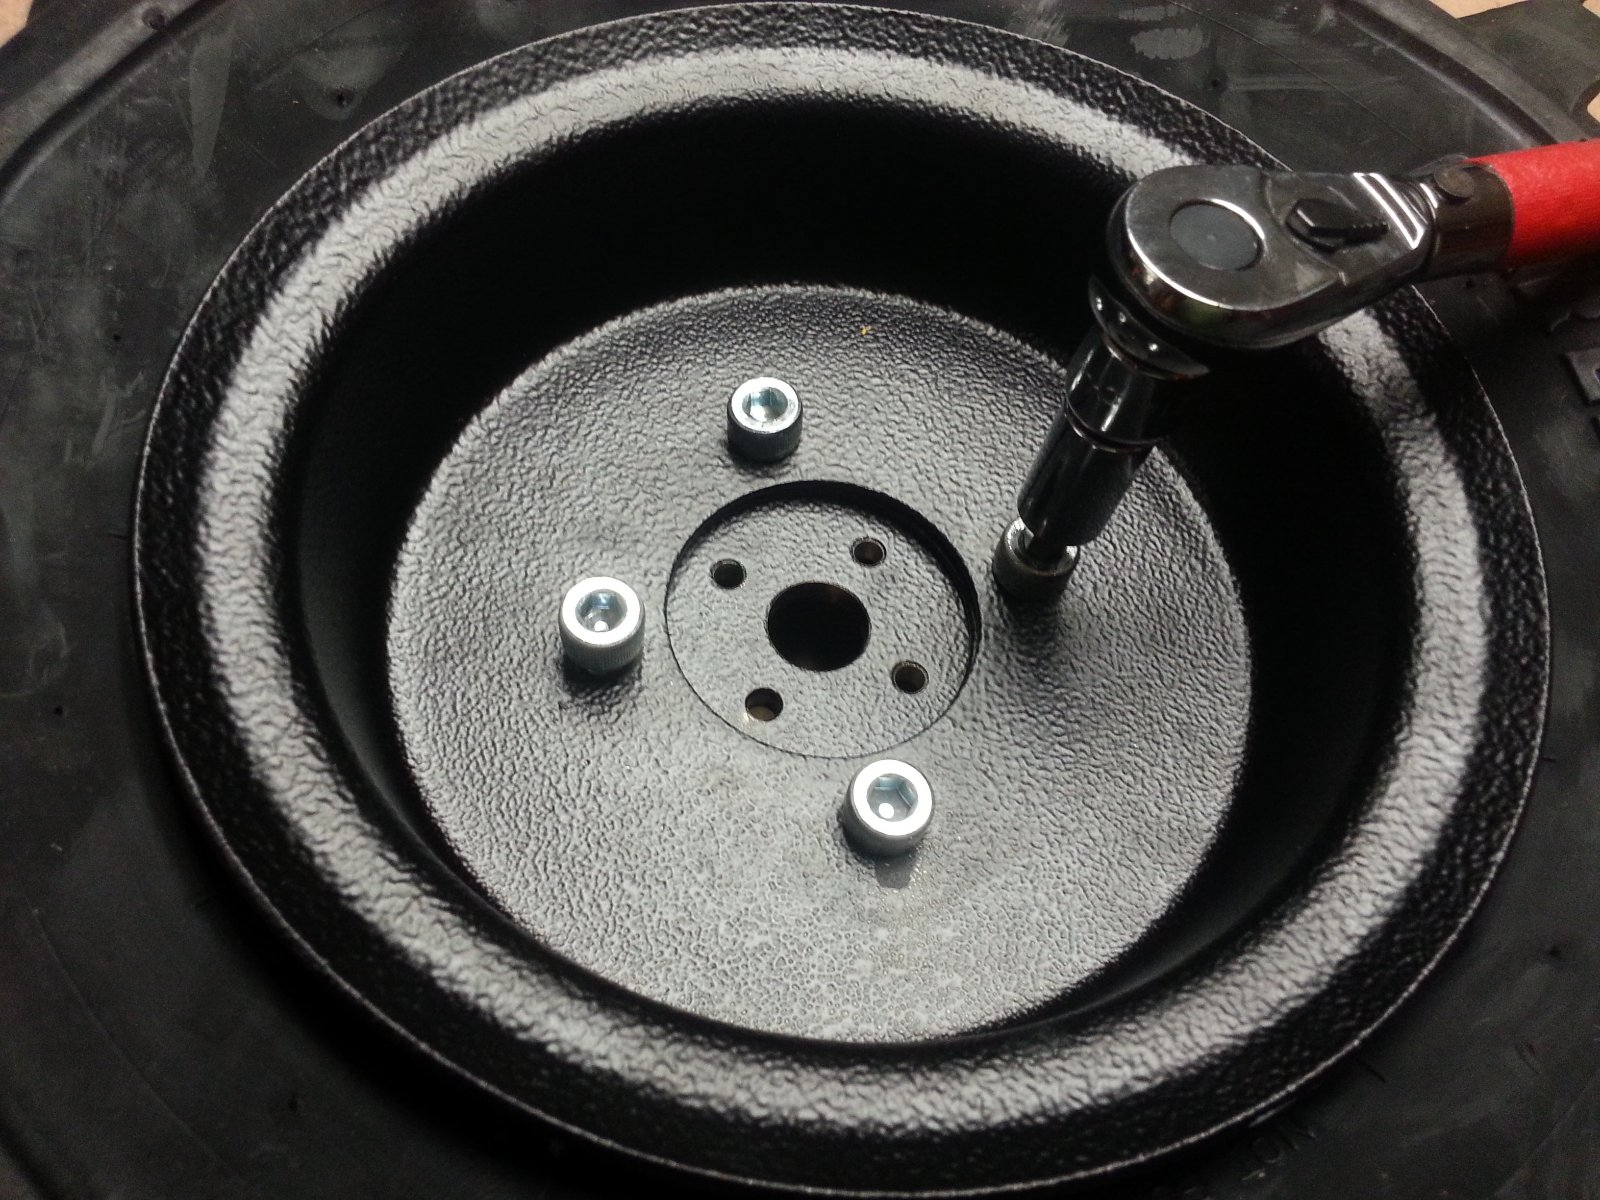
12. Mark the 4 screws and rim.
This will let you know if screws have loosened in service.
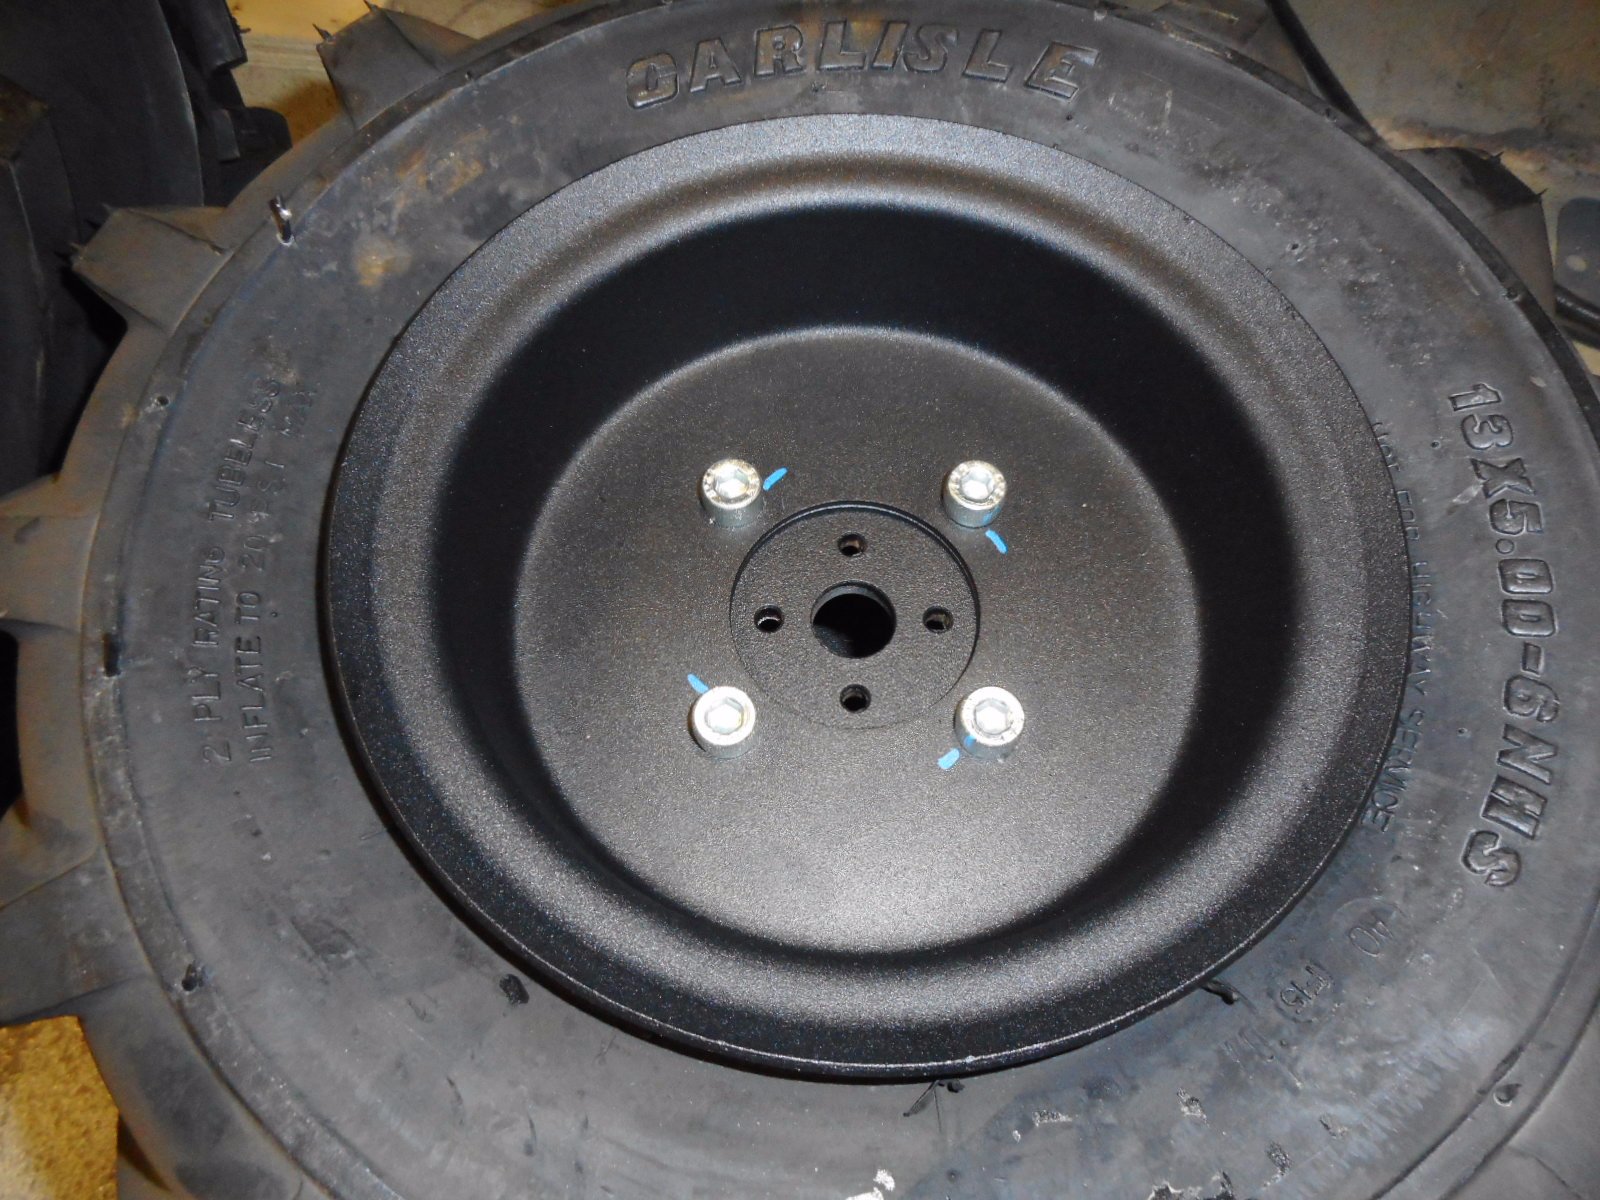
13. Inflate the inner tube to 138 kPa (20 psi).
Bounce the tire on the floor a few times after you have inflated it, and removed the compressor. The bounching will help seat the tire's bead.
You can drop the pressure after the tire's bead has seated. You can drop the pressure to as low as 69 kPa (10 psi).
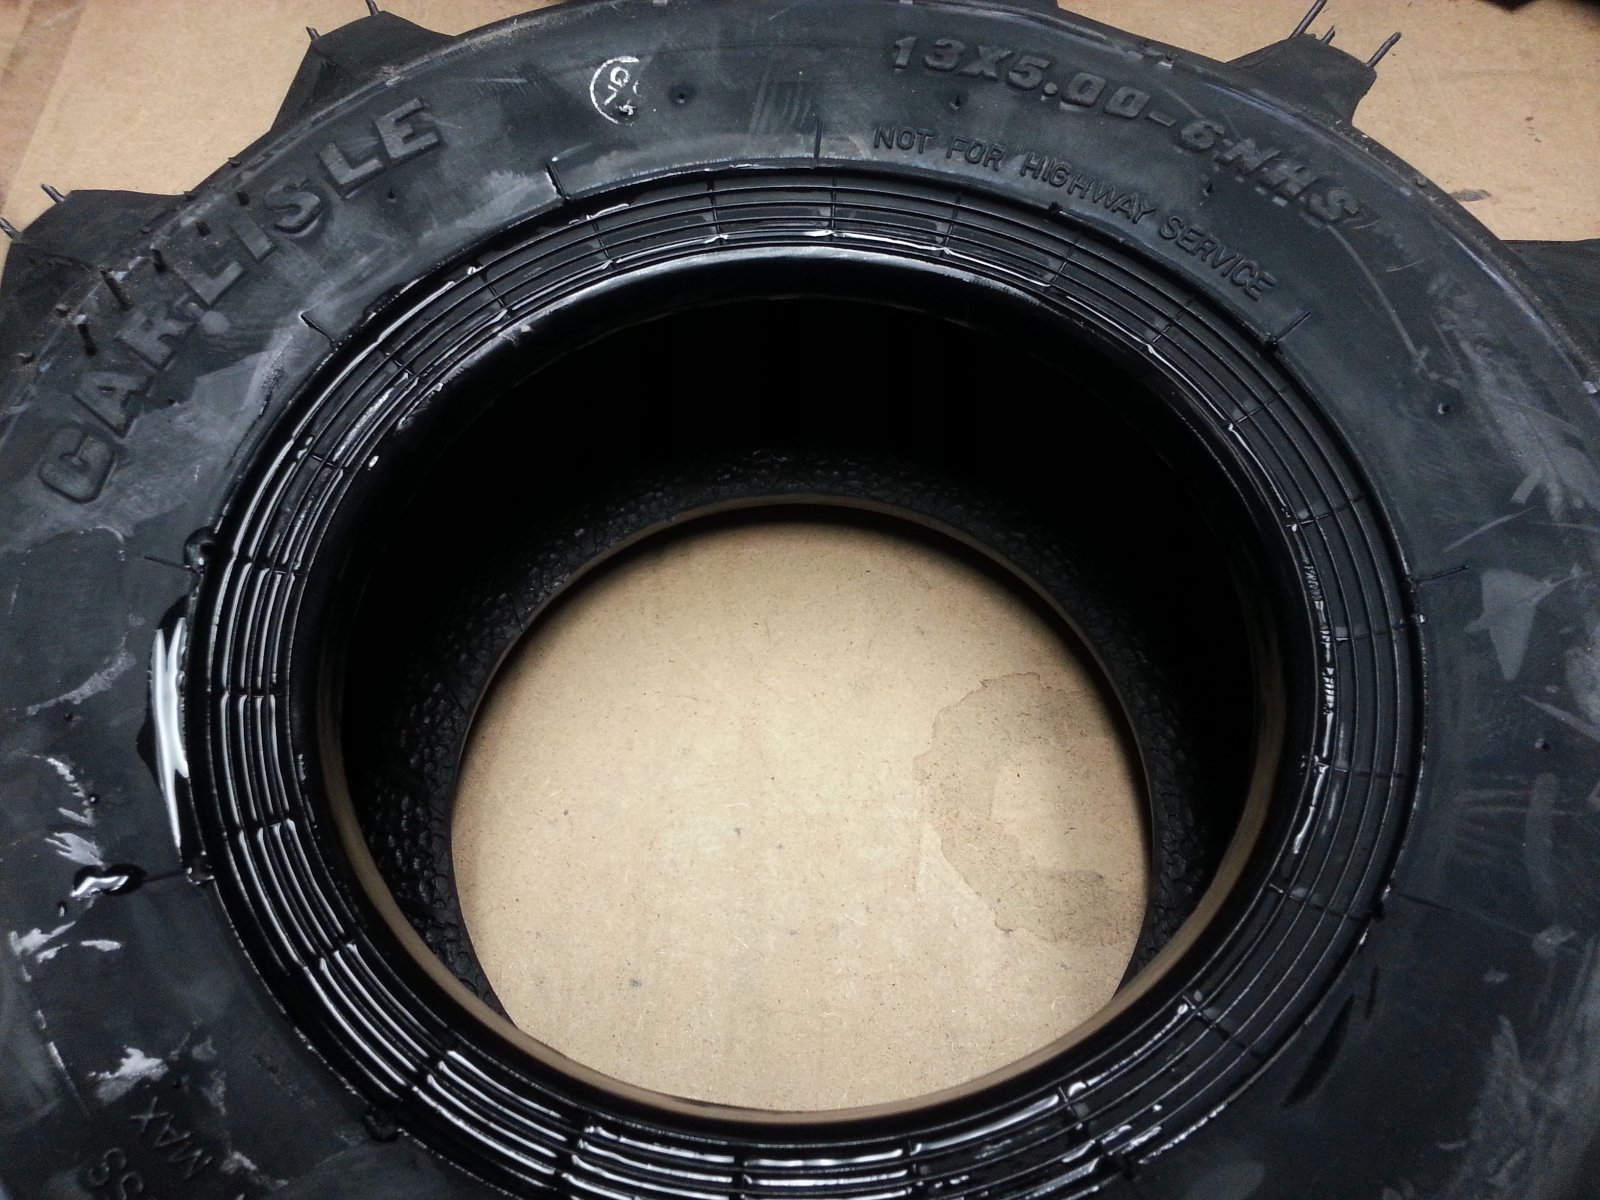
14. Check the tire for any odd stretching, wrinkles, or warped areas.
These anomalies can cause the Husky to not drive straight, and affect your autonomy program's performance.
Lead-Acid Battery Care
Husky's default power supply is a sealed 24 V lead-acid battery (VRLA), providing 20 Ah of charge. These tips are intended to help keep your Husky Lead-Acid Battery in tip-top shape. With proper maintenance, the battery should maintain the majority of its capacity for hundreds of cycles.
The most damaging thing to a lead-acid battery is a phenomenon called sulfation. When a lead-acid battery is left in an uncharged state for long periods of time, sulfate crystals solidify on the electrodes of the battery. This effect can be permanent, and it causes premature reduction in capacity. Therefore, it is important to fully charge the battery as soon as you are finished using it, regardless of how much capacity remains.
Your robot's battery charger works in 3 stages:
- Constant current charging
- Topping charge
- Float charge
The bulk of the capacity (70%) is regained during the first stage.
It is important to let the charger complete all 3 stages whenever possible, to help maintain the life of the battery. The initial stage will take 5 - 7 hours, and a complete charge may take up to 14 hours.
In general, following these tips will help maximize the life of the battery:
- Always fully charge the battery as soon as you are finished using it.
- Charge batteries at room temperature. Never charge lead-acid batteries at temperatures above 35°C.
- Charge batteries in a well-ventilated area.
- Do not allow the battery to freeze. A low battery will freeze sooner than a fully charged one. Never charge a frozen battery.
- Stored batteries should be topped up every month. Completely cycle batteries every 4 - 6 months.
- At a discharge rate of 50% DOD (depth of discharge), the lifecycle of the battery is 450 - 550 cycles. After this point, reduced capacity will be apparent.
- Regularly discharging the battery below 50% DOD will reduce the lifecycle of the battery, sometimes to less than 300 cycles.

Lithium Battery Care
If your Husky has an upgrade to lithium batteries, note the required maintenance below.
Balancing Lithium Batteries
The Husky's batteries must be balanced on a regular basis to ensure accurate feedback, consistent performance, and long life. If the batteries are allowed to fall out of balance, they will become unevenly loaded. This can lead to back-feeding between batteries, reduced charge-holding capacity for the system as a whole, and increased stress on both batteries. If the imbalance becomes severe enough, one of the system batteries will enter a protective state and disconnect itself from the system. Once the battery enters this state there is a limited time window to recover it. If that window expires the battery will become irreversibly damaged with no possibility of recovery.
Battery balancing is a slow process that will occur automatically when the fully-charged batteries are held at their float voltage. Because the automatic charger will shut off when it determines that the batteries are fully charged, the system cannot be balanced using the autocharge dock. The manual charger must be used.
To perform a "quick" balance, leave the robot plugged into the manual charger overnight. A quick balance is recommended at least once per week. A full balance of 24+ hours is recommended at least once per month.
Contact Clearpath Robotics for assistance with recovering a battery that has entered a protective state.
Checking Lithium Battery Health
A regularly-balanced battery system can be recharged thousands of times before degrading. Even with good battery maintenance, the battery will lose capacity over time. This results in reduced runtime and driving range for your Husky. This translates to reduced run-time and range. The robot will need to be recharged more frequently and overall system availability will be reduced.
It is recommended that the system operator review runtime performance once per year to determine whether battery replacement is required. Runtime measurements should be taken immediately after a full balancing operation. Battery replacement is performed by Clearpath Robotics and is subject to battery availability. Replacement batteries may be purchased in advance and warehoused at Clearpath for future use.
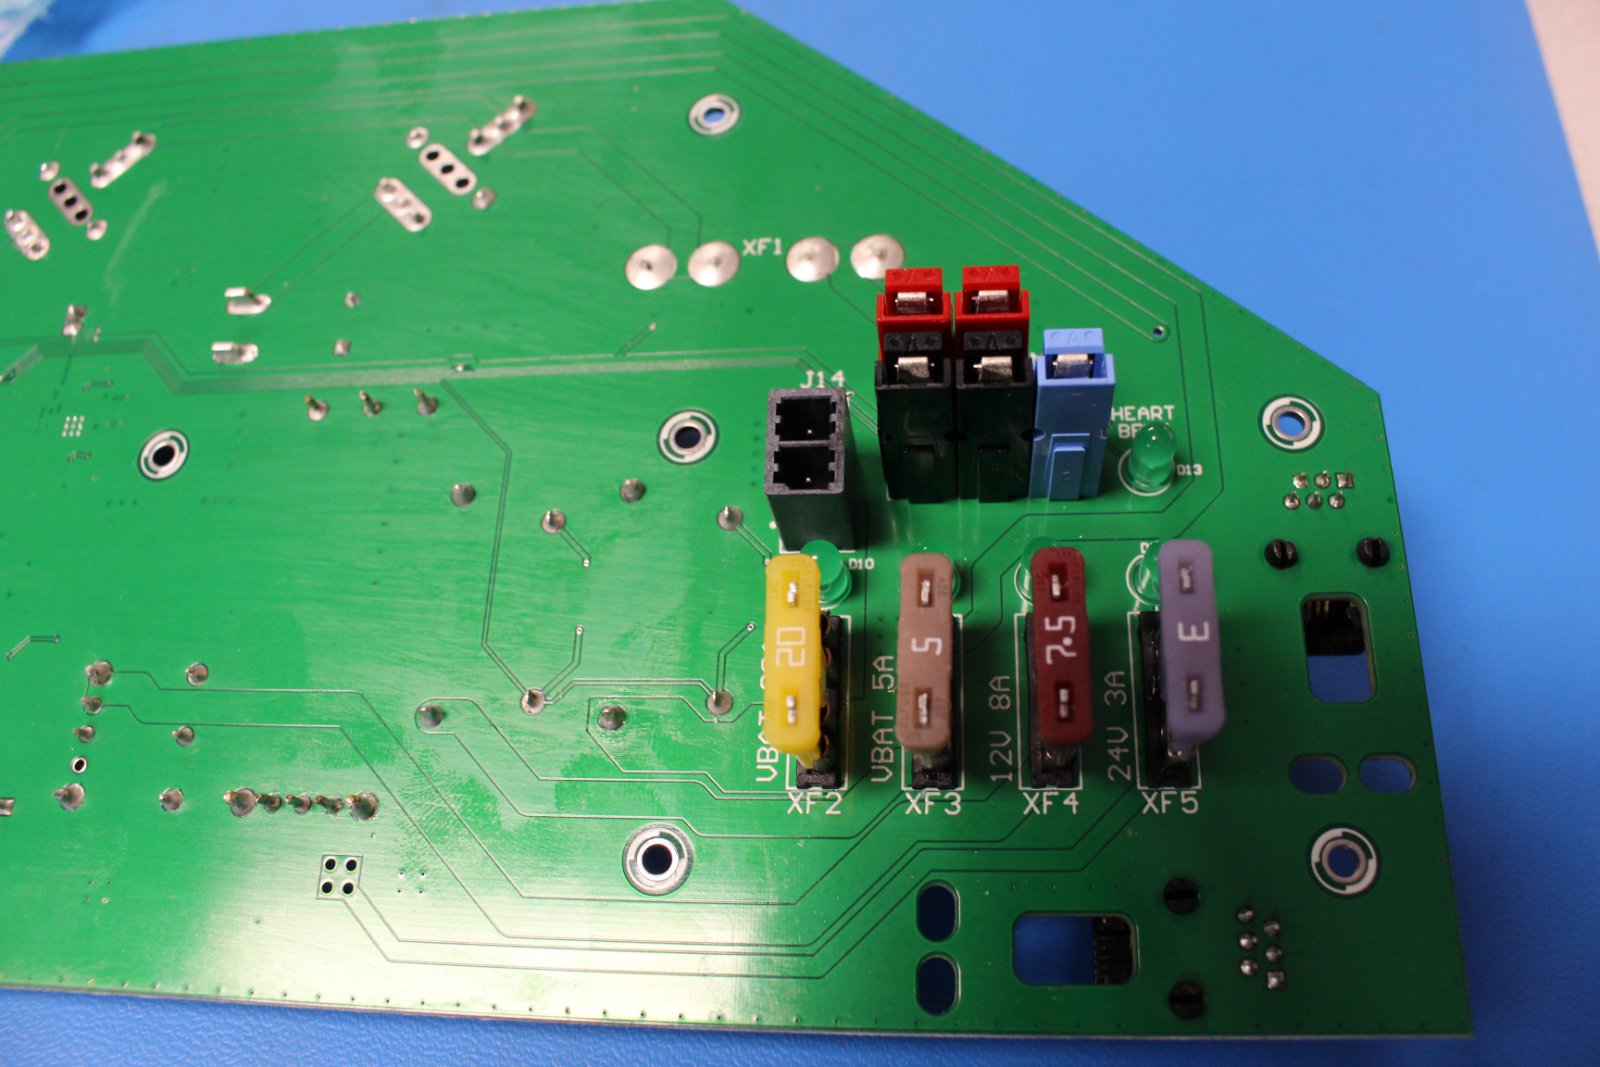
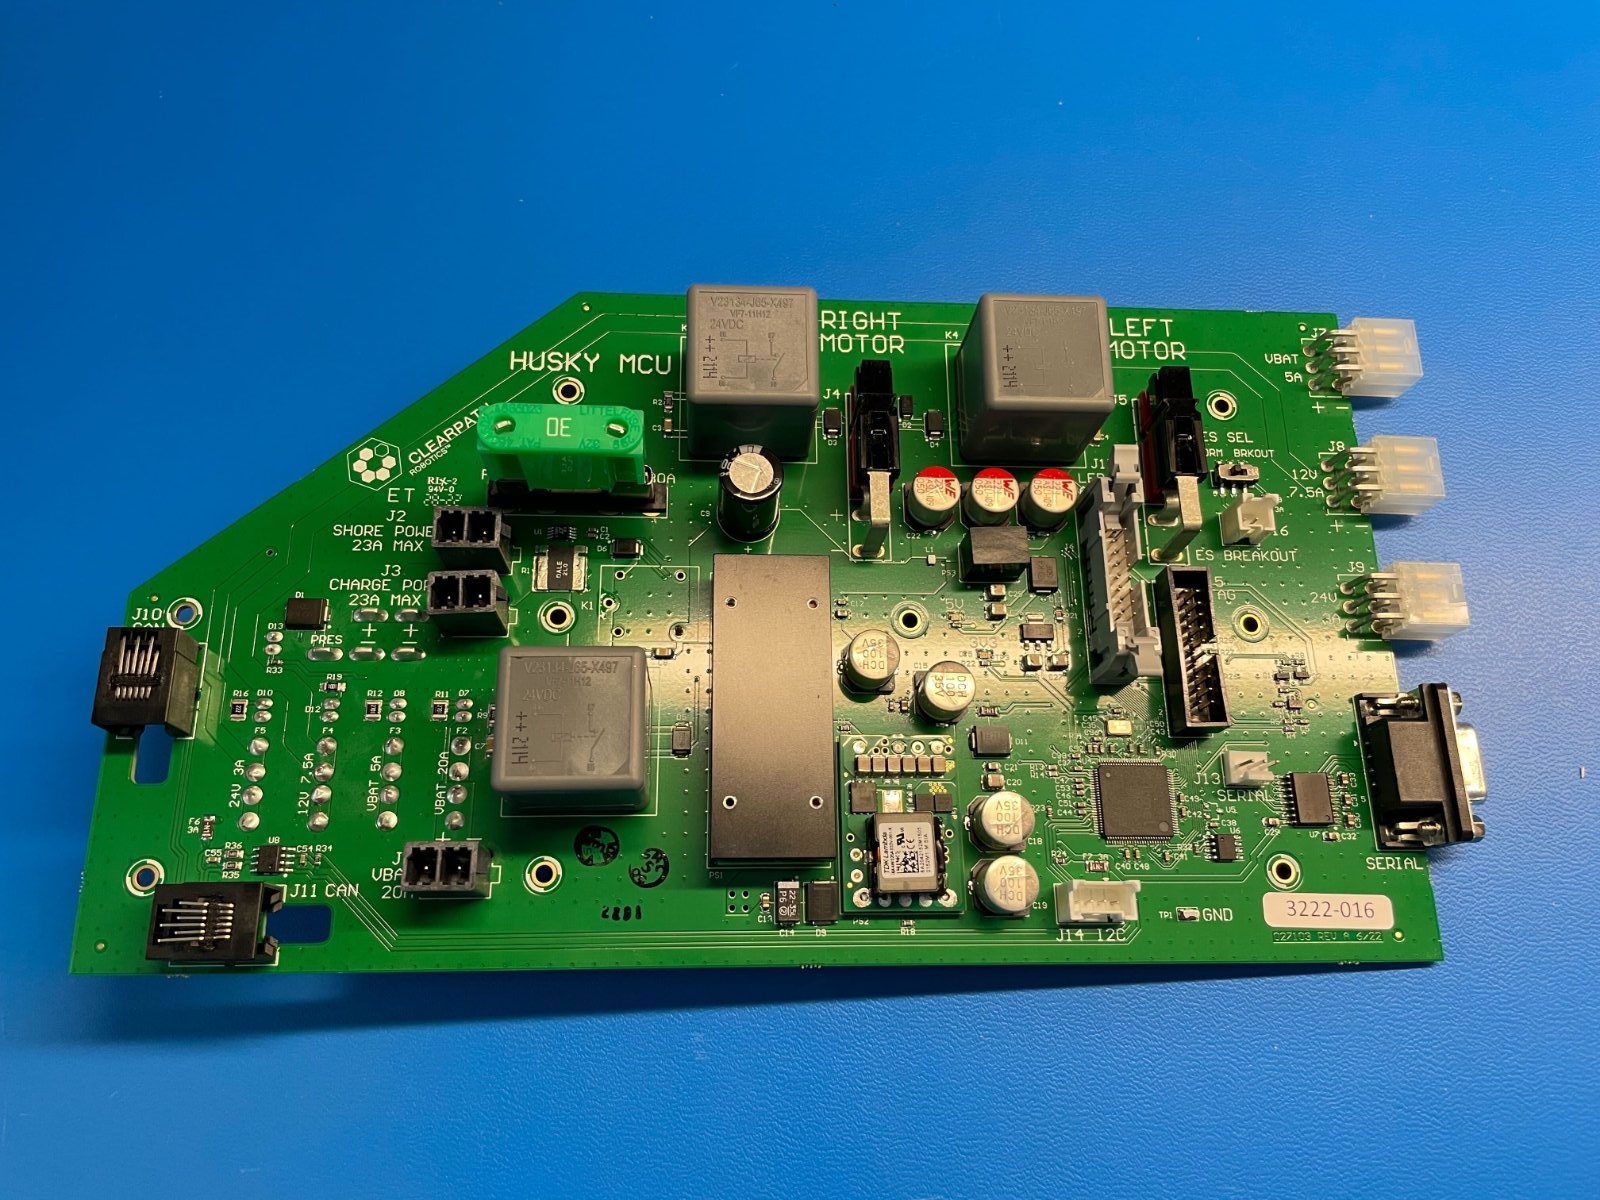
Replacing Fuses
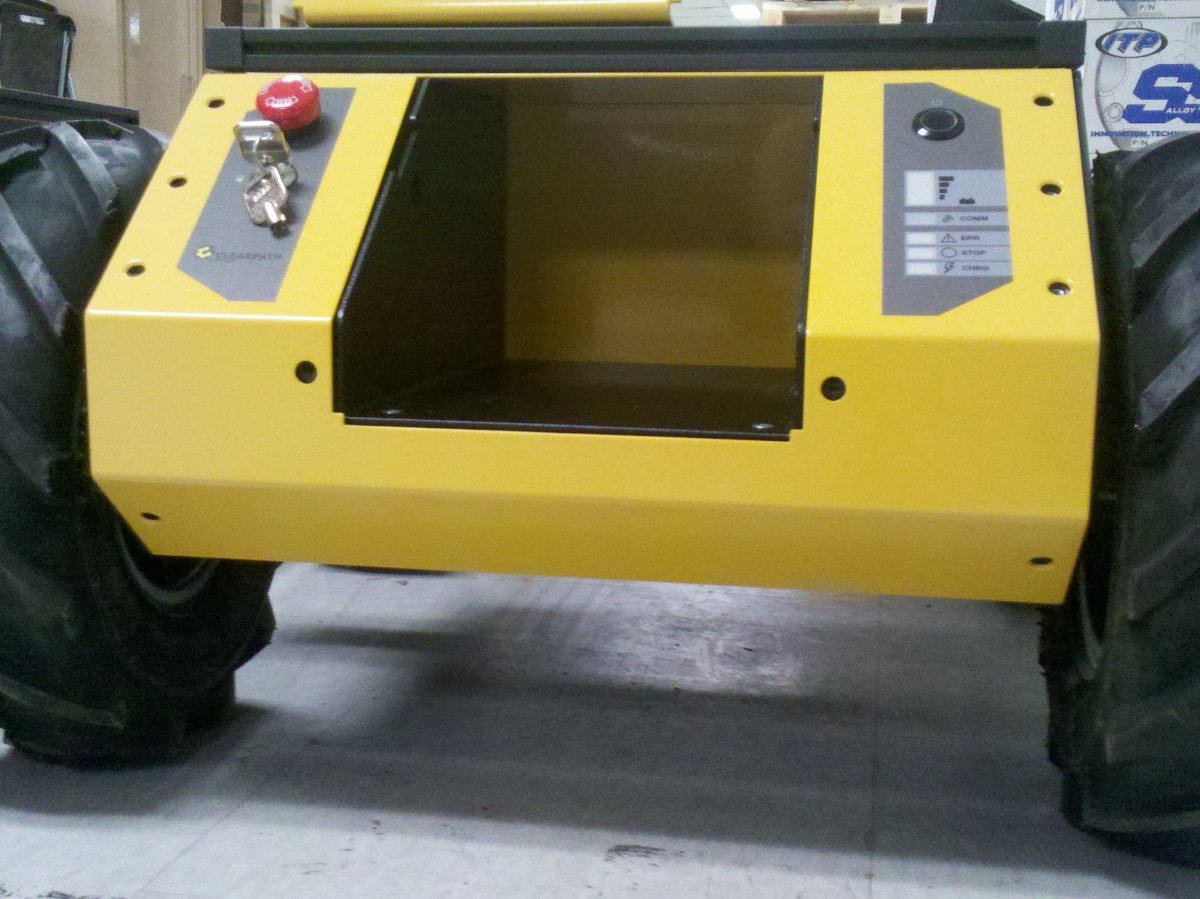
You Husky's MCU has fuses that can be changed through the rear battery access panel. The large battery input fuse is on the other side of the MCU, so you will need to remove Husky's metal panels to access this fuse.
Refer to the white lettering on the circuit board for what rating of fuse to replace in the fuse holder.
The Common Replacement Items section of this page shows where you can purchase new fuses.
Click to expand
Software Maintenance
Getting New Packages
If you are upgrading your robot from an older version of ROS, please refer to our upgrade instructions for upgrading to Melodic, Noetic and ROS 2 Humble.
Clearpath Robotics robots are always being improved, both its own software and the many community ROS packages upon which it depends!
You can use the apt package management system to receive new versions all software running on the platform.
Each robot leaves the factory already configured to pull packages from http://packages.ros.org as well as http://packages.clearpathrobotics.com. To update your package and download new package versions, simply run:
sudo apt-get update
sudo apt-get dist-upgrade
MCU Firmware Update
Customer updates of Husky firmware are not supported at this time. Contact Support if Husky firmware updates are needed.
Motor Controller Firmware Update
Click to expand
1. Tools required:
-
A laptop or development computer running Ubuntu.
-
An internet connection on your development computer.
-
A variety of hand tools to get access to the motor controllers inside your Husky, Dingo, or Ridgeback.
-
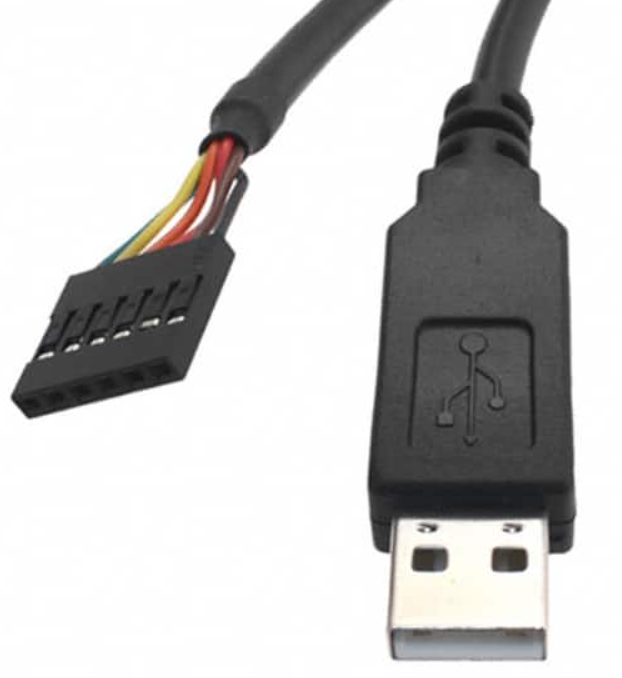
A cable to connect your computer to the robot's motor controller. We use an FTDI TTL-232R-3V3 with it's default pinout. You can purchase this cable from Digi-Key as 768-1015-ND.
2. Get the firmware tools from GitHub.
You can download the firmware tool, and the firmware binary file from this GitHub repository. Refer to the README inside that repository to decide which binary file you should use for your robot platform and application.
You can get these tools by using git clone, or by using the GitHub's Download ZIP button.
3. Get physical access to the motor controllers
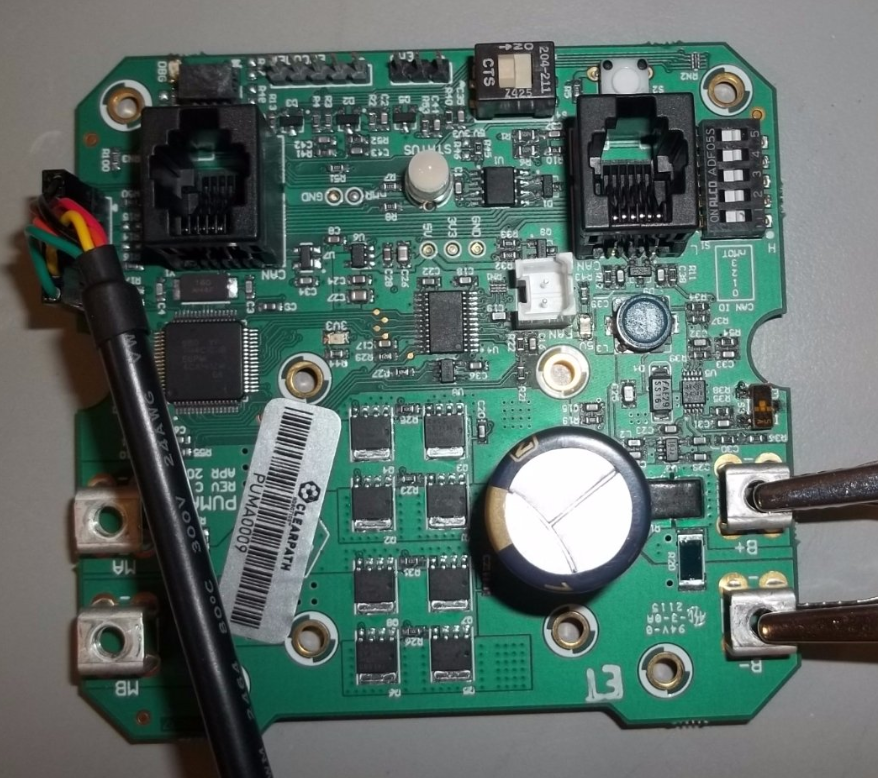
Turn off the robot. Use hand tools to remove panels on your robot so you can get access the motor controllers.
4. Connect the cable.
Depending on the robot, you will have 2 or 4 motor controllers installed. You will need to repeat this installation process for each motor controller, so keep track of which ones you have updated.
Connect the cable with the orientation as shown in the attached image.
The wrong orientation will irreparably damage the motor controller.
Remove jewlery and similar electrically conductive objects from your hands and arms. The capacitors on the motor controllers store energy even after the robot is turned off. Conductive objects that electrically-short the motor controller's terminals can cause shocks or burns to your hands.
Do not change or remove any of the other components on your motor controllers.
- Switches
- Input power cables
- Motor power cables
- RJ11 communication cables
- DIP switches
- Terminating resistor switch
5. Connect the USB end of the cable to your development computer.
6. Place the motor controller in firmware loading mode.
You can do this by pressing the button shown below, and then turning the robot on. You may release the button 3 seconds after turning the robot on. Notice that the large Status LED is not turned on.
The other motor controllers' Status LEDs will be orange since they are not in firmware loading mode.
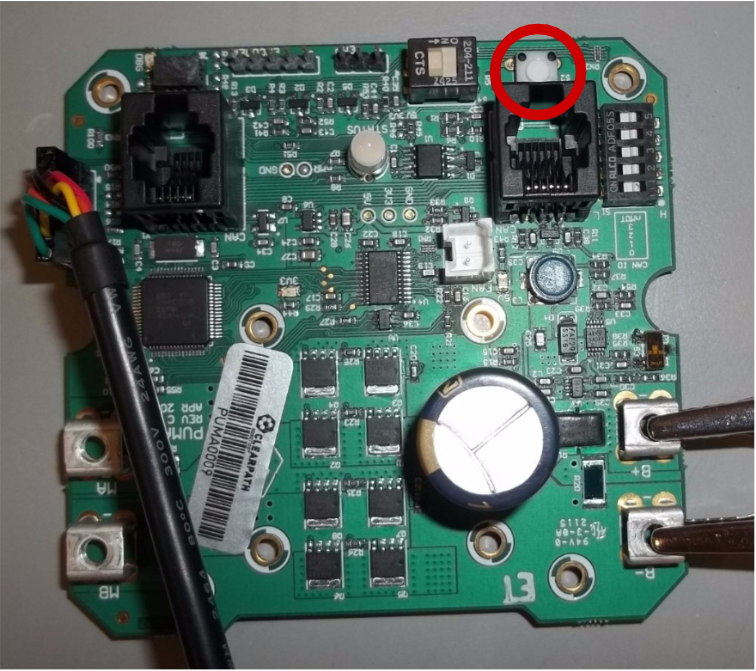
Button shown in the top right corner.
The Status LED is between the RJ11 connectors.
7. Install the new firmware.
Open a new terminal shell on your development computer. Navigate to the folder that you cloned of downloaded from GitHub in Step 2. For example, if you saved the repository to your Downloads folder:
cd ~/Downloads/puma-motor-firmware
Now install the firmware on the motor controller by running the command:
./sflash motor_controller_firmware_husky_001.bin -c /dev/ttyUSB0
Replace motor_controller_firmware_husky_001.bin with whatever firmware file you have chosen for your application.
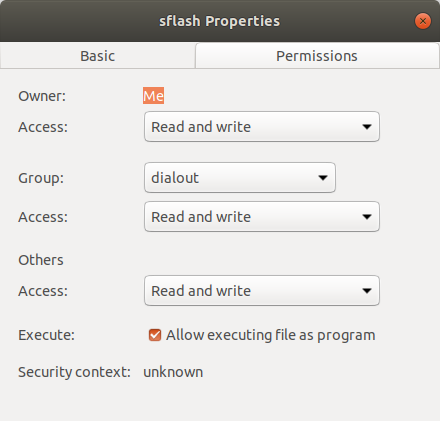
You may need change the permissions of the sflash program.
You can do this by right-clicking on sflash and selecting properties.
Change the permissions to Allow executing file as a program.
Alternatively; you can add execute permissions to sflash using a termainal. Navigate to the file through a terminal, and running:
chmod +x sflash
You should see the program running in the terminal window. You will see the following message when the firmware installation is complete:
Application    : motor_controller_firmware_husky_001.bin
Program Address: 0x0
      COM Port: /dev/ttyUSB0
      Baud Rate: 115200
Erasing Flash:
Remaining Bytes: 00000000
Successfully downloaded to device.
8. Repeat the process for the remaining motor controllers.
You can follow Steps 4 - 7 for the remaining motor controllers. Make sure you turn off the robot each time.
9. Reboot the robot and test.
Power-cycle your robot. Once it has restarted, use a joystick to drive it around.
The robot's dynamics may be very different than what you are familiar with.
The new firmware will change how the motor's react to /cmd_vel messages, so you should test in a controlled setting.
WD Blue SA510 SATA SSD Critical Firmware Update
Some computers shipped with a WD Blue SA510 SATA SSD, for which the manufacturer has posted a critical firmware update notice.
Failure to perform the firmware update could result in permanent failure of the SSD.
See these instructions to check if your SSD is affected and to perform the update.
Support
Clearpath is committed to your success. Please get in touch with us and we will do our best to get you rolling again quickly: <support@clearpathrobotics.com>.
To get in touch with a salesperson regarding Clearpath Robotics products, please email <research-sales@clearpathrobotics.com>.
If you have an issue that is specifically about ROS and is something which may be of interest to the broader community, consider asking it on Robotics Stack Exchange. If you do not get a satisfactory response, please ping us and include a link to your question as posted there. If appropriate, we will answer on Robotics Stack Exchange for the benefit of the community.
Future Work
Components that may require replacement
- Battery
- MCU
- PUMA
- Gearmotor
- Drive Belt