Web UI Autonomous Mode
Ensure that the Safety document has been read and the user is aware of possible hazards when using this product as well as the safety methods that can be used to stop the moving UGV.
The Autonomous Mode of OutdoorNav Software is a set of robotic navigation modules that enables robotics developers to define and then autonomously execute missions on UGVs, getting work done without requiring direct operator action. This software is composed of four main modules: localization, navigation, safety monitoring and user control unit. This a combination of Clearpath's proprietary packages and custom configured open-source packages from ROS community. Please see the software architecture section for more information.
Definitions
The list below defines what a "Mission" is as well as its components. These components are referred to throughout this manual.
- Mission A Mission is a set of one or more Waypoints.
- Path The list of Waypoints that will determine the path for the specific Mission.
- Waypoint A Waypoint is any geographical point referenced by its position relative to the datum in meters.
- Task A Task is an automated activity or wait time implemented as a ROS action at a specific Waypoint. Tasks are called in the order they are added to a Waypoint.
- Ghost Waypoint A transparent waypoint that is not part of the mission. This Waypoint appears between two other waypoints when in edit mode. The user can drag and drop this ghost waypoint to add a new waypoint to the mission between the other two waypoints.
Map Settings
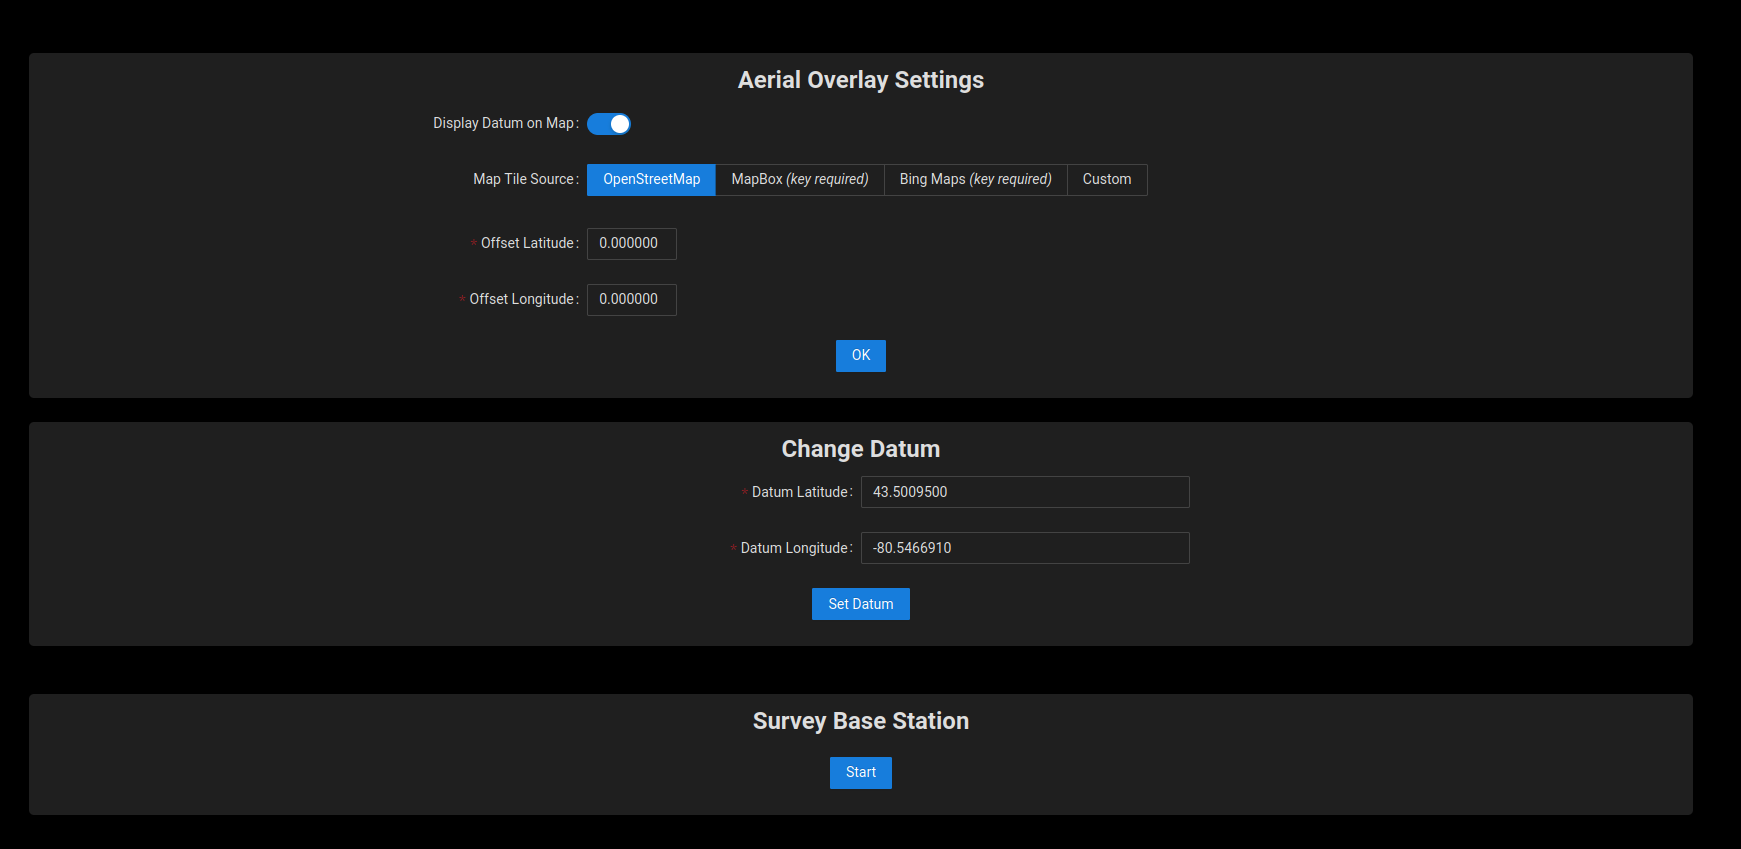
To access the Map Settings: Menu → Settings → Map:
- Map Offset: The map tiles used in this software are not perfectly aligned with the real world. Therefore, the user may need to apply an offset to the map so that the UGV's position in the real world matches its position on the map.
- Change Datum: The datum is represented by a blue marker on the map and should be set to a location within 10km of the test site. The user can change this value in the Map Settings page. Enter the new values and click the "Set Datum" button.
Mission Creation
To create a new Mission first ensure that the UI is in "Edit Mode" ( select the pencil icon in the bottom bar). Then open the drop down menu in the bottom bar and select the "Add Mission" option. This will allow the user to create a new mission which can then be defined with Waypoints.
Waypoint Mode
To add new Waypoints to a mission while edit mode is enabled select the "Waypoint Mode" button. This will allow the user to place Waypoints at locations where the user clicks on the map. These will appear as red Waypoints with the exception of the first waypoint (green) and the last waypoint (yellow).
The first Waypoint in the mission must be within 1.5 meters of the UGV's current position.
As Waypoints are placed, a "ghost waypoint" will appear between each pair of real Waypoints and can be dragged to a new spot to insert a real Waypoint between them. Waypoints can also be dragged and dropped on the map to modify their positions.
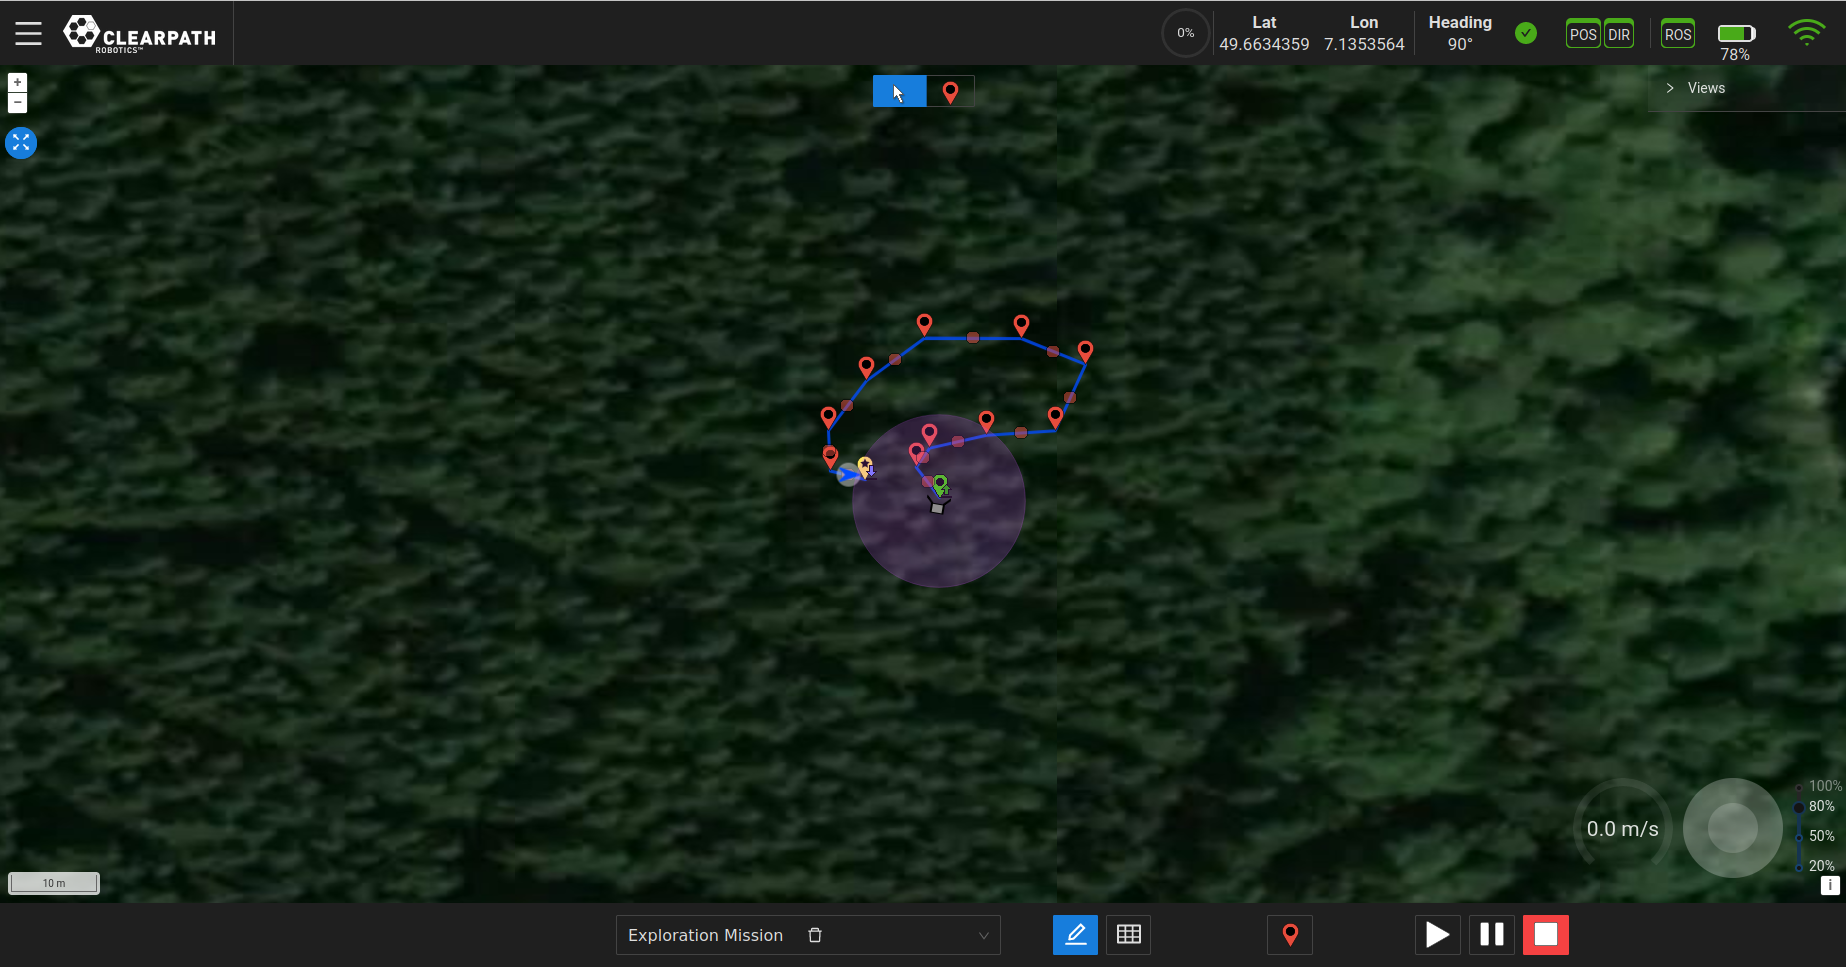
Constrained Replanning
If constrained replanning is enabled the user can show on the path deviation distance by navigating to the General settings in the hamburger menu. Once enabled the area of possible deviation will show over the planned route as can be seen in the following figure.
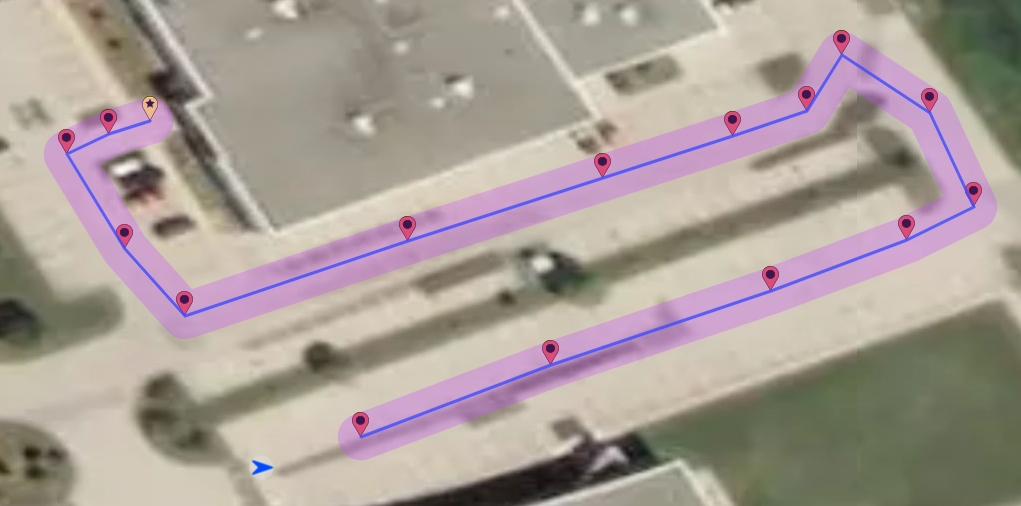
If the UGV is manually driven outside of the constrained replanning area while a Mission is running, the Mission will need to be restarted as the UGV will no longer be able to find it's way back onto the path.
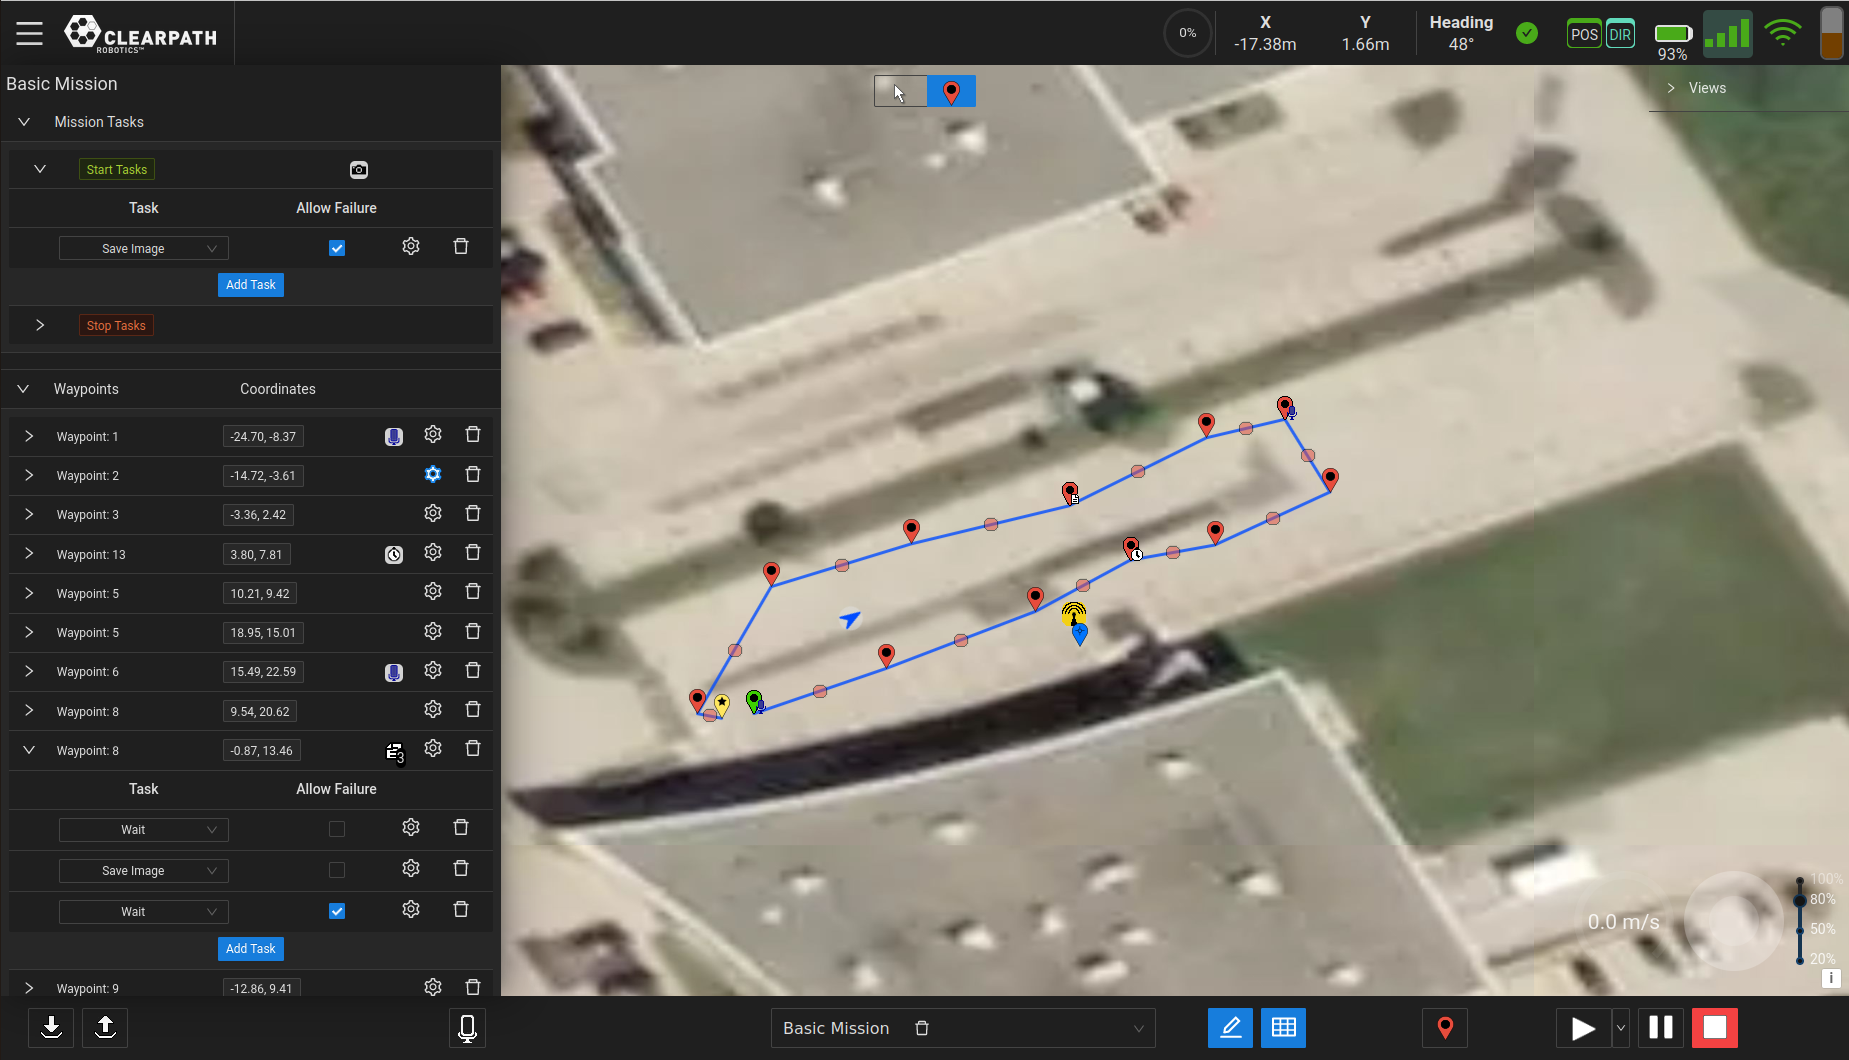
Waypoint Panel
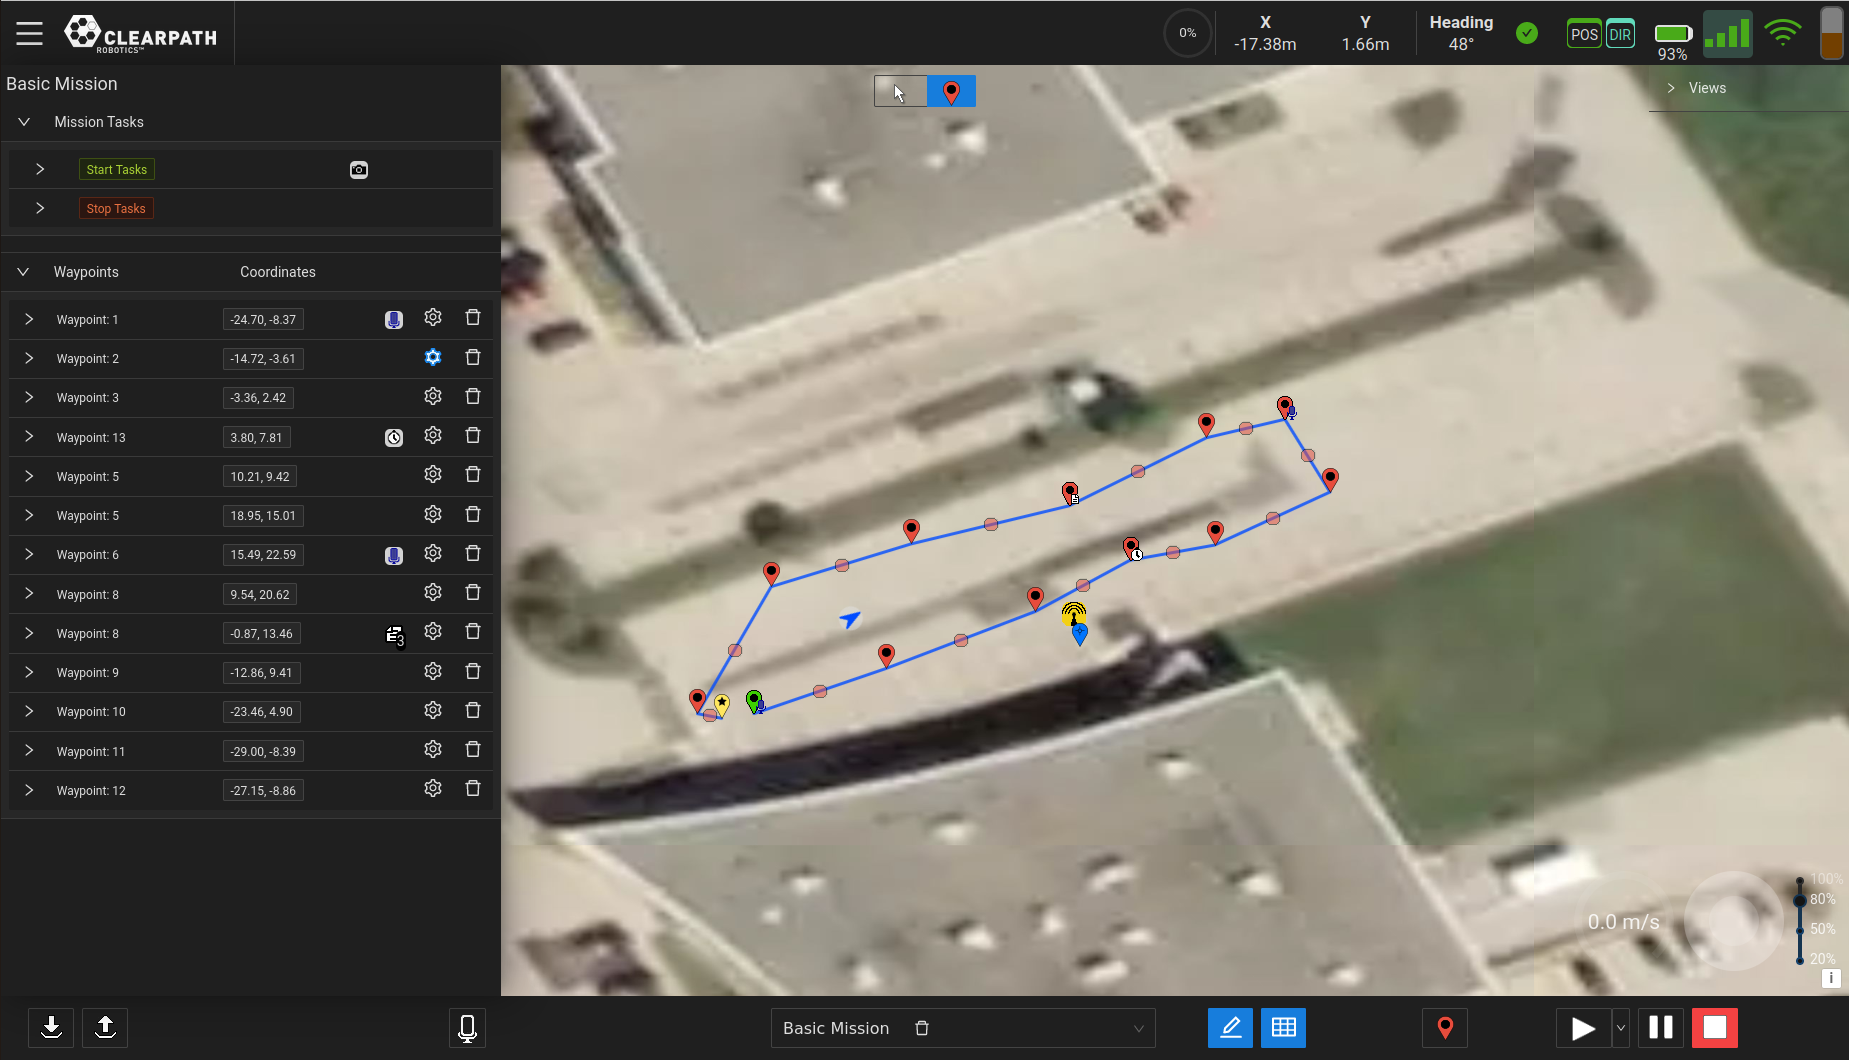
Enable the "Waypoint Panel" toggle to open the list of available Waypoints within the selected Mission as shown in the figure above. The user can now rearrange the list, rename Waypoints, add Tasks to the Waypoints, and modify the final heading and/or tolerance of each Waypoint.
Rearrange List of Waypoints
Waypoints can be rearranged in order of operation in the list. To do this, enable the "Waypoints Panel" toggle to access the list of Waypoints. Here, the user will be able to drag and drop the Waypoints to reorder them.
Rename Waypoint
By default, once Waypoints are created they are assigned a default name which is the word "Waypoint" followed by a numeric value representing the the number of Waypoints that have been created plus one. The user has the option to rename these Waypoints in order for them to have more descriptive meaning.
To rename a Waypoint follow these steps:
- Enable the "Waypoint Panel" toggle. See Waypoint Panel for further details.
- Click the name of the Waypoint which the user wants to rename.
- Erase the current name and type the new name.
Add Task to Waypoint
To add a Task to the end of a Mission:
-
Click the "+" icon (beside the Gear icon) in the Waypoint Row the Task is to be added to.
-
Click the "Add Task" Button that has appeared.
-
Select the Task from the dropdown list. Standard waypoint icons will be replaced accordingly depending on the task selected (waypoint icons will keep the colours assigned to them based on placement).
-
Dock UGV:
 Will dock the UGV to begin charging the UGVs
battery. See Autonomous Docking
for more information on the autonomous docking feature.
Will dock the UGV to begin charging the UGVs
battery. See Autonomous Docking
for more information on the autonomous docking feature. -
Move PTZ:
 Will move the PTZ camera to the position selected
in the task settings.
Will move the PTZ camera to the position selected
in the task settings.Settings: Select the camera position. See Pan-Tilt-Zoom (PTZ) View for details on how to save camera positions.
-
Save Image:
Will save an image using one of the UGV camera(s)
to the /onav_log folder and can be retrieved using a tool
such as Filezilla.Settings: Select which camera the image will be saved from.
-
Start/Stop Video Recording:
 Will start/stop recording video using one of the
UGV camera(s) to the /onav_log folder and can be retrieved
using a tool such as Filezilla.
Will start/stop recording video using one of the
UGV camera(s) to the /onav_log folder and can be retrieved
using a tool such as Filezilla.Settings: Select which camera the recording will come from.
-
Undock UGV:
 Will undock the UGV from the autocharge dock. Once
completed, the UGV can be sent on autonomous missions. It is
often recommended to place the undock Task first in the list of Waypoints;
that way, the UGV will automatically continue towards its next
Waypoint once undocked. See Section
Autonomous Docking for more
information on the autonomous docking feature.
Will undock the UGV from the autocharge dock. Once
completed, the UGV can be sent on autonomous missions. It is
often recommended to place the undock Task first in the list of Waypoints;
that way, the UGV will automatically continue towards its next
Waypoint once undocked. See Section
Autonomous Docking for more
information on the autonomous docking feature. -
Wait:
 Will pause and wait for the specified number of
seconds at the end of the Waypoint.
Will pause and wait for the specified number of
seconds at the end of the Waypoint.Settings: Enter the amount of time to wait, in seconds.
-
-
Click the Gear icon next to the selected Task to add the required Settings.
noteIf a waypoint has more than one task assigned to it, the icon will be replaced with

Advanced Settings
Waypoint Heading
When creating a Waypoint, the user has the option of setting a final heading for the Waypoint. For example, when creating a Waypoint at an inspection point, the user may want the UGV to navigate and stop facing a certain direction. In Waypoint Panel, the list of Waypoints can be seen and the advanced settings of each Waypoint can be accessed by clicking the "Gear" icon.
To set the Waypoint's final heading, the user will need to check the "Final Heading Enabled" checkbox and enter the heading value in degrees. The heading indicator on the top bar can be used to help set this value. See the figure below showing the advanced settings.
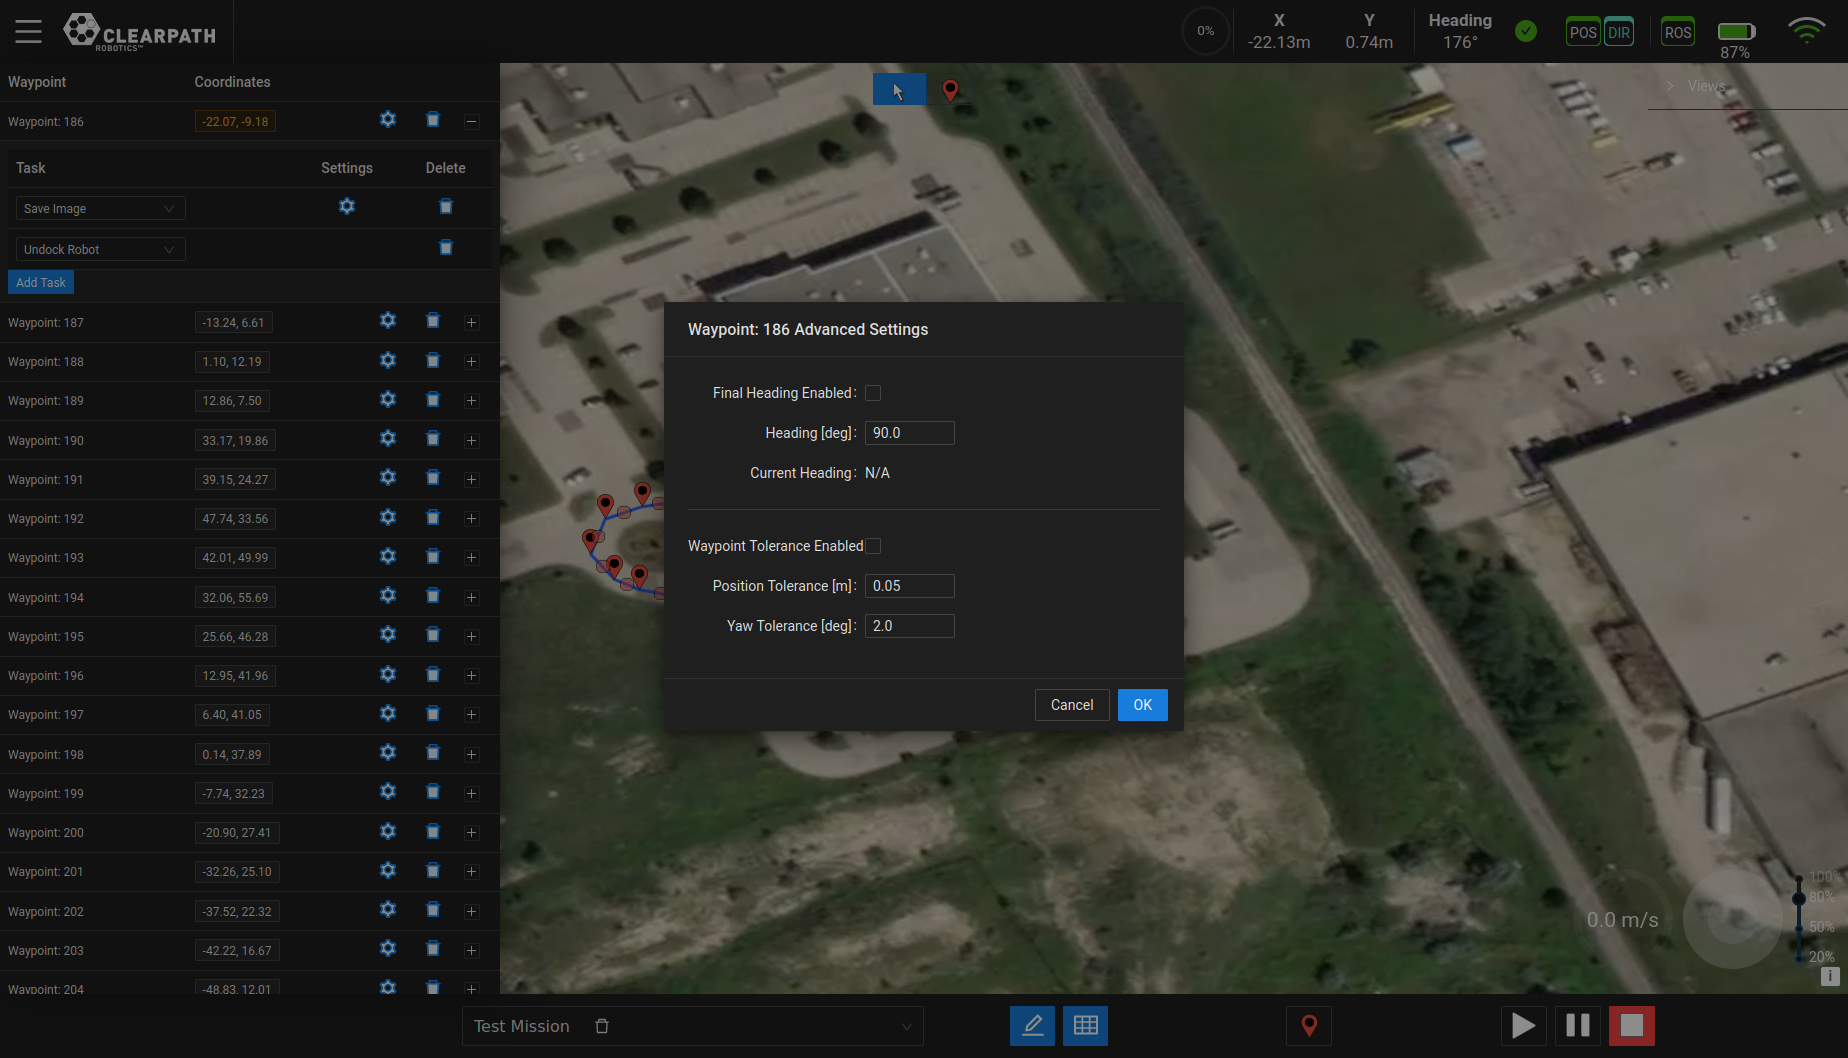
The heading that has been entered will only be applied to the Waypoint (ie. the robot will only align itself with the correct heading at the Waypoint). If the robot is required to be at specific headings at other Waypoints the user will need to enter these in for each specific Waypoint.
Waypoint Tolerance
When creating a Mission, the user has the option of setting a specific tolerance for each Waypoint. By default, the Waypoint position and orientation tolerances are 0.3 meters and 180°, respectively. If a specific Waypoint requires that the tolerances be either increased or decreased, these values can be modified in the advanced settings. For example, if it's required that the position and/or orientation at a Waypoint be very accurate, such as 0.1 meters position and 5° orientation, or looser at 1.0 meter position, this can be done within these settings.
In Waypoint Panel, the list of waypoints can be seen and the advanced settings of each Waypoint can be accessed by clicking the "Gear" icon. To set the Waypoint's tolerance, the user will need to check the "Waypoint Tolerance Enabled" checkbox and enter the position and orientation values, in meters and degrees, respectively.
Mission Execution
Start Mission
At the bottom of the UI, the user has the ability to start the currently
selected Mission by clicking the "Play" button 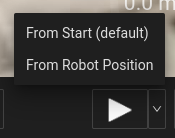 . When the
Mission has been started this button will turn green.
. When the
Mission has been started this button will turn green.
Pause Mission
At the bottom of the UI, the user has the ability to pause the currently
running mission by clicking the "Pause" button  . When the
mission has been paused this button will turn yellow. Pausing a mission
allows the user to take time to look around with the camera or to
teleoperate the UGV to a nearby location to perform an inspection. For
ease of operation, the user must PAUSE the active mission if the user
wants to teleoperate the UGV.
. When the
mission has been paused this button will turn yellow. Pausing a mission
allows the user to take time to look around with the camera or to
teleoperate the UGV to a nearby location to perform an inspection. For
ease of operation, the user must PAUSE the active mission if the user
wants to teleoperate the UGV.
Cancel Mission/Task
At the bottom of the UI, the user has the ability to stop the currently
running mission or task by clicking the "Stop" button  . When the
mission/task has been cancelled this button will turn red. The name of
the mission/task will be shown to be cancelled in the feedback bar.
. When the
mission/task has been cancelled this button will turn red. The name of
the mission/task will be shown to be cancelled in the feedback bar.
Autonomous Docking
Docking The UGV
To dock the UGV autonomously, the user should follow these steps:
- Enable the "Edit Mission" toggle.
- Create a Mission whose Waypoints approach the dock from the front and whose final Waypoint is within the maximum predock distance which is shown as a circle around the dock.
- Enable the Waypoints Panel toggle to view the list of Waypoints, rename the last Waypoint to "Dock Waypoint" or something descriptive and add the "Dock UGV" Task to this Waypoint. If there is more than one dock in the system the user will have to open the task options and select the dock name from the list.
- Run the Mission.
Undocking The UGV
To undock the UGV autonomously, the user should follow these steps:
- Enable the "Edit Mission" toggle. Select the "Waypoint Mode" button.
- Select the Waypoint icon on the bottom bar to create a Waypoint at the current location of the UGV. This step should either be it's own mission or it should be the starting point of a mission.
- Enable the Waypoints Panel toggle to view the list of Waypoints, rename this Waypoint to "Undock Waypoint" or something descriptive and add the "Undock UGV" task to the Waypoint that was just created.
- Run the Mission.
Compatibility with a Doghouse
In order for the autonomous docking feature to be compatible with a doghouse, the doghouse must conform to a few specifications:
- Must be installed on a flat surface, and have no elevation change between the charge-deck and the outdoor surface (ie. no ramp into the doghouse).
- Must be greater than 1.2 m wide.
- Must be between 1.5 and 2.5 m long.
- Dock target should be installed centered along the back of the doghouse.
Recover from Failed Docking or Undocking
If for any reason, the docking or undocking tasks fail, the user can:
- Manually drive the UGV towards the dock target, aligning the charging unit with the receiver on the UGV.
- Manually drive the UGV in reverse away from the dock target. It is suggested that the user reverse roughly 2-3 meters away from the target, then wait 1-2 minutes before starting any autonomous navigation missions.