Extrusion Rails
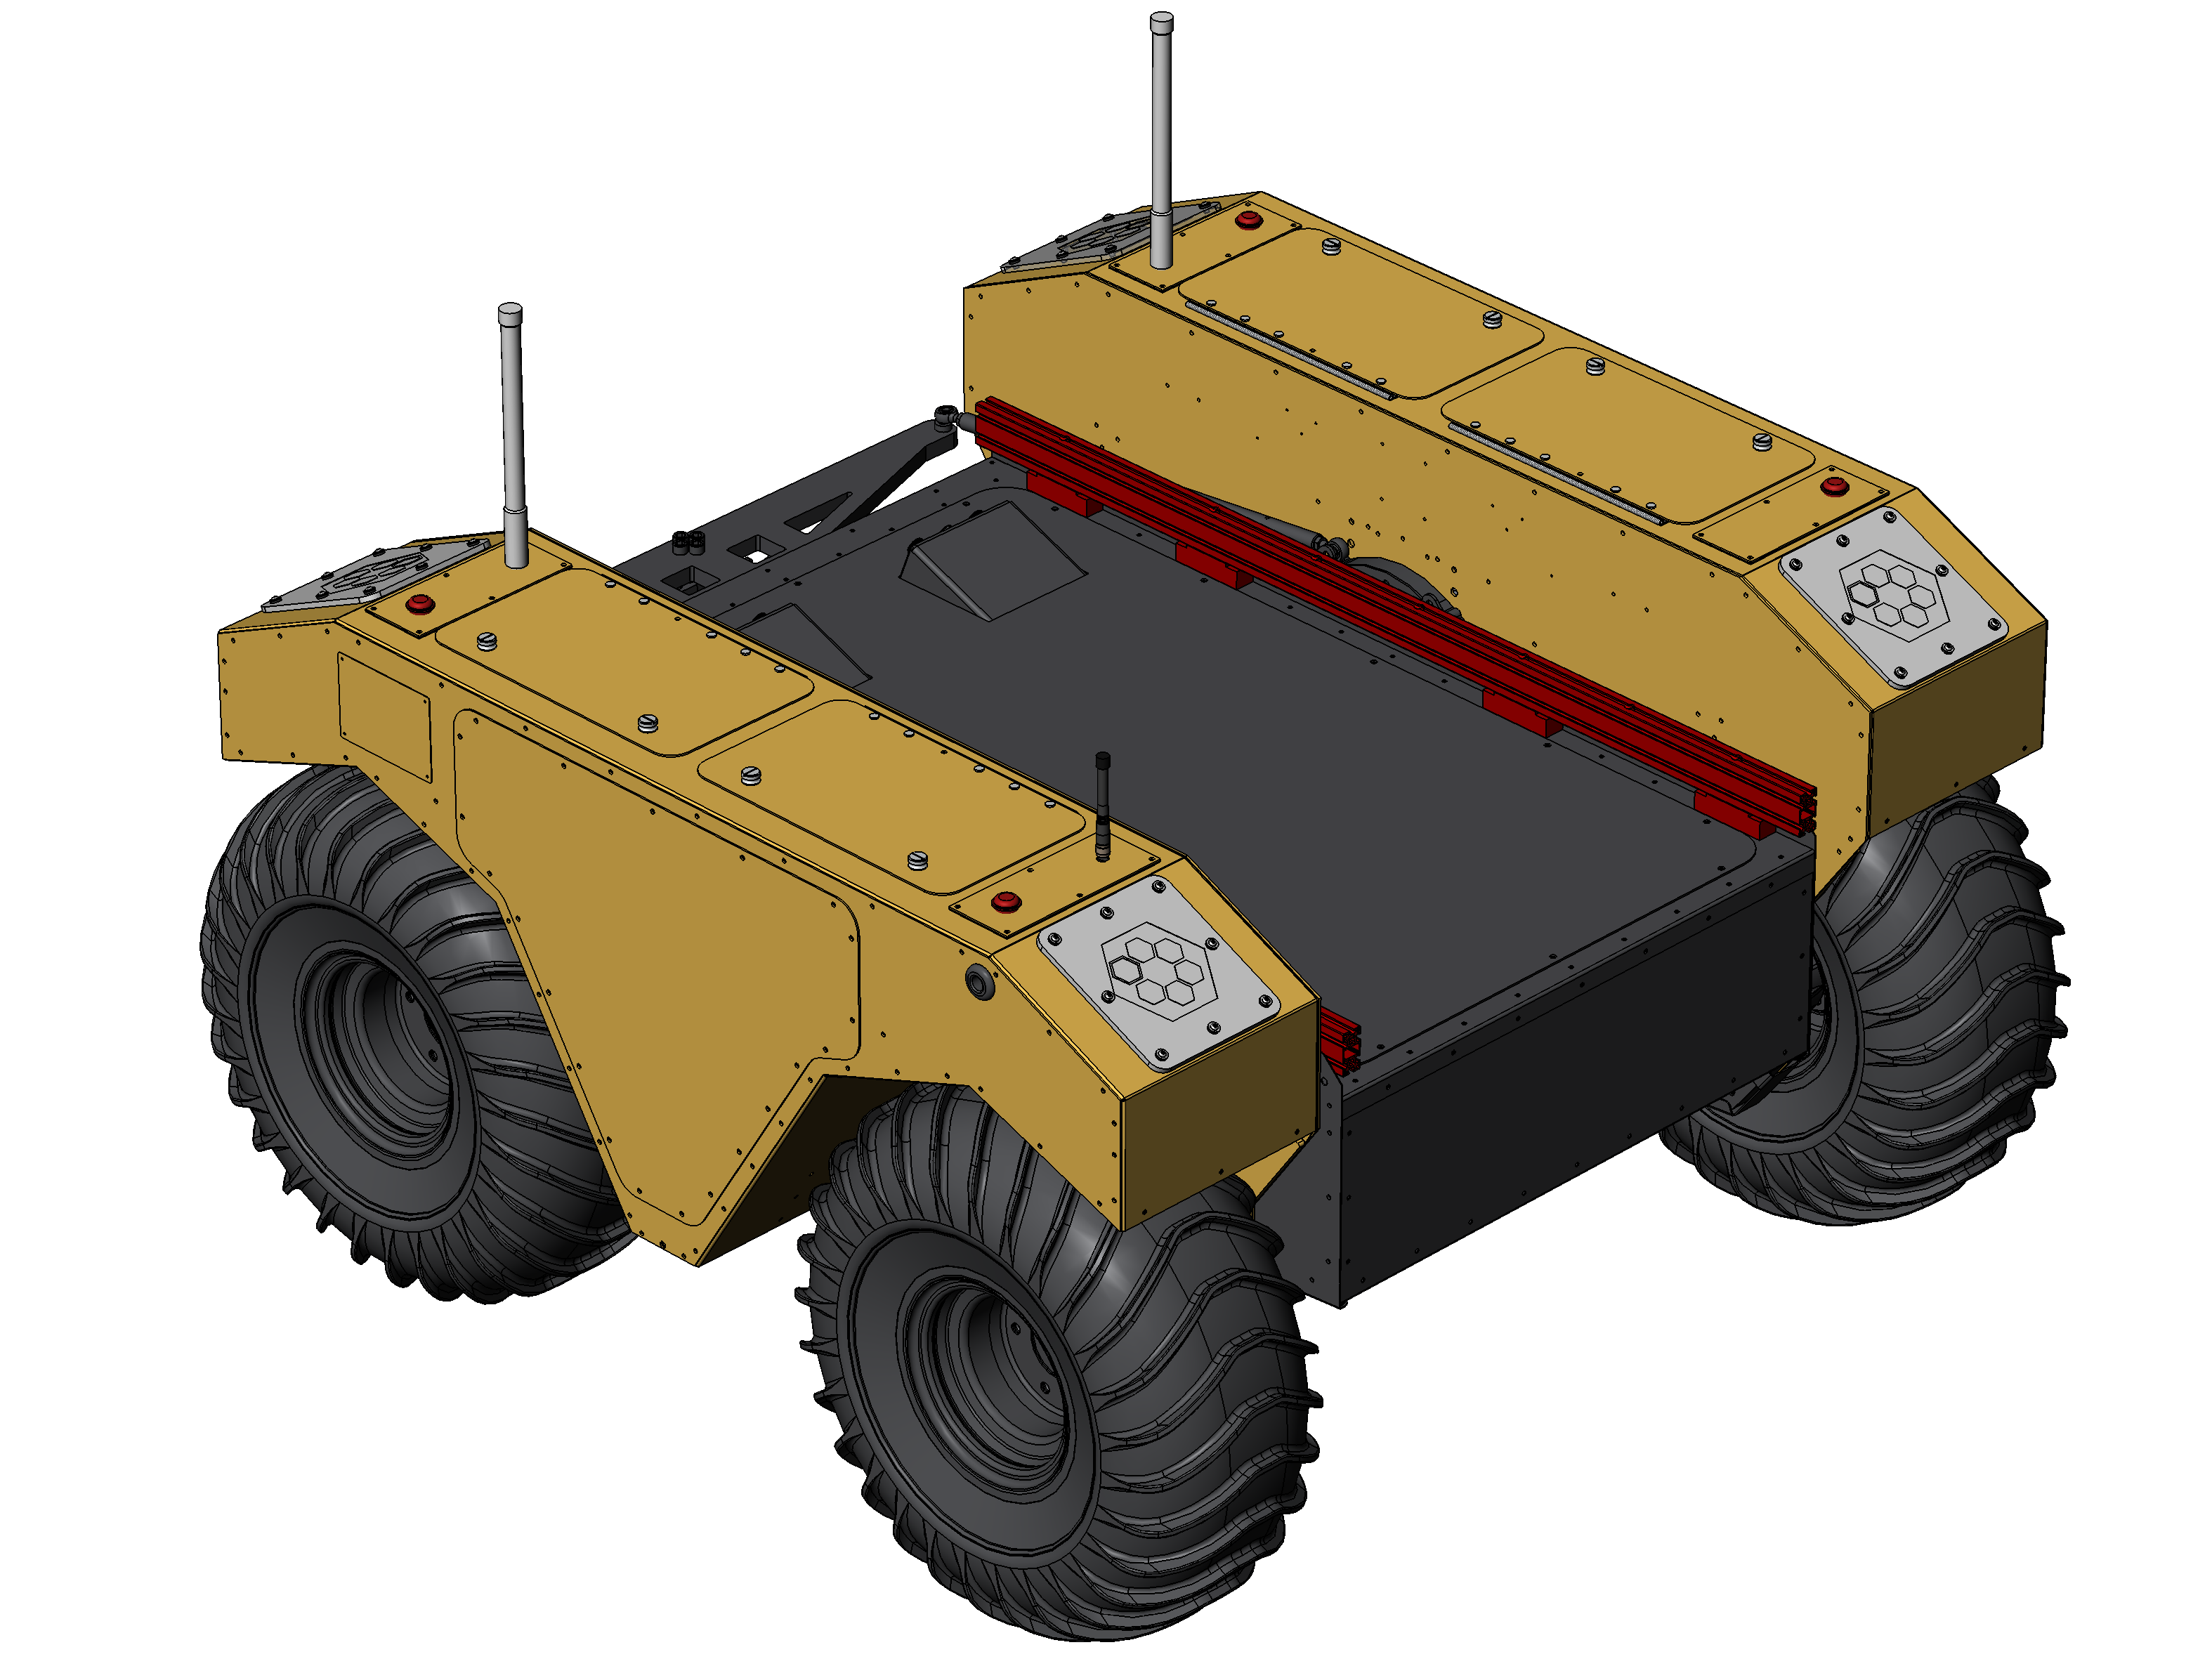
This kit adds 25 mm X 50 mm aluminum extrusions to both sides of the Warthog. The extrusions are attached to the Warthog using M6×1 stainless steel screws, and stainless steel rivets with a Ø5 mm shank.
You can attach your own custom brakets to the extrusions using M5×0.8 T-slot nuts, or these other useful off-the-shelf items:
| Description | CPR Item | Manufacturer | Manufacturer Item |
|---|---|---|---|
| Nut, T-Slot—M5×0.8 X 5.8 X 10, Steel | 028463 | Misumi | HNTTSS5-5 |
| Bracket, T-Slot, 90°—5.8, 20, Aluminum, Black | 028464 | Misumi | HBLFSSWB5 |
| Bracket, Flat, 90°—Stainless Steel | Misumi | SHPTUL5 | |
| Beam, T-slot—25 X 25, Aluminum, Black | Configurable Lengths | Misumi | HFSB5-2525 |
| Beam, T-slot—25 X 50, Aluminum, Black | Configurable Lengths | Misumi | HFSB5-2550 |
Misumi also offers a range of configurable products that can help with your integration.
Please email <research-sales@clearpathrobotics.com> if you want Clearpath's team to design a bracket structure for your application.
Sales Kits
| Description | Sales Kit |
|---|---|
| Installation—Extrusion, 25 X 50, 1217 | 028454 |
Parts List
| ID | Description | CPR item | Manufacturer Item | Quantity |
|---|---|---|---|---|
| 1 | Block—76.2 X 25.4 X 25.4 X M10×1.5 | 028452 | 8 | |
| 2 | Insert, Thread, Adhesive—M6×1 X M10×1.5 X 10.5, Stainless Steel | 028458 | 97120A230 | 8 |
| 3 | Beam, T-slot—25 X 50, 1217, Aluminum, Black | 028459 | 2 | |
| 4 | Rivet, Blind, Dome—Ø5 X 20 - 25, Stainless Steel | 028460 | 97525A247 | 16 |
| 5 | Screw, Cap, Socket Head—M6×1 X 35, Stainless Steel | 023186 | 92290A334 | 8 |
Tools Required
- Drill, with Ø6 mm drill bit
- Rivet installation tool (Refer to our Physical Tools page for a suggested rivet installation tool)
- Large flat-head screwdriver, or a thread insert installation tool
- Hex Key, 5 mm
- Torque wrench (optional, for safety applications)
- Loctite 243 (optional, for high vibration applications)
Installation
Step 1
Use the drill to remove the 16 existing rivets on the top deck of the Warthog. You can use the Extrusion Beam (ID3) as a reference of what rivets to remove.
Just remove the rivet's head with the drill. We do not want to enlarge the holes in the Warthog's frame.
This kit only includes 4 Blocks (ID1) per Beam. You can install up to 7 Blocks per beam if your application requires a stiffer base.
Part of the rivet will fall into the Warthog's steel tube frame. We intend for you to leave these scrap bits of rivet within the Warthog's frame.
Step 2
Place the Blocks (ID1) above the holes where you had removed the rivets.
Step 3
Insert the new Rivets (ID4) through the Blocks (ID1) and into the Warthog's frame.
Step 4
Fasten the rivets using your rivet installation tool.
Step 5
Install a Thread Insert (ID2) into each of the Blocks (ID1) using your standard screwdriver or thread insert installation tool. Make sure the installed Thread Inserts are below the top surface of the Blocks.
Step 6
Place the two Beams (ID3) onto the Warthog's Blocks (ID1).
Notice that the Beams have a small diameter hole on one side, and a larger diameter hole on the other side. The small holes face down, the large holes face up.
Step 7
Install a Screw (ID5) into each of the Blocks (ID1). This will fasten the Beams (ID3) onto the Warthog. Torque these screws to 5 N·m.
You may add a small amount of thread locker to these screws if you are concerned about them loosening from high vibration applications.