Manipulators include all robotic arms and grippers. Unlike sensors, manipulators are not controlled by external drivers. Instead, a hardware controller must be loaded into the controller manager to handle the joint interface to move the specific manipulator joints.
Additionally, MoveIt! must be launched to plan paths and move manipulators to a given pose.
Every arm can have at most one gripper, and grippers can only be added to an existing arm. This way, depending on the arm and the gripper, the configuration system can determine whether the arm handles communication with the gripper or whether it must be done through an external connection directly to the robot computer.
Arms
Kinova Gen3 Lite
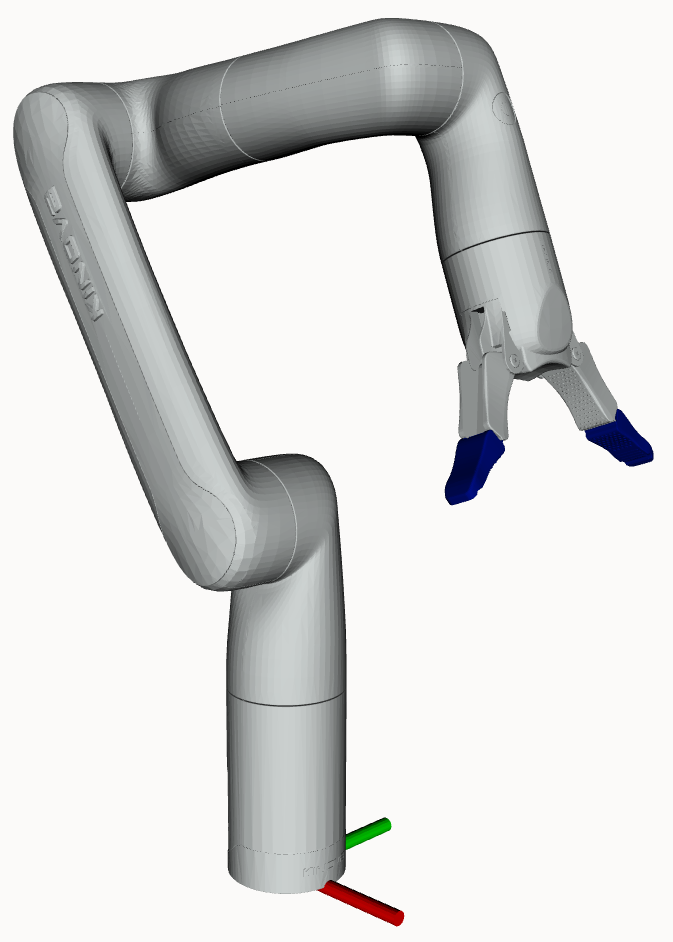 | |
Kinova Gen3 Lite Setup
Package and Setup
Kinova manipulators the kortex_description and kortex_driver ROS 2 Packages. The driver is open source, maintained by Kinova Robotics, and hosted on GitHub.
For more specifics on the way Clearpath's configuration system adds the manipulator to the robot description, see the Kinova description files in clearpath_manipulators_description.
Device IP and Port
The ip and port parameters must be set to the corresponding values set on the manipulators configuration page.
Wrist Camera
Set vision: true under the arm configuration to enable the Kinova wrist camera.
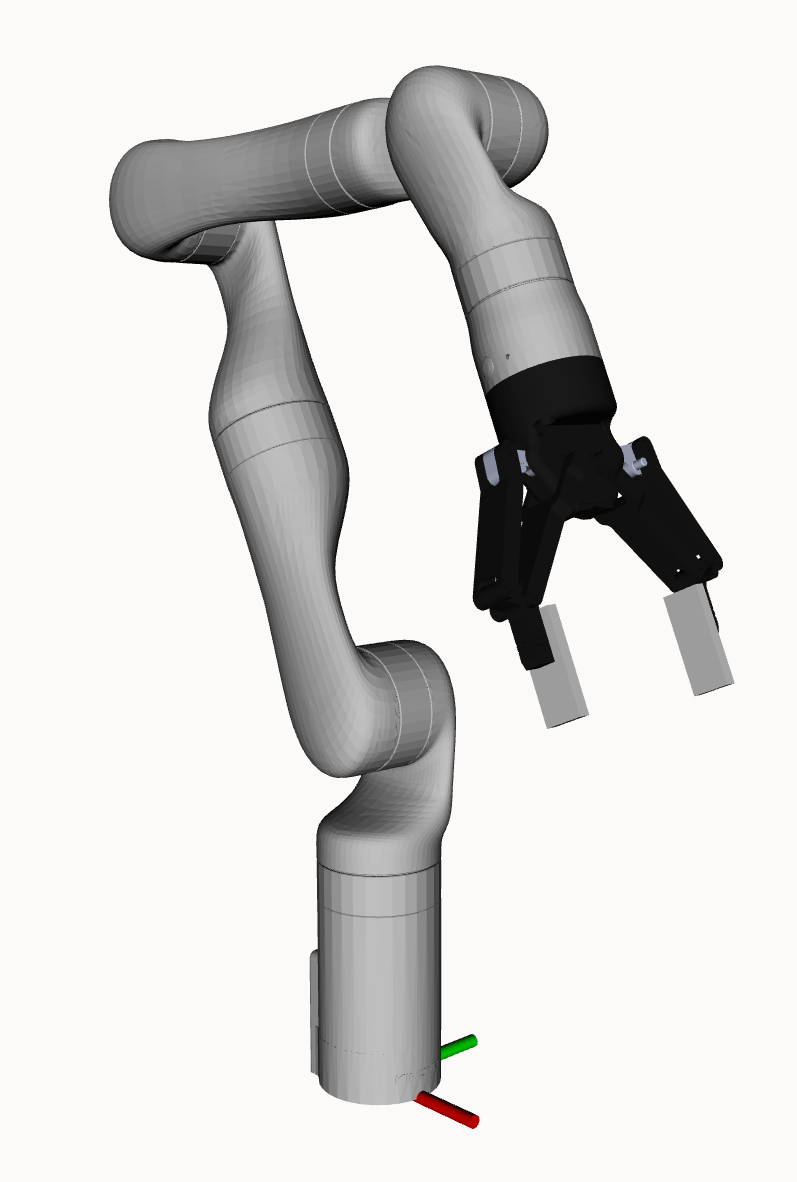
Kinova Gen3 6DoF
 | |
Kinova Gen3 6DoF Setup
Package and Setup
Kinova manipulators the kortex_description and kortex_driver ROS 2 Packages. The driver is open source, maintained by Kinova Robotics, and hosted on GitHub.
For more specifics on the way Clearpath's configuration system adds the manipulator to the robot description, see the Kinova description files in clearpath_manipulators_description.
Device IP and Port
The ip and port parameters must be set to the corresponding values set on the manipulators configuration page.
Wrist Camera
Set vision: true under the arm configuration to enable the Kinova wrist camera.
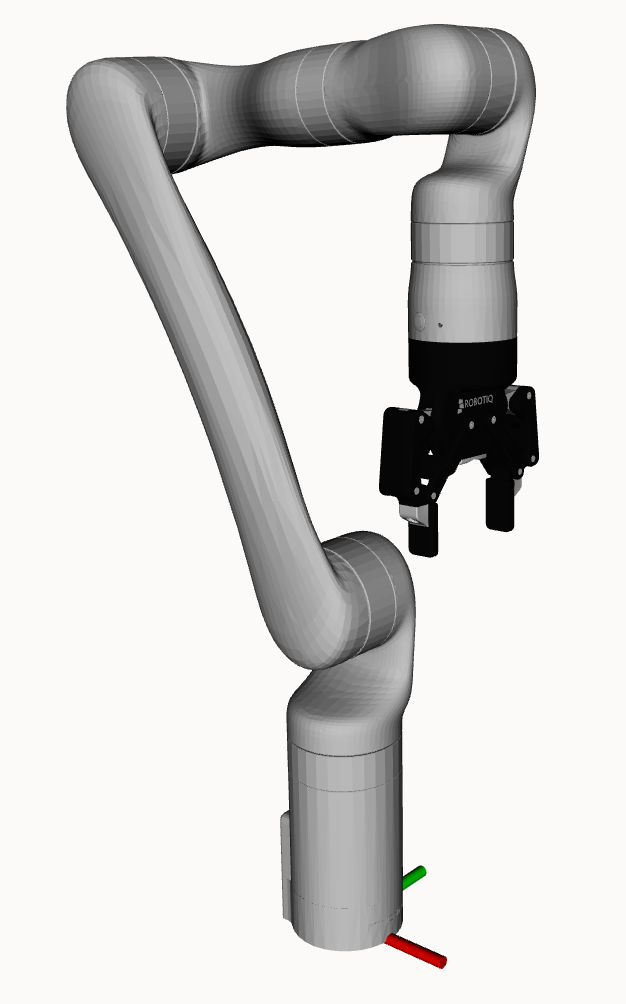
Kinova Gen3 7DoF
 | |
Kinova Gen3 7DoF Setup
Package and Setup
Kinova manipulators the kortex_description and kortex_driver ROS 2 Packages. The driver is open source, maintained by Kinova Robotics, and hosted on GitHub.
For more specifics on the way Clearpath's configuration system adds the manipulator to the robot description, see the Kinova description files in clearpath_manipulators_description.
Device IP and Port
The ip and port parameters must be set to the corresponding values set on the manipulators configuration page.
Wrist Camera
Set vision: true under the arm configuration to enable the Kinova wrist camera.
Universal Robots
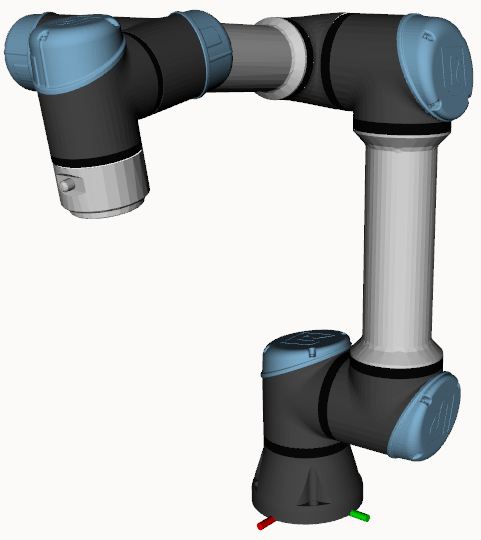 | |
Universal Robots Setup
Package and Setup
The Universal Robots arms use the ur_description and ur_driver ROS 2 Packages. The description and driver are open source, maintained by Universal Robots, and are hosted on GitHub. Refer to the description repository and driver repository.
For more specifics on the way Clearpath's configuration system adds the arm to the robot description, see the description file. Note, all parameters to the xacro:macro universal_robots can be passed through the robot.yaml entry above. For examples, read the sections below.
For more information on how to setup the arm, see the Universal Robots ROS 2 Driver Documentation.
Teach Pendant Setup
The following sub-sections will cover the standard UR teach pendant setup, but with the specific Clearpath parameters. For the UR instructions see: Setting up a UR robot for ur_robot_driver and Installing a URCap on a e-Series robot.
Networking Settings
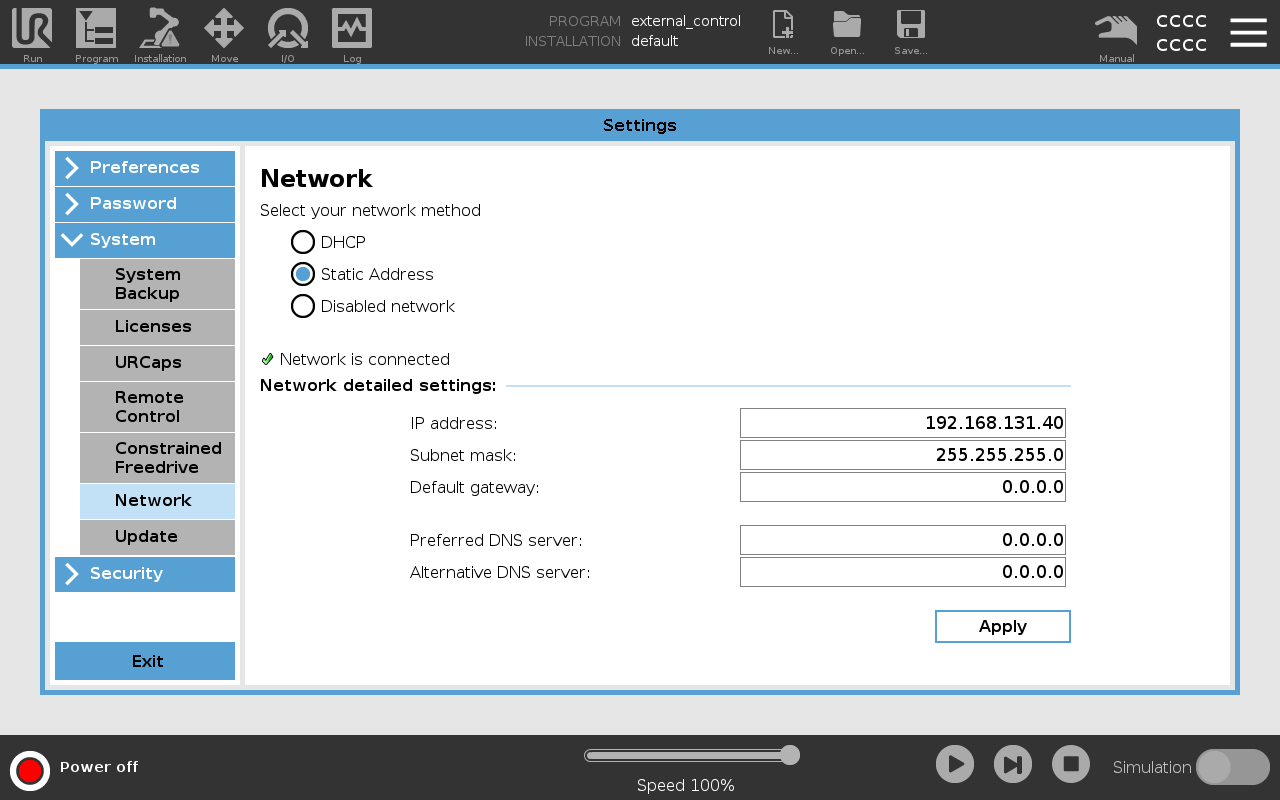
At Clearpath, we use the 192.168.131.x subnet and assign manipulators to the range 192.168.131.40-49. Therefore, when setting up a UR arm, we encourage the use of the 192.168.131.40 address.
Navigate to the Settings/System/Networking page of the UR teach pendant and set the following:
URCap
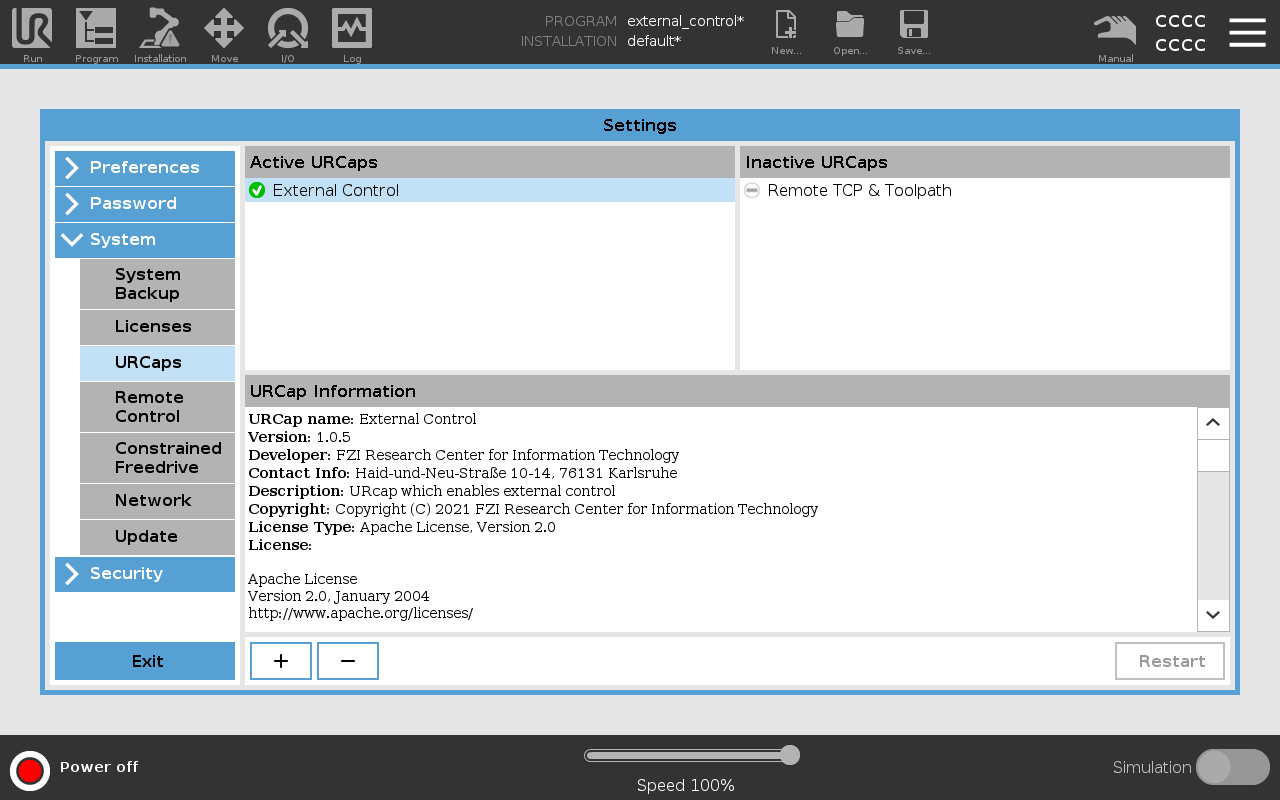
In order to control the arm from an external device, the External Control URCap needs to be setup. You can find the latest externalcontrol-x.x.x.urcap in its repository. Install it by adding it to the programs folder in the /, root directory of the arm's control box. Use a USB stick or scp.
Navigate to the Settings/System/URCaps page to install the URCap. Note, you will be prompted and must restart before using the URCap.
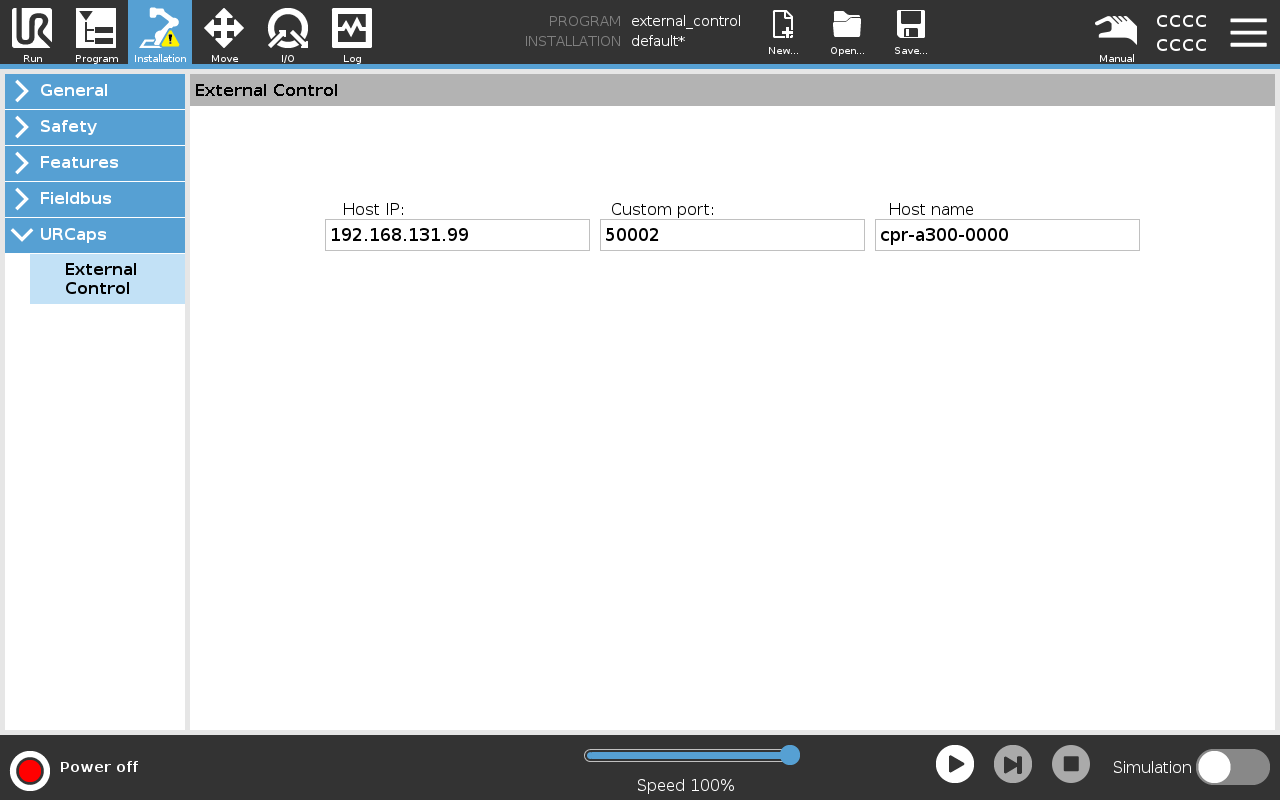
Navigate to the Installation/URCaps page to configure the IP address and hostname of the external device. The standard Clearpath robot computer IP address is 192.168.131.1. Each robot has its own hostname, we will use cpr-a300-0000 as a placeholder:
External Control Program
Once the URCap has been installed and configured, a program that launches the ExternalControl task needs to be created and set as default.
Begin by navigating to the Programs/URCap section, make sure the program is empty except for the addition of the ExternalControl task. Save the program as external_control.urp:

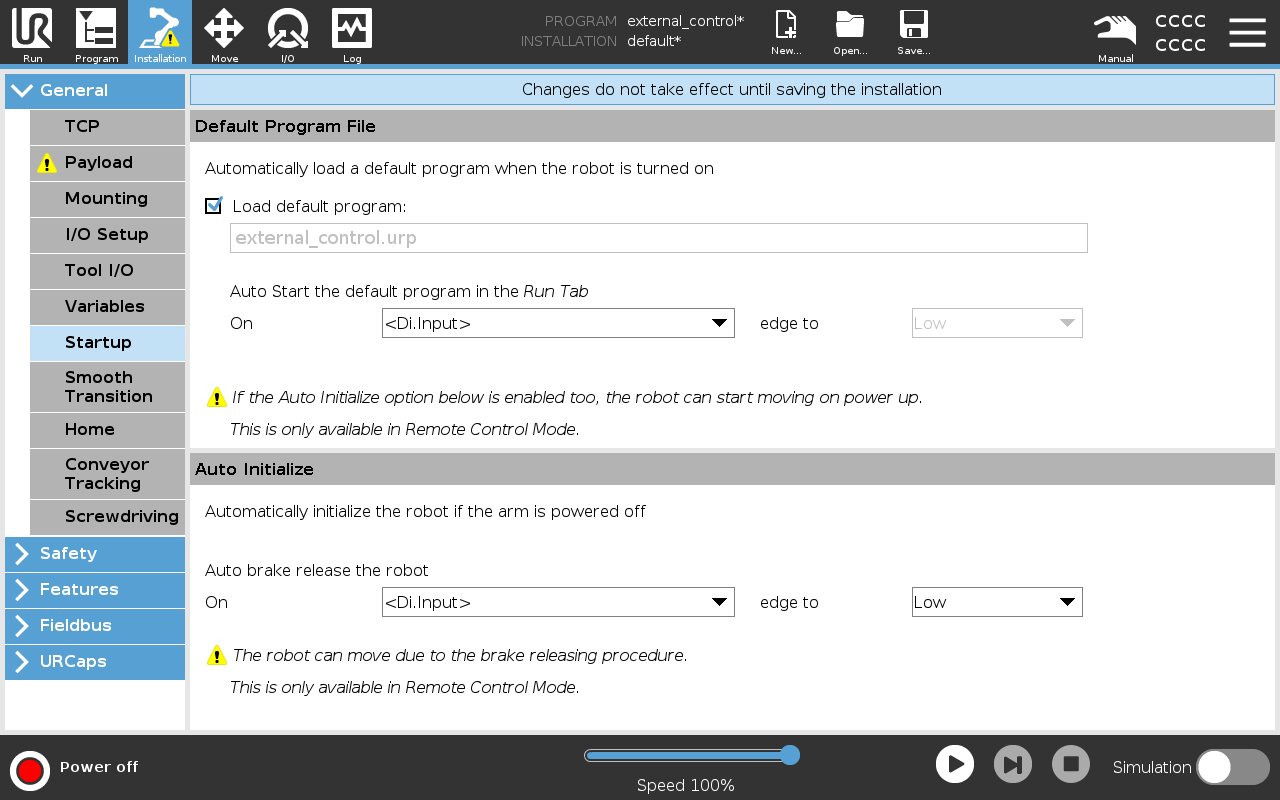
Now, set the program as default so that it is automatically loaded and ready to run on start-up. Navigate to the Installation/General/Startup page and set the external_control.urp program as the default:
Initializing the Arm
At start up, the arm needs to be turned on and initialized. Press the button in the bottom left corner which will bring-up the arm start-up sequence window. Follow the instructions to initialize the arm:
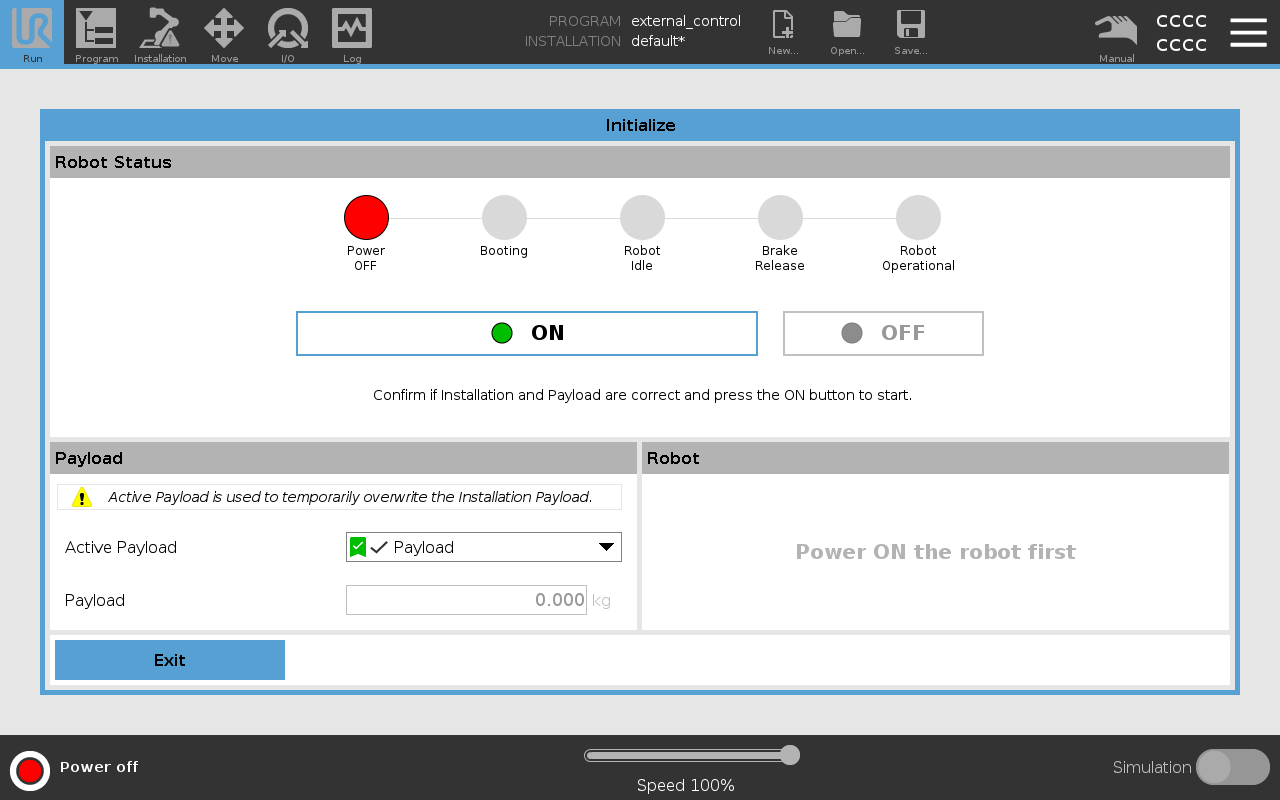 |
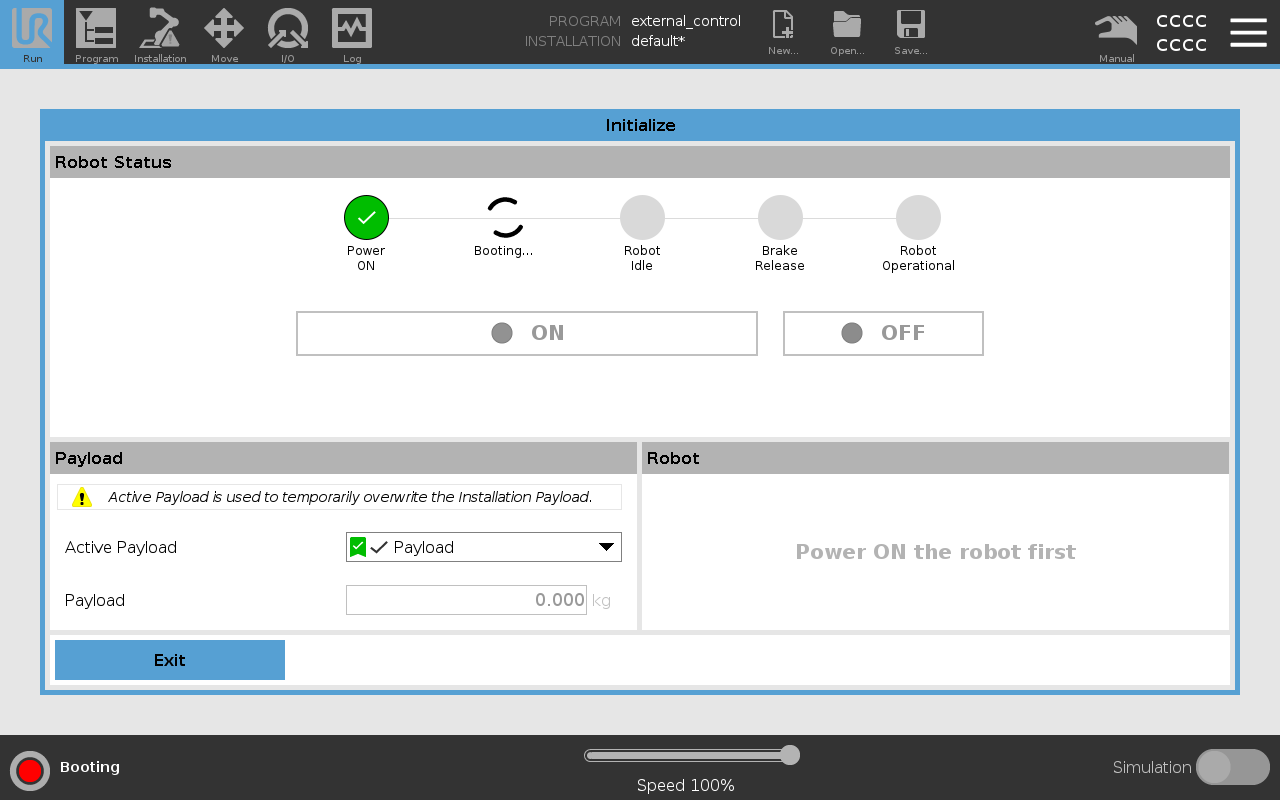 |
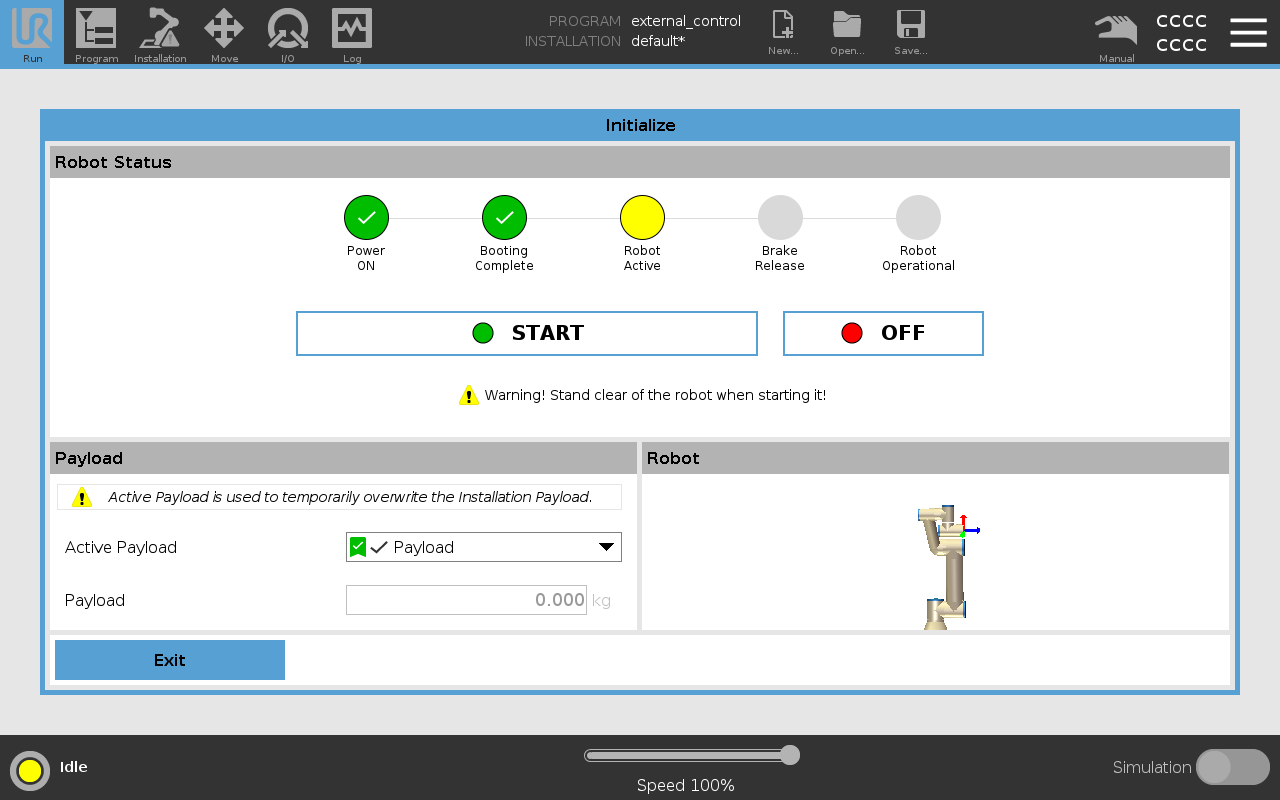 |
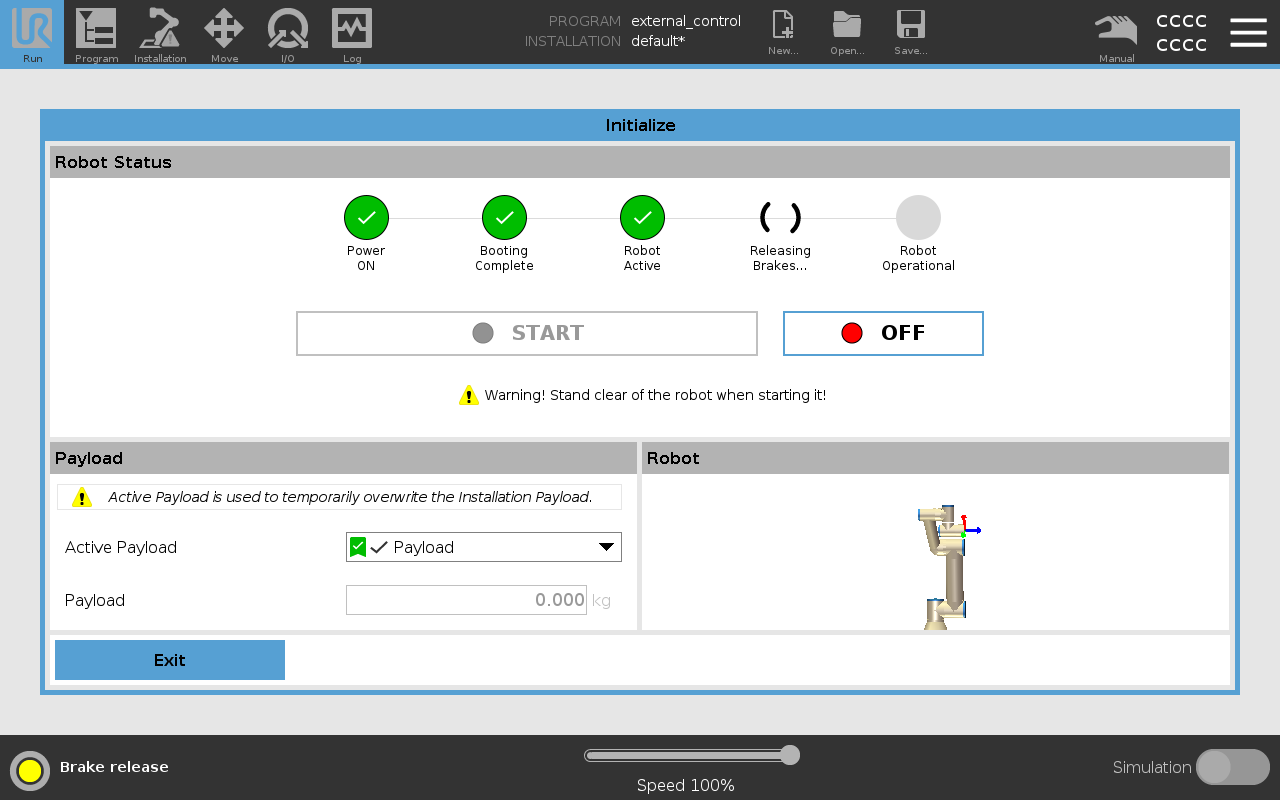 |
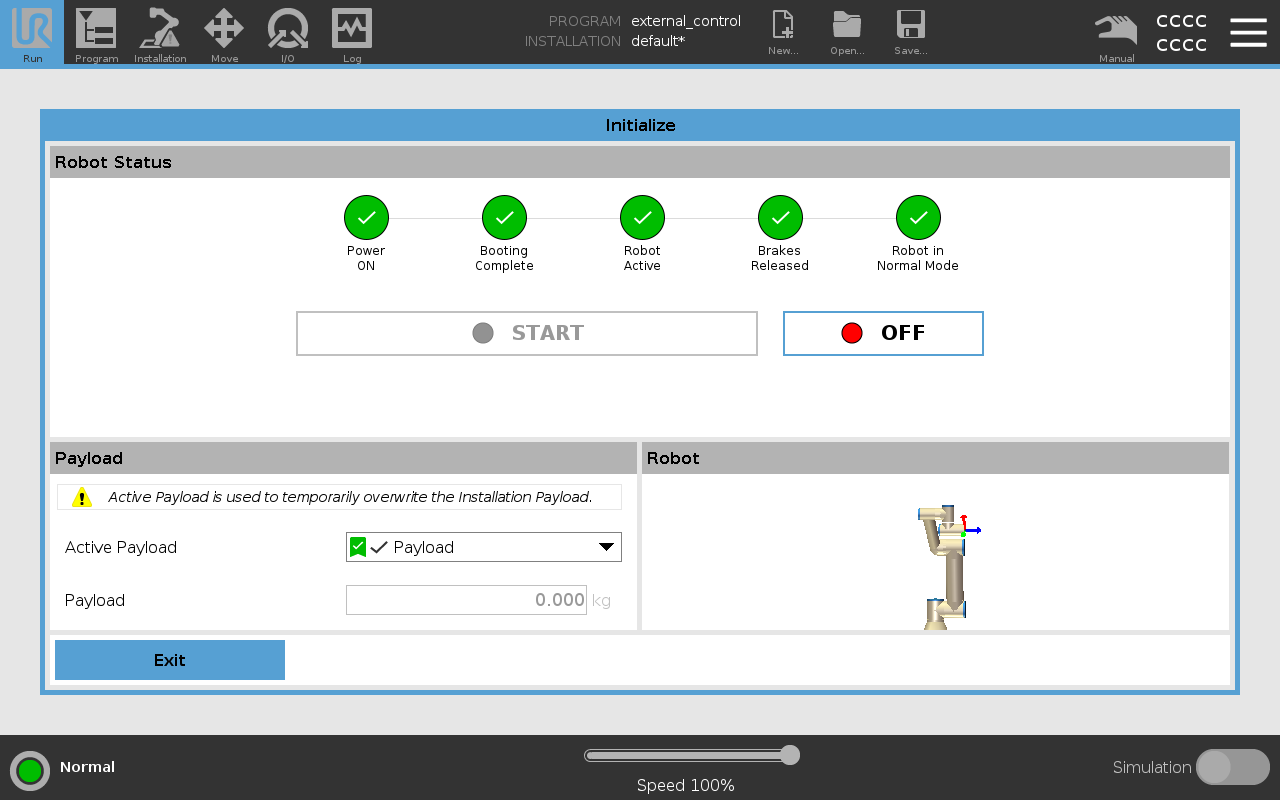 |
Once the robot is in normal mode, you can proceed to initialize the external control program.
Standard Initialization (Recommended)
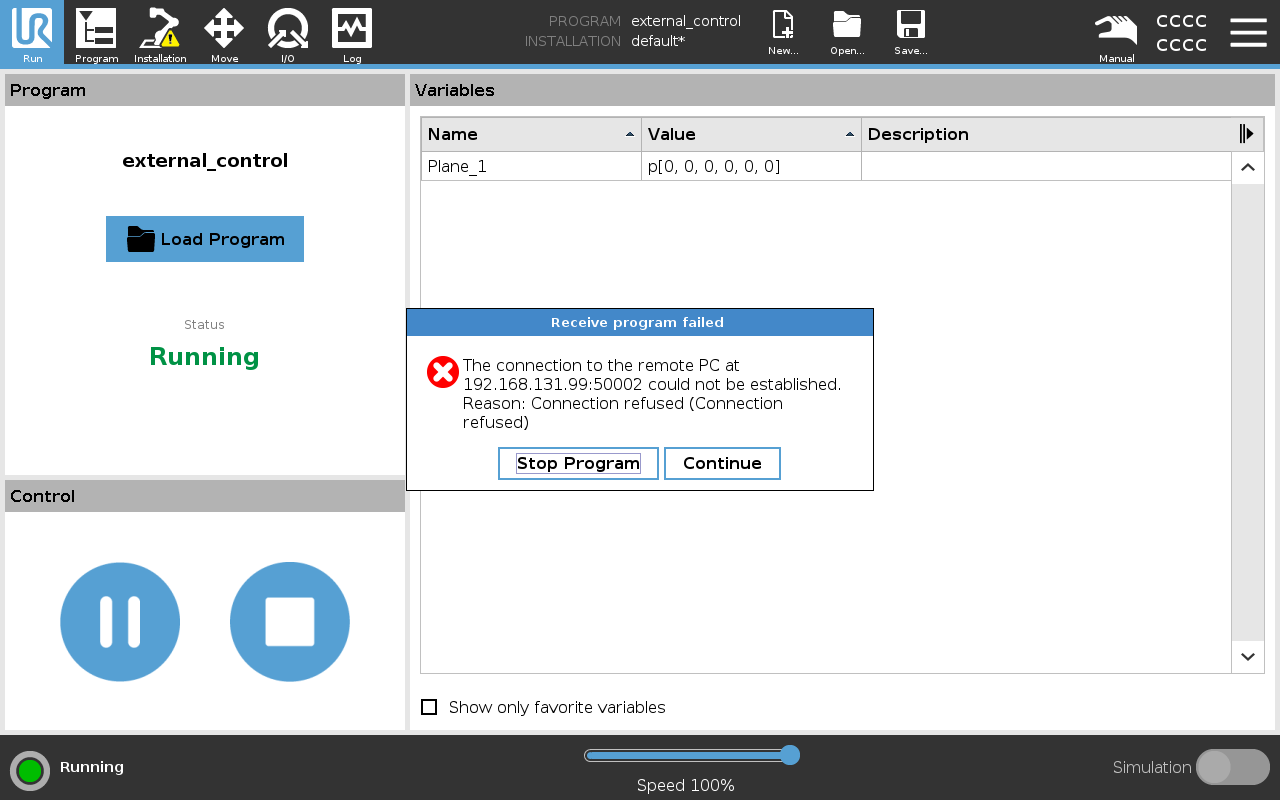
At start up, the robot computer will launch the arm's controller using the clearpath-manipulators.service. Once the arm is on and initialized through the teach pendant, start the external_control program, which will begin communication with the ROS driver.
Start the program by pressing the play button on the Run page.
Troubleshooting
If the following error pop-up window appears, then ensure that the arm's URCap configuration matches the robot's computer and that the robot's computer is able to ping the arm. The error also indicates that the ROS driver is not currently running or has been stopped. Restart the clearpath-manipulators.service and try again:
sudo systemctl stop clearpath-manipulators.service
sudo systemctl start clearpath-manipulators.service
Headless Initialization
If the arm has been setup to accept external control by surrendering manual control in the teach pendant, then it is possible to bypass the manual initialization of the UR program on the tablet. If this is the case, make sure the arm has been turned on and initialized through the teach pendant, then set, headless_mode: true in the robot.yaml. This will restart the services and the arm should connect automatically.
Setup
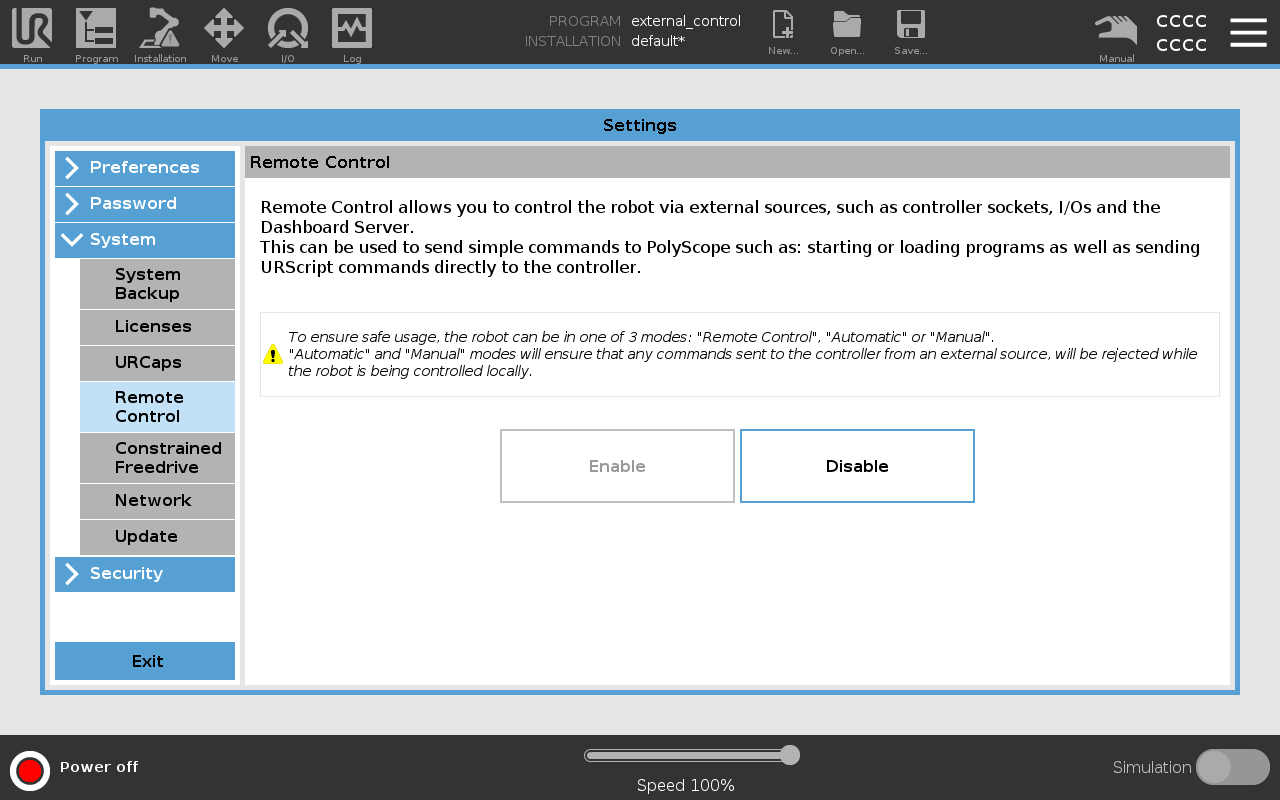
The headless setup is not recommended as it is more complicated, however it exposes the entire teach pendant's functionality to the ROS interface, and thus, provides experienced ROS users with the ability to detect arm faults, clear faults, and restart the arm programmatically.
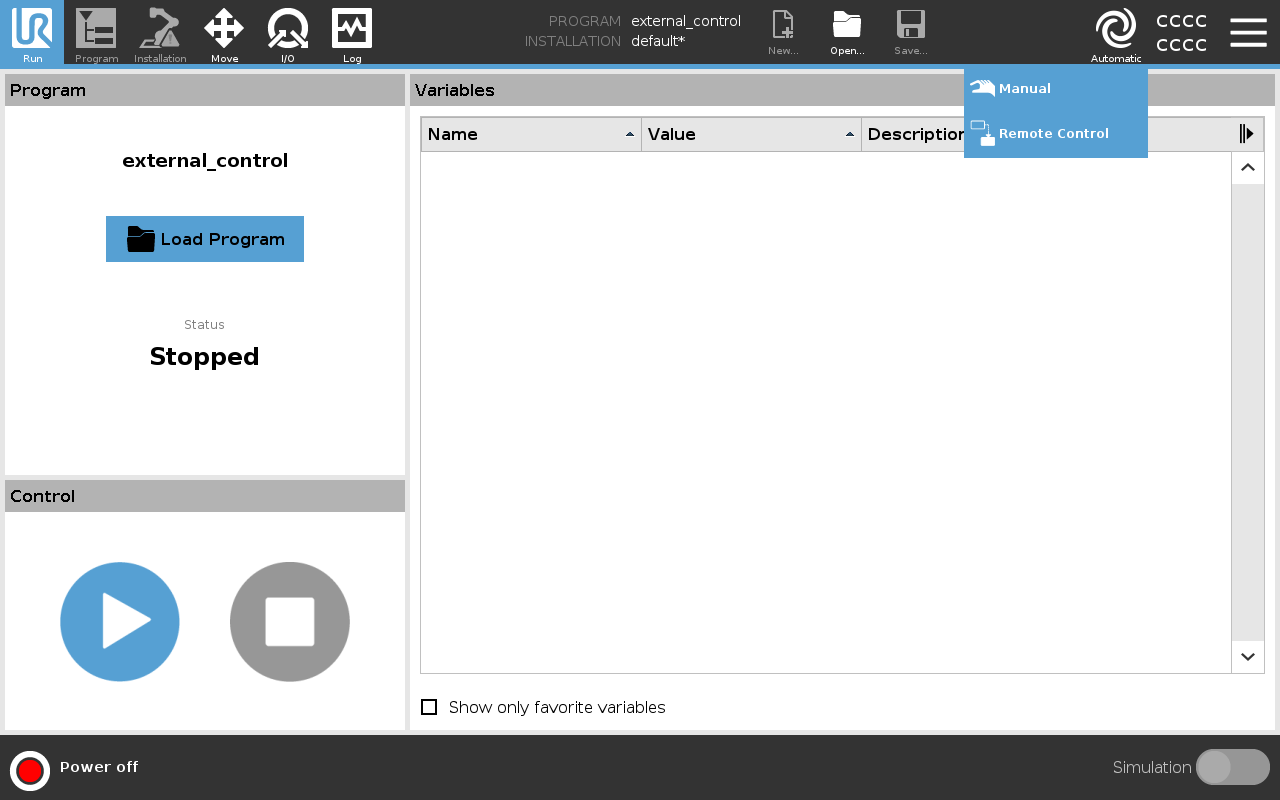
To begin the setup, make sure that remote control is enabled in the Settings/System/Remote Control page:
To enter Remote Control mode, first put the teach pendant in Automatic:
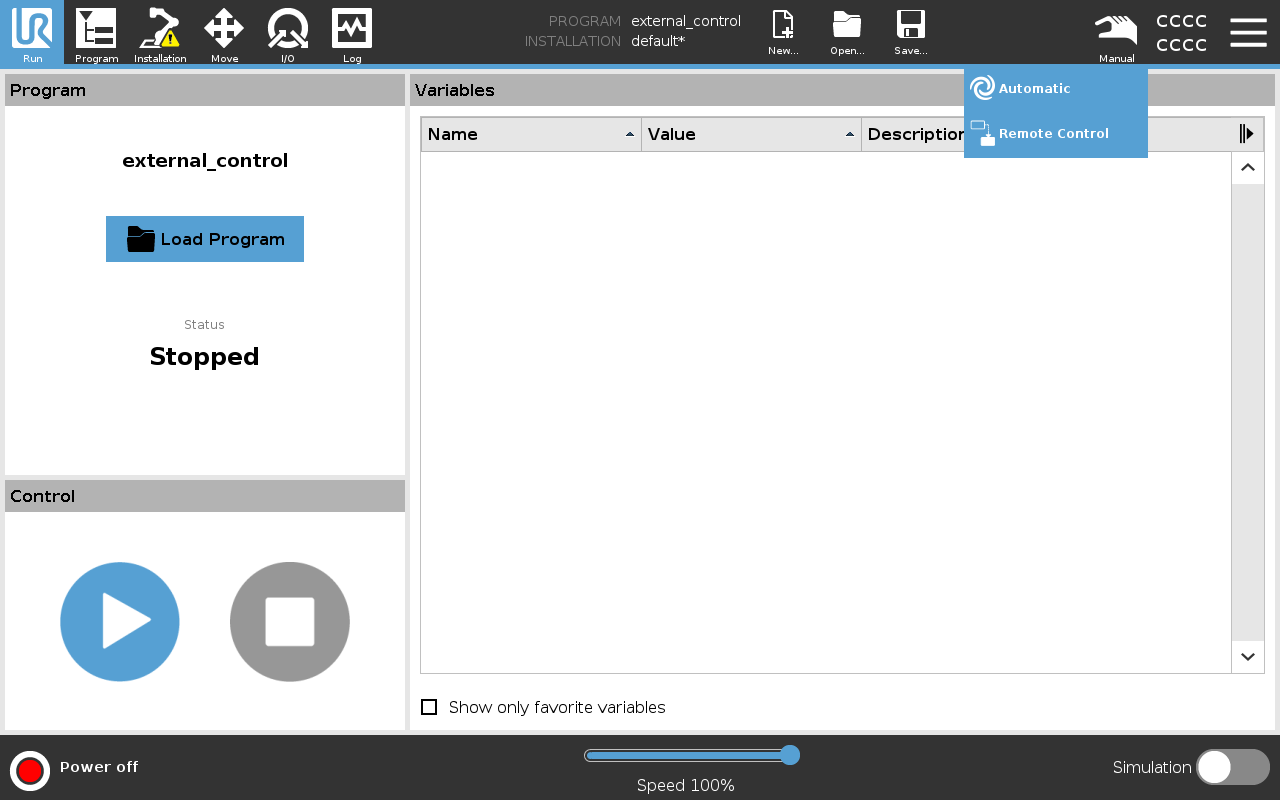
Then, you will be able to switch from Automatic to Remote Control:
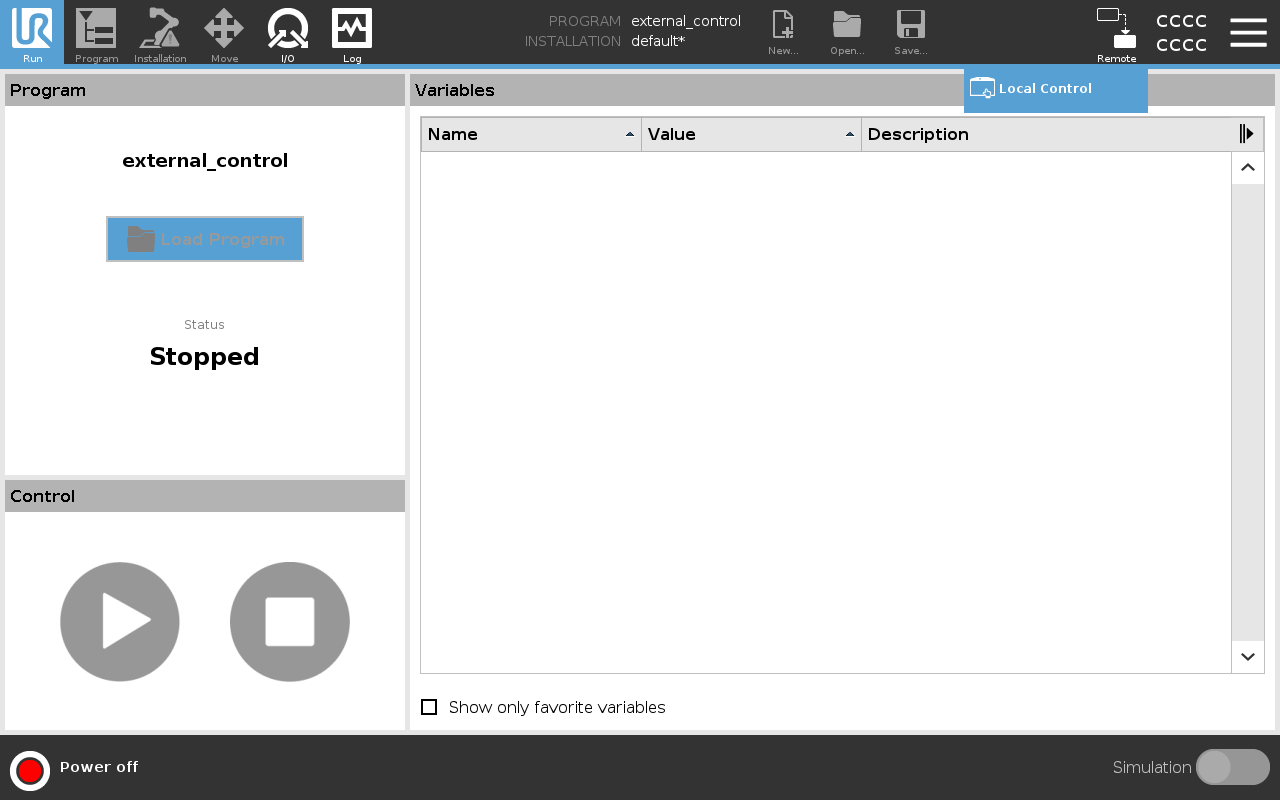
In this mode, you will be unable to interface with the arm directly from the tablet. Instead, all commands must be sent by the external device. You can restore manual control by following the steps above in reverse.
Parameter: Device IP
The robot_ip must be set to match the networking settings of the arm's control box. By default, we use the 192.168.131.40 address.
Parameter: UR Type
The ur_type parameter can be modified to change the type of the arm. By default, it is set to ur5e. But, it is critical that it is changed to match the real arm type. The following types are supported: ur3, ur3e, ur5, ur5e, ur10, ur10e, ur16e, ur20, ur30.
Parameter: Calibration Parameters
By default, the default kinematics parameter file is passed to the arm's ROS controller. Because each arm has it's own measurable offsets, it is likely that without updating this calibration file the arm's movements will not be as accurate as could be. Therefore, use the ur_calibration package to obtain the calibration parameter file.
ros2 launch ur_calibration calibration_correction.launch.py robot_ip:=<robot_ip> target_filename:="${HOME}/my_robot_calibration.yaml"
Then, in the entry to the configuration file, pass in the path to the calibrated kinematics file.
manipulators:
  moveit:
    enable: false
  arms:
    - model: universal_robots
      parent: default_mount
      xyz: [0.0, 0.0, 0.0]
      rpy: [0.0, 0.0, 0.0]
      ur_type: ur5e # ur3, ur3e, ur5, ur5e, ur10, ur10e, ur16e, ur20, ur30
      robot_ip: 192.168.131.40
      headless: false
      kinematics_parameters_file: "/path/to/my_robot_calibration.yaml"
Note, you can also pass in substitution arguments:
kinematics_parameters_file: "$(find package_name)/path/to/my_robot_calibration.yaml"
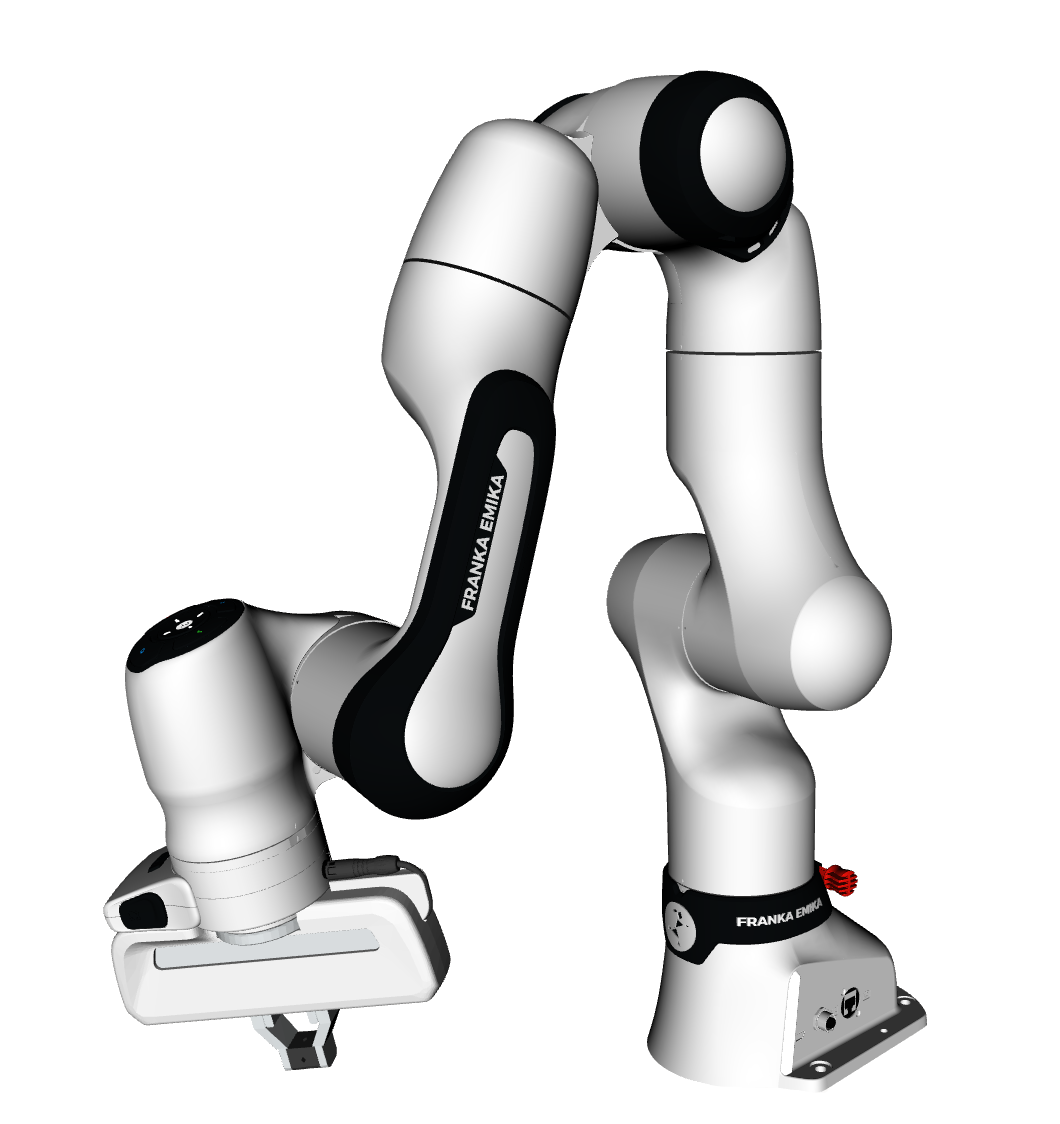
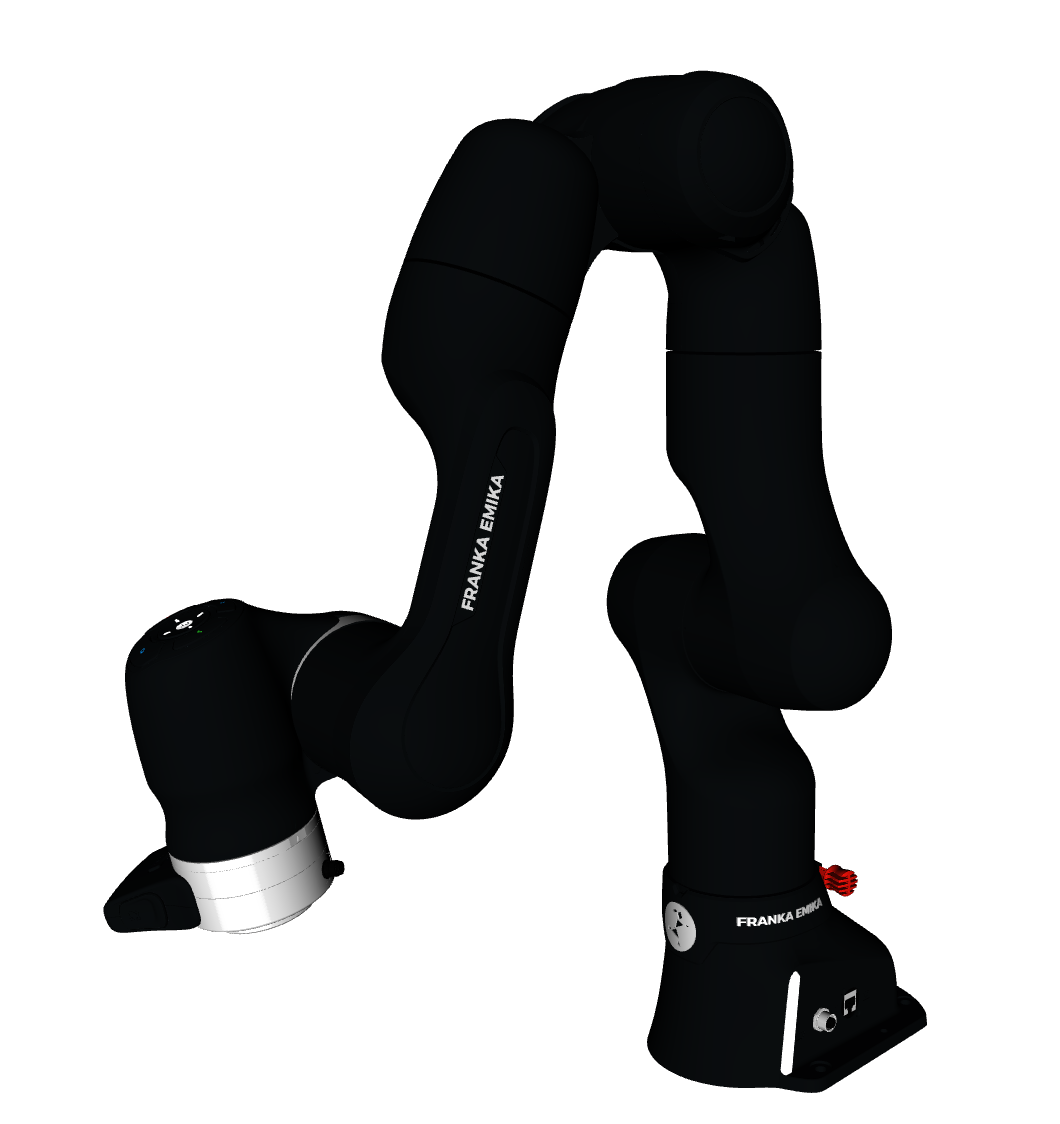
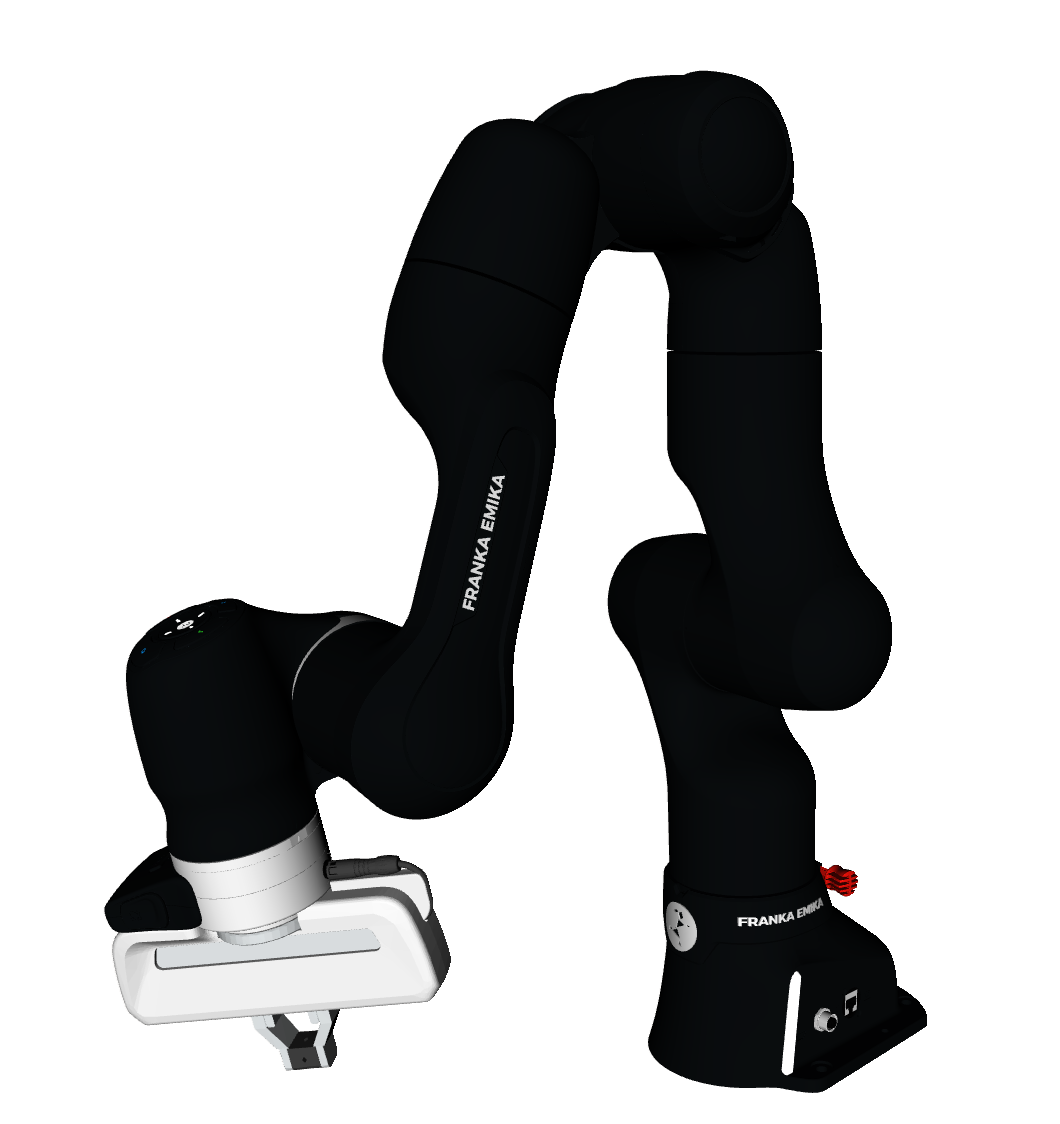
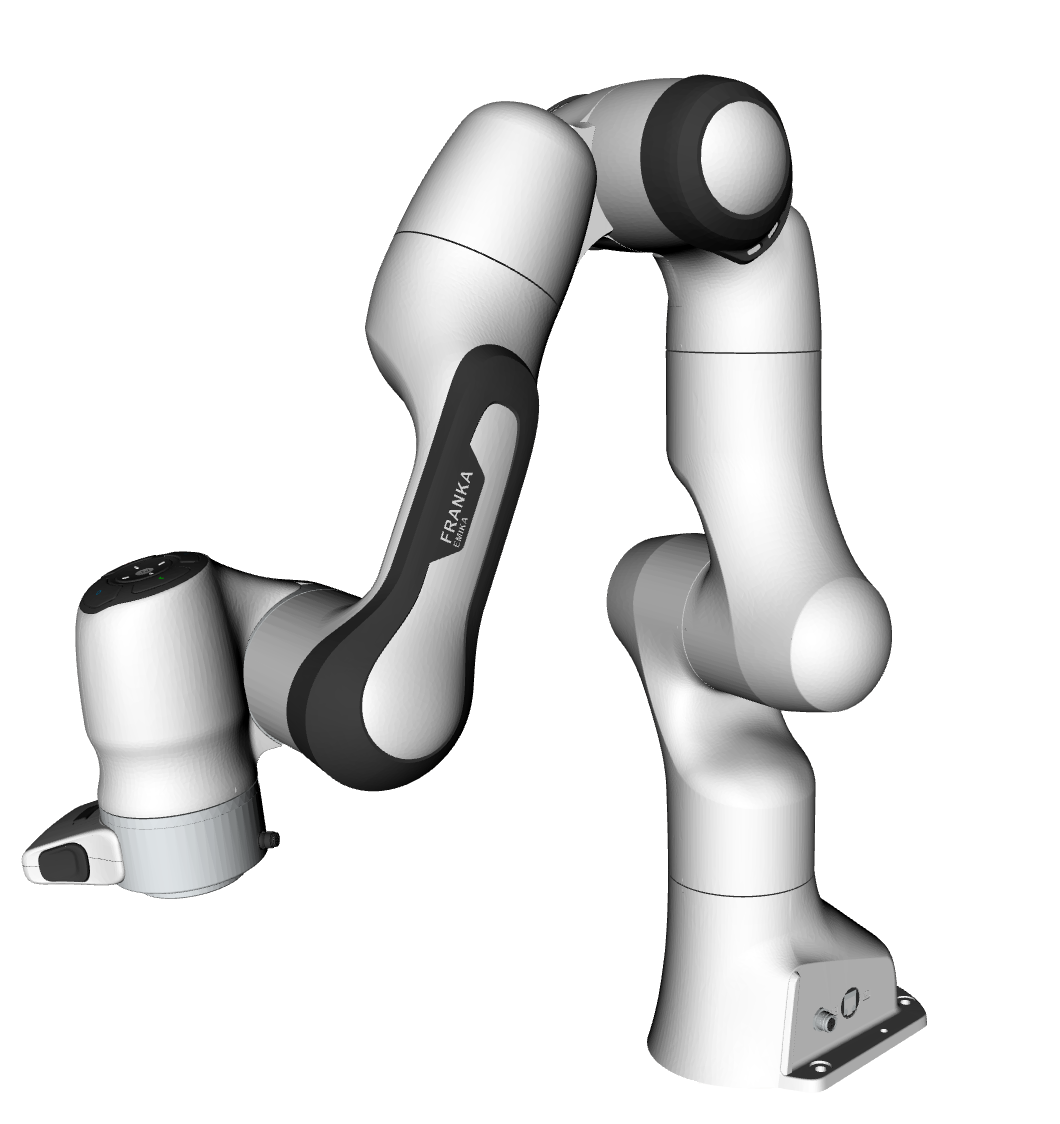
Franka
- Franka Research 3
- Franka Production 3
- Franka Emika Robot
 | |
 | |
 | |
 | |
 | |
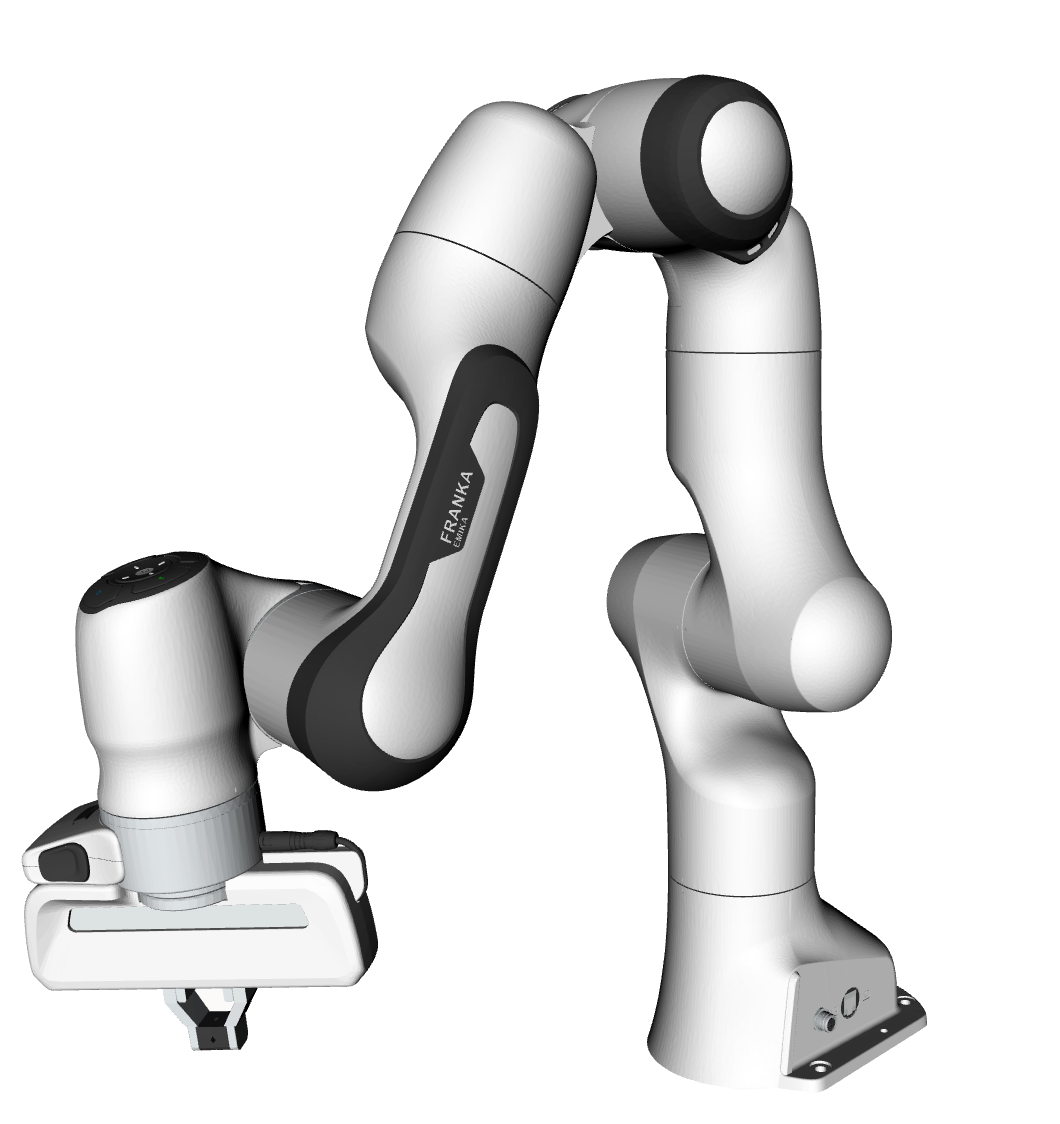 | |
Franka Setup
Package and Setup
The Franka arms use the franka_description and franka_ros2 ROS 2 packages abd the libfranka SDK. The description and driver are open source, maintained by Franka Robotics, and hosted on GitHub. Refer to the description repository, driver repository, and SDK repository. Follow the instructions in the driver repository's README to build the Franka packages in a workspace.
For more specifics on the way Clearpath's configuration system adds the arm to the robot description, see the description file. Note, all parameters to the xacro:macro franka can be passed through the robot.yaml entry above. For examples, read the sections below.
Franka Desk Setup
Networking Settings
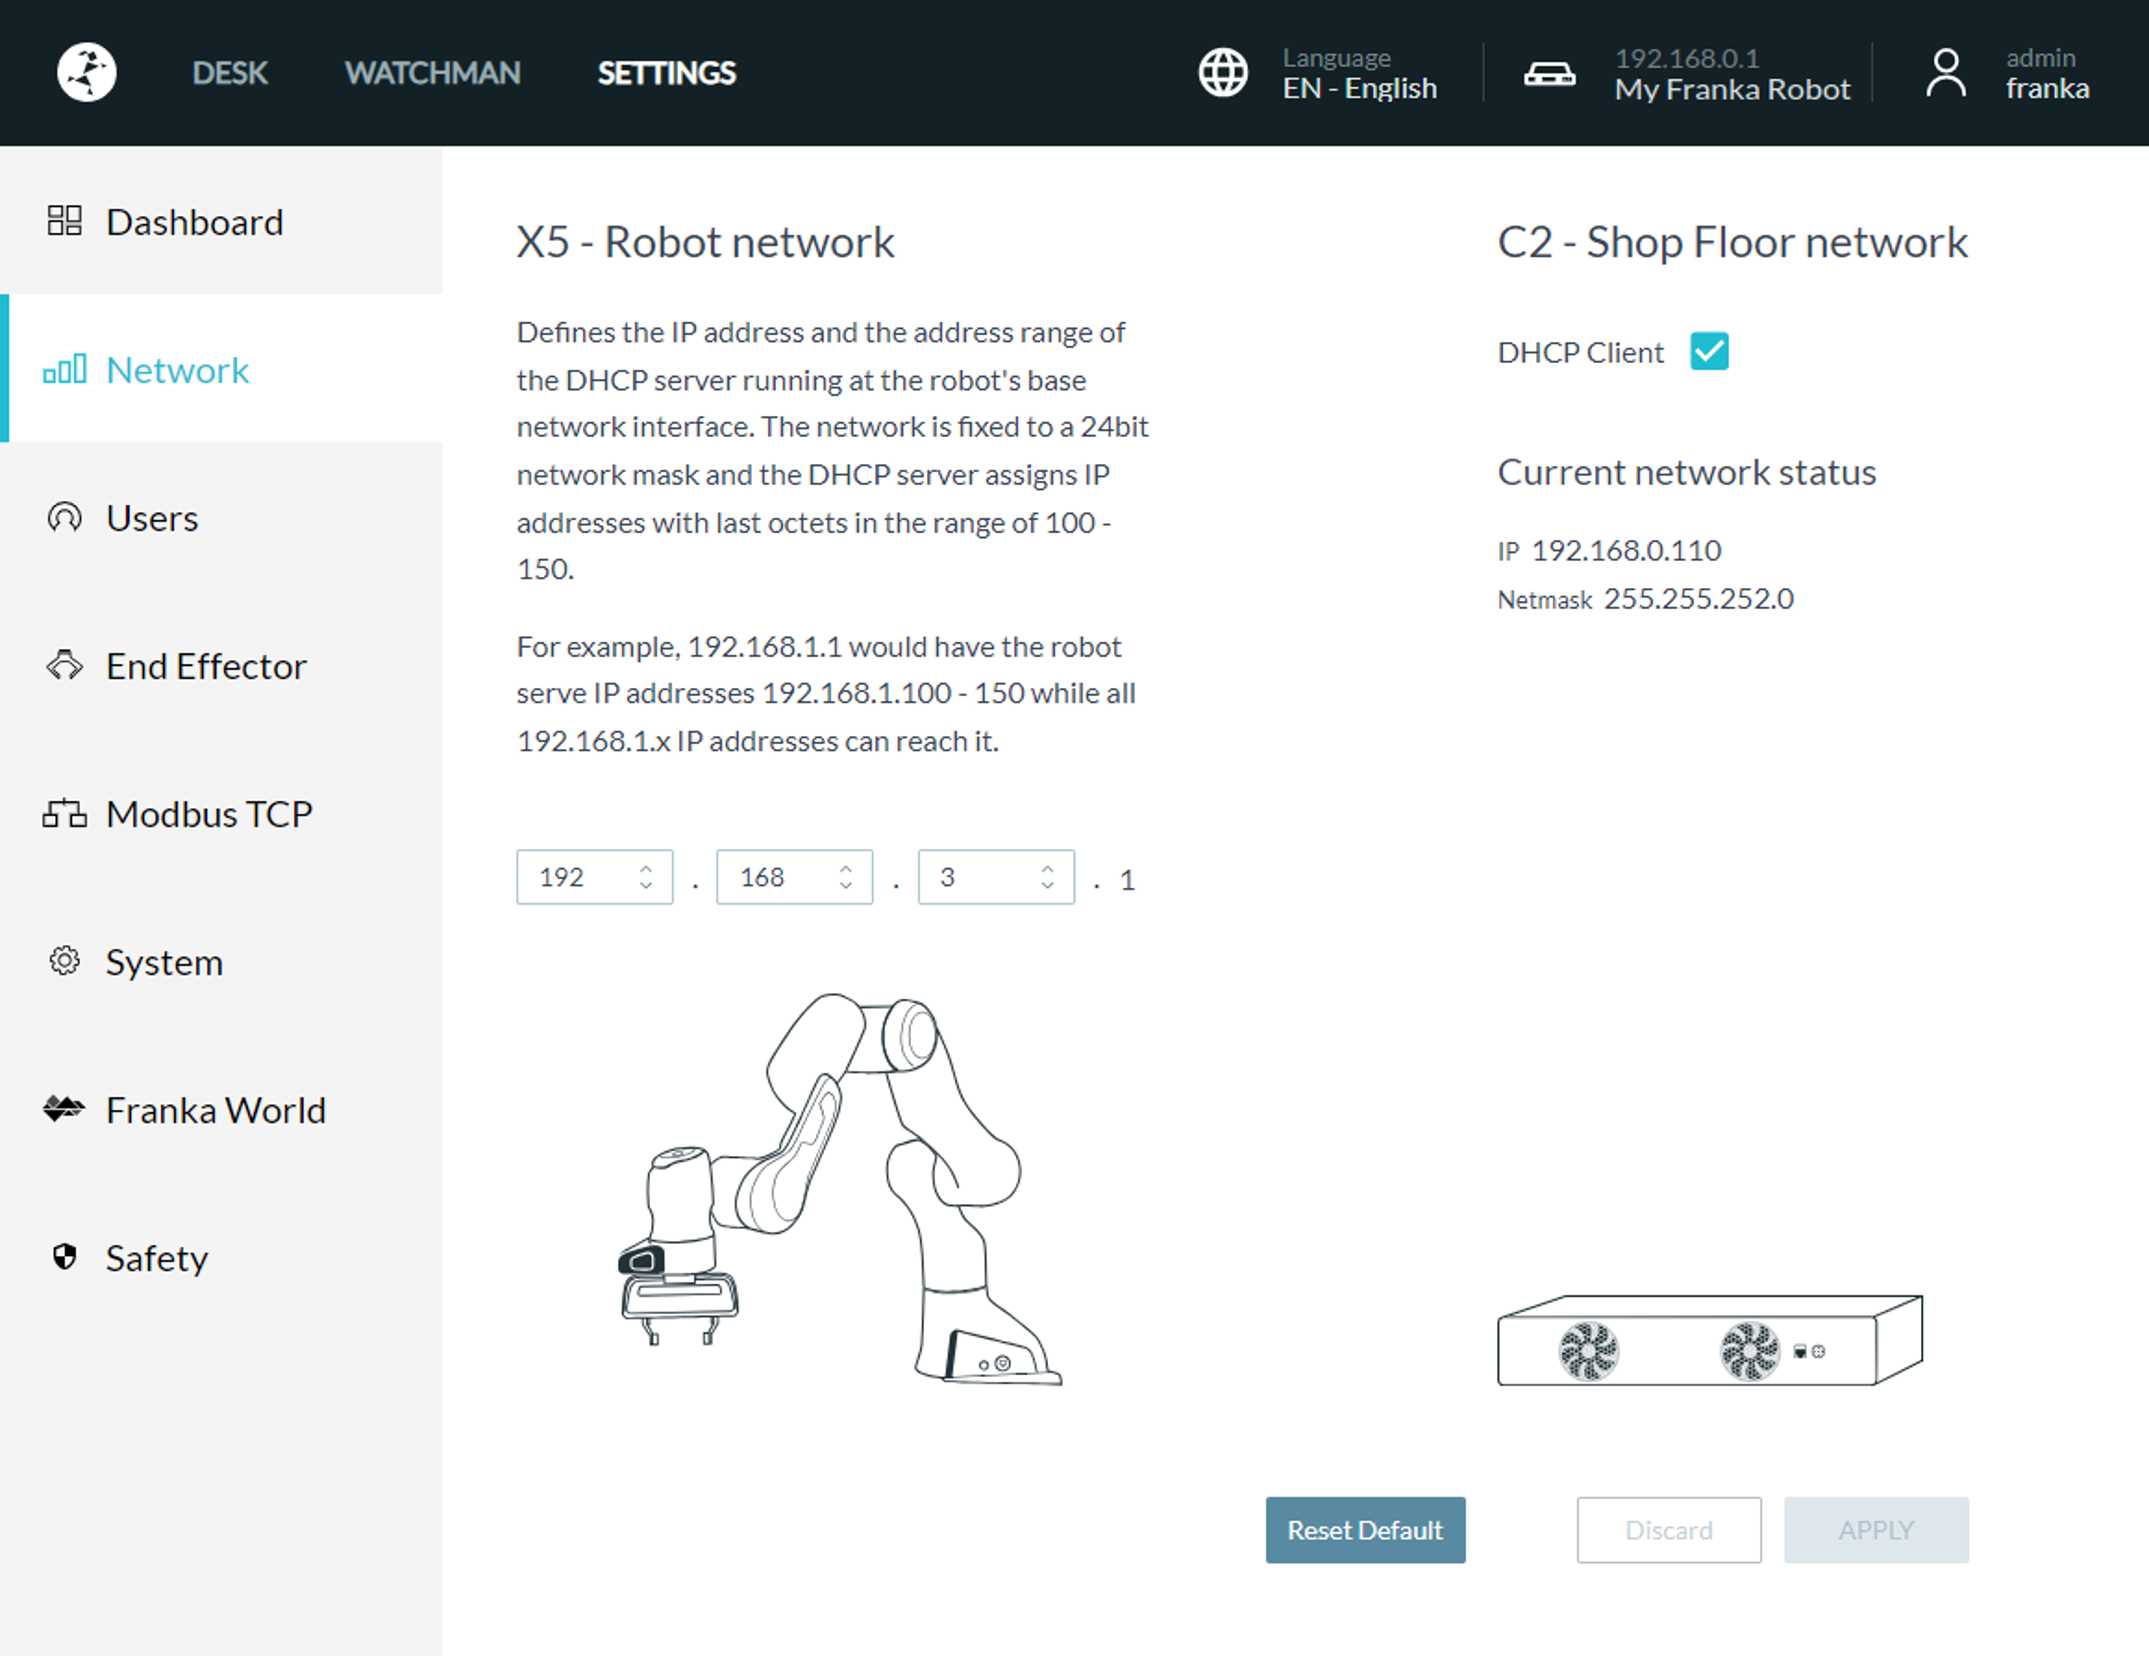
By default, the C2 - Shop Floor network should have DHCP Client disabled and set to the static 192.168.131.40 IP address. If changed to an IP other than 192.168.131.40, then that new address must be passed to the robot.yaml entry through the robot_ip parameter.
Initializing the Arm
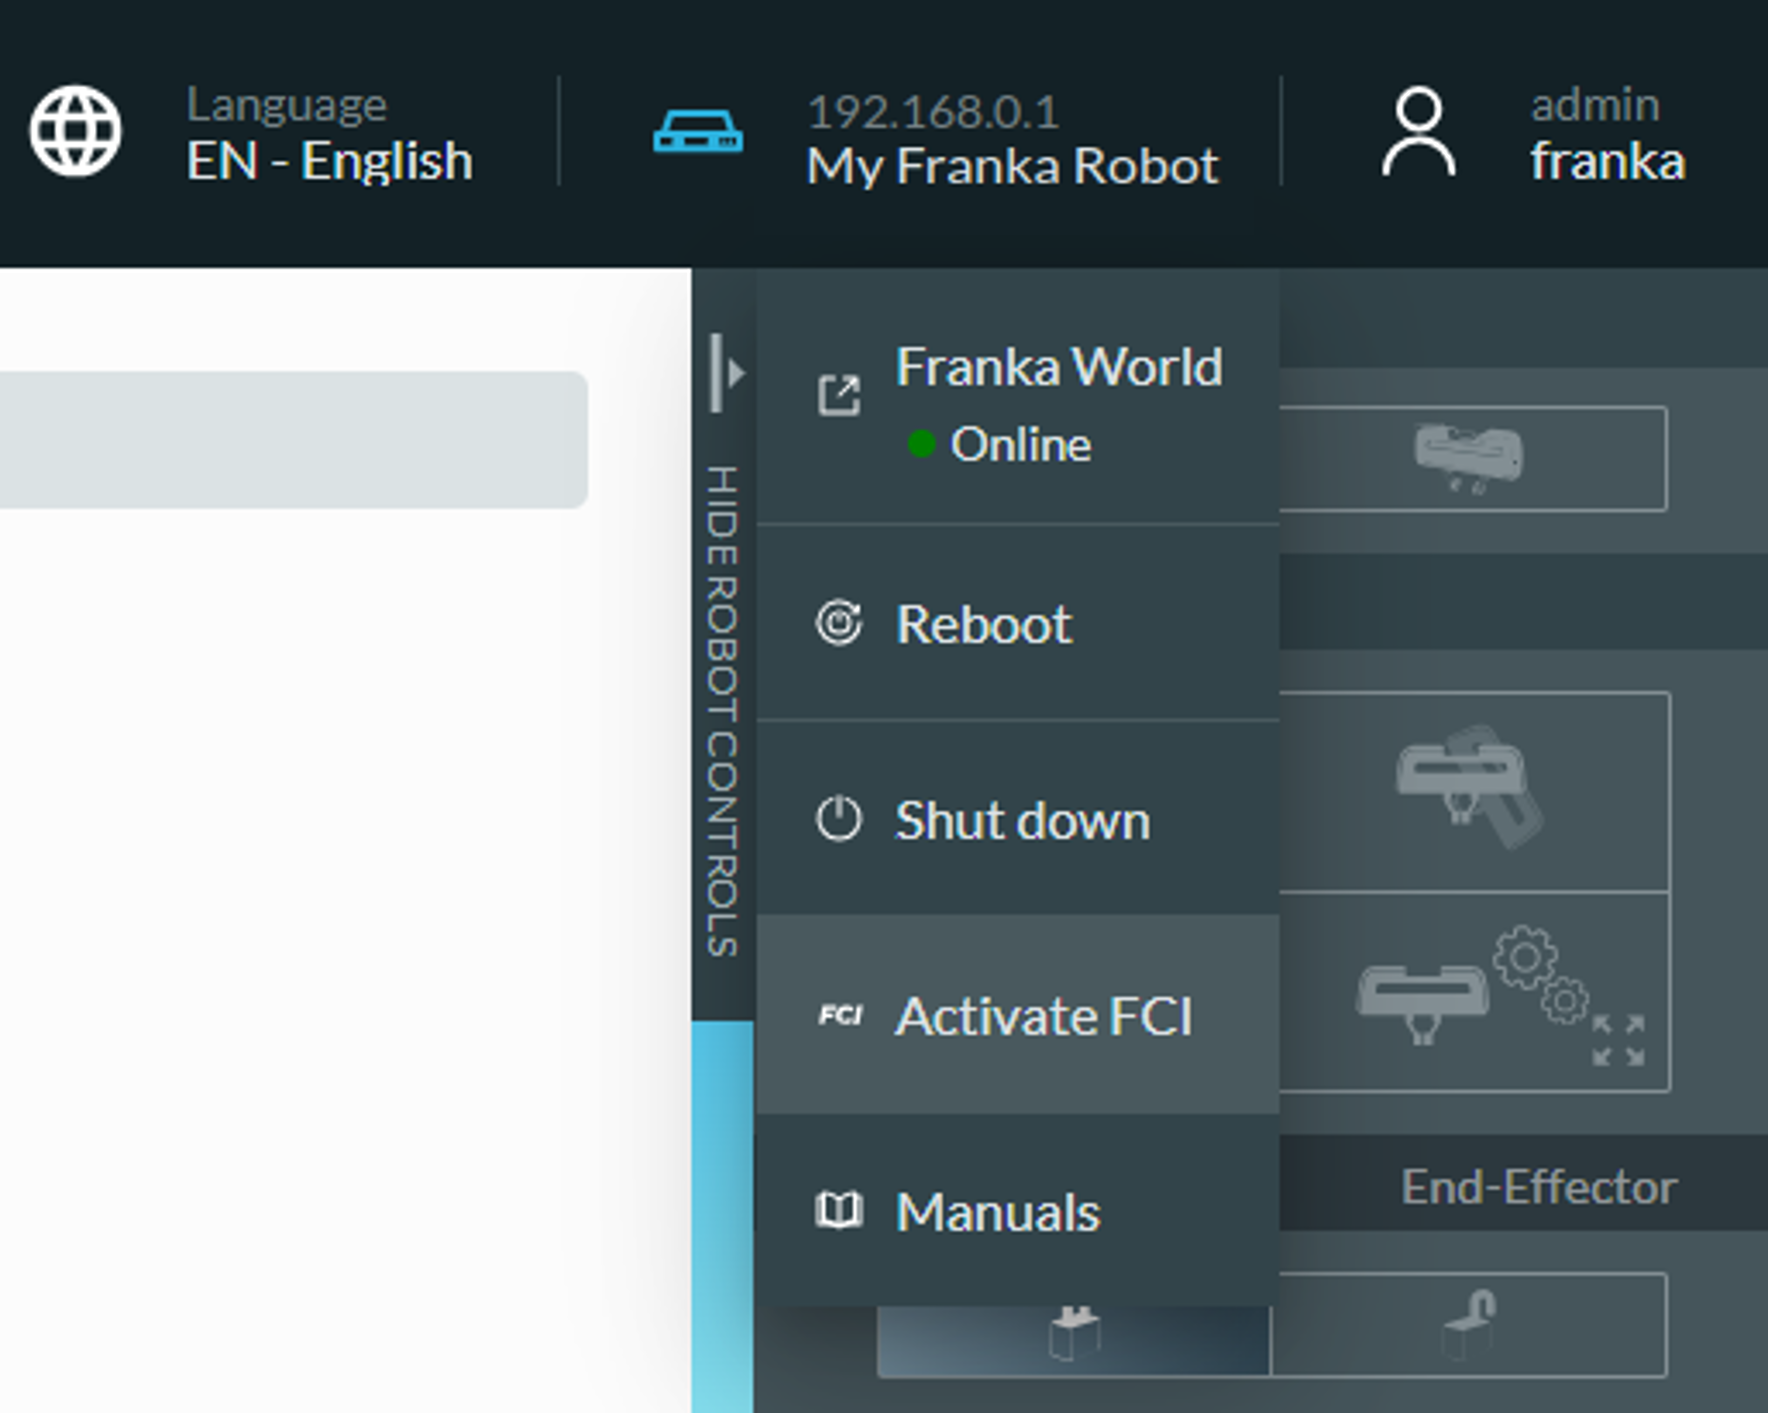
To begin moving the arm, unlock the joints. Then, enable the FCI mode to allow a an external computer to control the arm.
Parameter: Device IP
The robot_ip must be set to match the networking settings of the arm's control box. By default, we use the 192.168.131.40 address.
Grippers
Kinova 2F Lite
 | |
Kinova 2F Lite Gripper Setup
The Kinova 2F Lite gripper is the standard gripper on the Kinova Gen3 Lite. It is controlled via the arm's hardware interface and therefore, does not need its own controller.
Package and Setup
Kinova manipulators the kortex_description and kortex_driver ROS 2 Packages. The driver is open source, maintained by Kinova Robotics, and hosted on GitHub.
For more specifics on the way Clearpath's configuration system adds the manipulator to the robot description, see the Kinova description files in clearpath_manipulators_description.
Device IP and Port
The ip and port parameters must be set to the corresponding values set on the manipulators configuration page.
Wrist Camera
Set vision: true under the arm configuration to enable the Kinova wrist camera.
Robotiq 2F 85
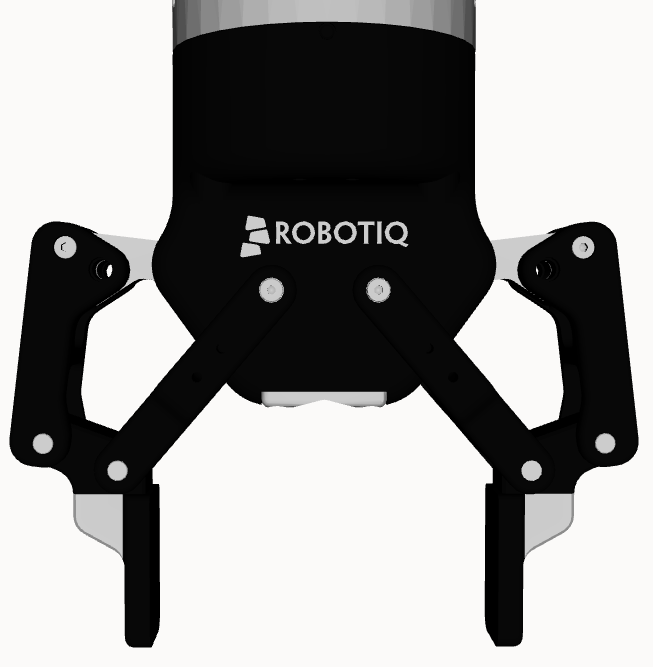 | |
Robotiq 2F 85 Setup
Package and Setup
The Robotiq 2F 85 gripper is supported by the Kinova Gen3 arm's wrist connector and hardware interface. Therefore, when attached to Kinova arm's the Robotiq gripper does not need its own controller.
The Robotiq 2F 85 uses the robotiq_description and robotiq_driver ROS 2 Packages. The driver is open source, maintained by PickNik Robotics, and hosted on GitHub.
For more specifics on the way Clearpath's configuration system adds the manipulator to the robot description, see the Robotiq 2F 85 gripper description file in clearpath_manipulators_description.
Robotiq 2F 140
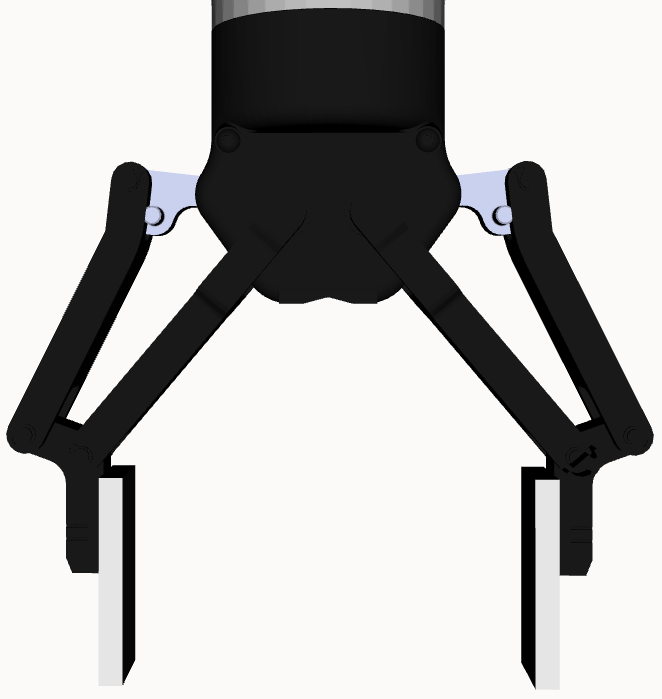 | |
Robotiq 2F 140 Setup
Package and Setup
The Robotiq 2F 140 gripper is supported by the Kinova Gen3 arm's wrist connector and hardware interface. Therefore, when attached to Kinova arm's the Robotiq gripper does not need its own controller.
The Robotiq 2F 140 uses the robotiq_description and robotiq_driver ROS 2 Packages. The driver is open source, maintained by PickNik Robotics, and hosted on GitHub.
For more specifics on the way Clearpath's configuration system adds the manipulator to the robot description, see the Robotiq 2F 140 gripper description file in clearpath_manipulators_description.
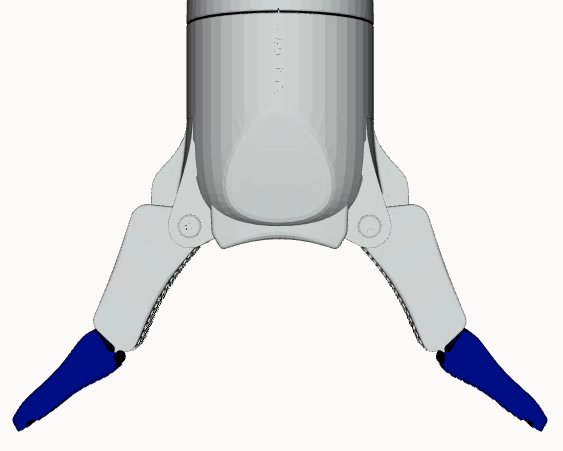
Franka Hand
 | |
Franka Gripper Setup
Package and Setup
The Franka grippers can only be used with the Franka arms and have the same dependencies. They use the franka_description and franka_ros2 ROS 2 packages abd the libfranka SDK. The description and driver are open source, maintained by Franka Robotics, and hosted on GitHub. Refer to the description repository, driver repository, and SDK repository. Follow the instructions in the driver repository's README to build the Franka packages in a workspace.
For more specifics on the way Clearpath's configuration system adds the arm to the robot description, see the description file. Note, all parameters to the xacro:macro franka can be passed through the robot.yaml entry above. For examples, read the sections below.