Quick Start
This section outlines how to set up your OutdoorNav system for some preliminary testing with the OutdoorNav Software on a UGV.
Connect to Web UI
-
Ensure that the UGV is powered on.
-
If the optional Base Station is included, ensure that it is powered on.
-
If using a custom networking configuration, ensure that the custom networking setup on the UGV is complete.
-
Connect your computer to the same wifi network as the UGV, then open the Chrome browser on your computer and load the OutdoorNav Homepage.
- Option 1 (easiest): No base station, computer connected to UGV's
wifi access point (eg. cpr_a300_amp_00009)
- OutdoorNav homepage: https://192.168.131.1
- Option 2: No base station, UGV and computer connected to the same
(external) wifi access point
- OutdoorNav homepage:
- if DNS is working on the wifi network, use the robot's hostname (eg. https://cpr-a300-00009)
- if DNS is not working on the wifi network, check the IP address of the UGV's computer and use it
- OutdoorNav homepage:
- Option 3: Base station, UGV and computer connected to base station
- OutdoorNav homepage: use the IP address that was noted on the documentation that shipped with the robot
- Option 1 (easiest): No base station, computer connected to UGV's
wifi access point (eg. cpr_a300_amp_00009)
-
Click to accept the End-User License Agreement. This page will be visible each time the UGV is restarted but only on the first navigation to the page. The EULA should be reviewed prior to using the system.
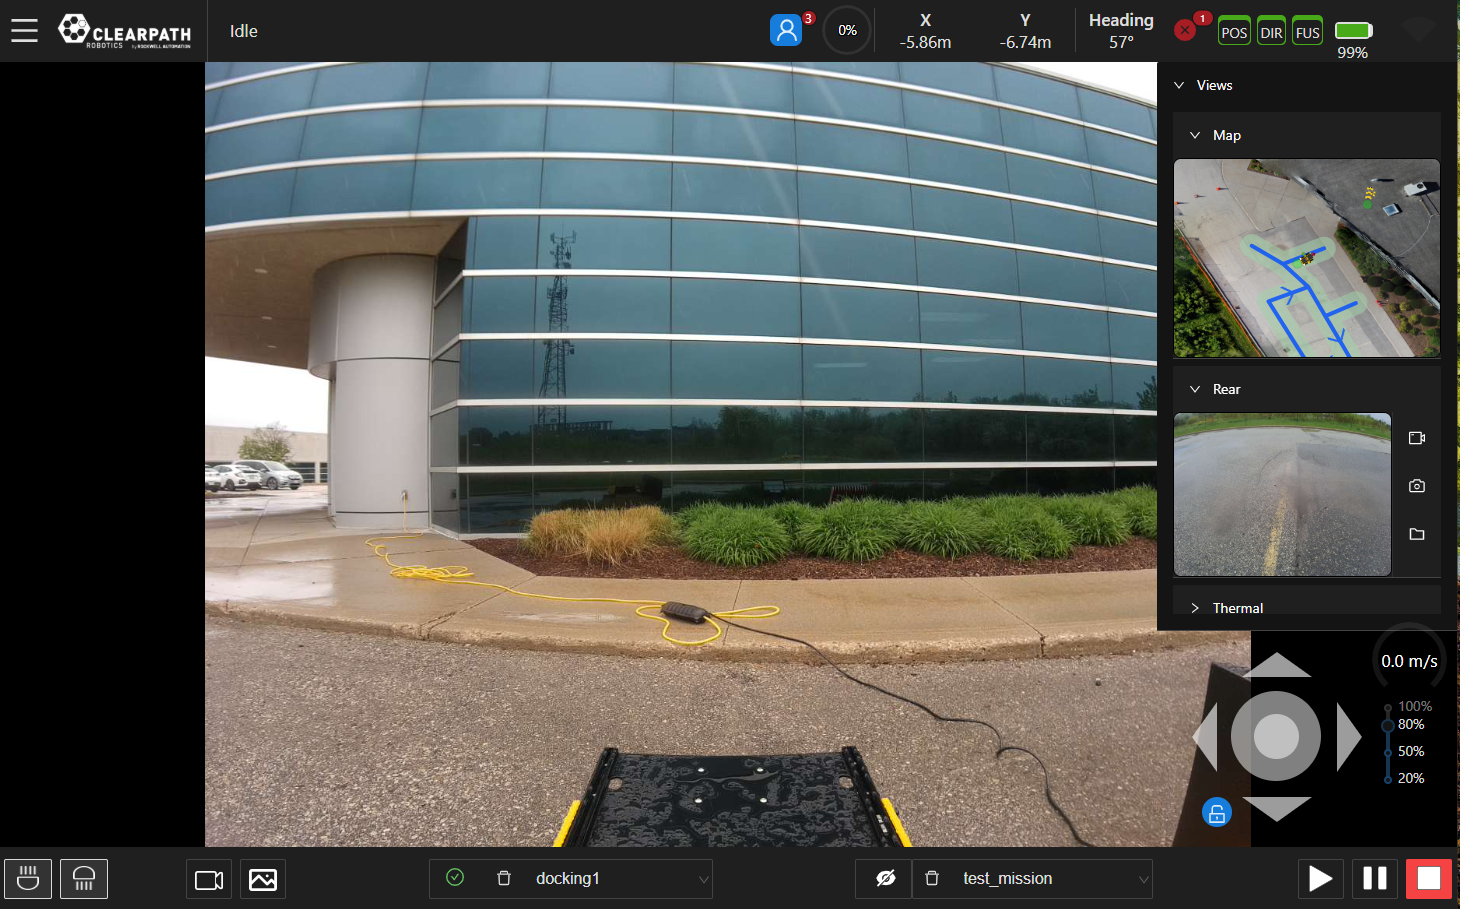
Check Camera Views
When your system includes cameras, the live view from each camera is shown on the right side of the OutdoorNav Homepage. Clicking on a camera view will maximize it on the screen. Cycle through each camera view and confirm that it is providing live updates.
Refer to Camera Views for more details.
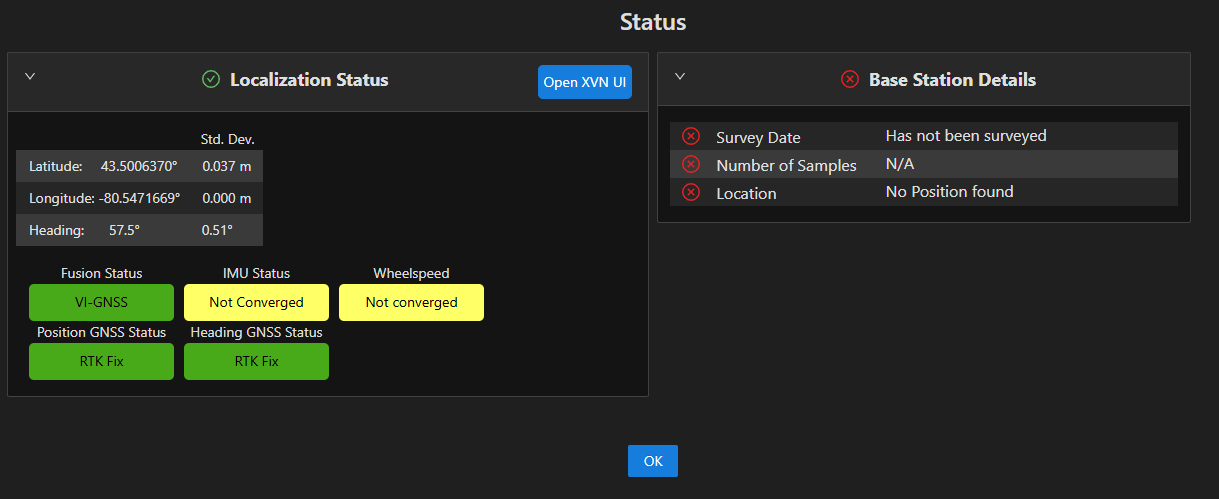
Check System Status
Access Menu → TOOLS → Status Monitor to display the system status.
Make note of any issues and correct those before proceeding.
Check GPS RTK Fix
Each time the UGV has been powered up (or moved from a GPS-denied
environment to a GPS-available environment), let the UGV sit in this
position for 2 minutes to acquire an RTK GPS fix. The POS (position),
DIR (heading), and FUS (sensor fusion) GPS status indicators on the UI
should be green: 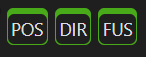 .
.
If the GPS status indicators are yellow or red, the selected location does not have an adequate GPS signal. Move the UGV such that the GPS antennas have clearer visibility to satellites.
If your robot is not equipped with a Base Station, a separate data source is required to obtain a GPS fix. Contact Support for additional details.
Complete the System Configuration
Load Map Tiles
The Web UI does not cache map tiles on the browser; therefore, the user will need to ensure their computer has a connection to an Internet source to load the map tiles. There are several options to achieve this:
- If the system includes a Base Station that is connected to the Internet, you will be able to access the Internet and therefore map tiles over the base station network without needing any further updates.
- Connect your phone via USB to your computer (or tablet) and enable USB tethering on your phone to share the Internet from your phone.
- Switch your computer (or tablet) to a network that is connected to the Internet, zoom in/out of the map to load the tiles then switch back to the original network.
Set Dock Location
If the Clearpath Robotics autonomous docking package has been included, follow these instructions to set up the dock location. Otherwise, this section can be skipped.
Keep the area around the dock free of objects and people. There is no obstacle detection between the pre-docking point and the dock; similarly, there is no obstacle detection during the undocking operation.
Before being able to dock the UGV autonomously, set up the dock location. Follow these steps to position the UGV in its correct position and orientation.
-
Power ON the UGV and wait for the system to finish booting.
-
Start by manually driving the UGV to the dock target and align it as straight and centered as possible so that it begins charging.
-
On the left side of the UI, select the Edit mode button (pencil icon) and then select the Docks option.
-
Click anywhere on the map to create a dock. Name it and select the default configuration.
-
Click and drag the dock to the location of the robot icon and align its position and orientation. To rotate the dock, hold the
Ctrlbutton and use the cursor to orient the dock (the arrow on the dock should be used as a guide). -
On the left side of the UI, select the Edit mode button and then select the cursor option.
-
With the remote controller, drive the robot at low speed purely in reverse so the robot icon on the UI lines up with the green dot on the UI (ie. the predock point).
-
Right click the dock and select
Surveyin the list of option. -
The docks position/orientation will be updated in 10 seconds. You should see the dock snap to its new pose.
If the Base Station has been moved (and therefore been resurveyed), or if the dock has been moved to a new location, the user will need to repeat the above steps to set the location of the dock.
Create Your First Map
- Ensure that the UI is in "Map Edit Mode":
 →
→
 .
. - Open the drop down menu in the bottom bar (left-side) and select the "Add Map" option.
- Start placing points and building paths. (A map will be created with the default settings.)
For more details, refer to Map Creation.
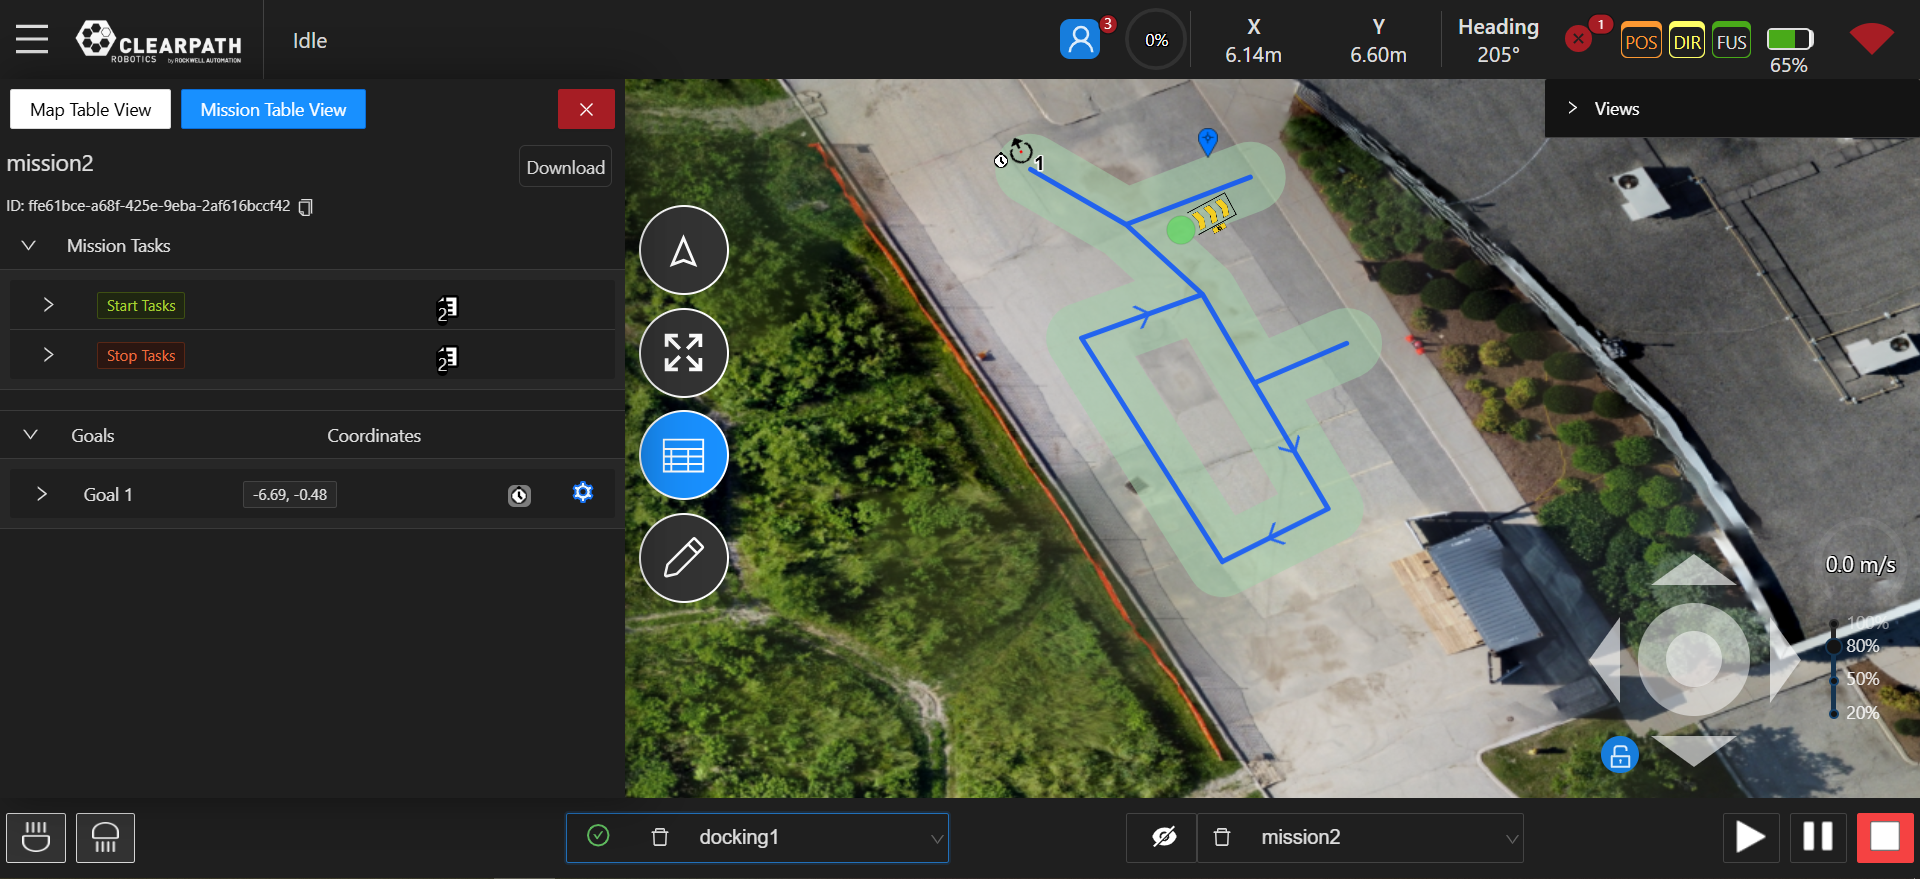
Create Your First Mission
- Ensure that the UI is in "Mission Edit Mode":
→
 .
. - Open the drop down menu in the bottom bar (right side) and select the "Add Mission" option.
- Select the "Goalpoint Mode" button.
- Click on the map to add a goalpoint.
- Confirm that a preview path is shown on the map.
For more details, refer to Mission Creation.
Execute Your First Mission
- In the bottom bar of the UI, click the "Play" button
 .
. - Confirm that the "Play" button has turned green, which indicates that the mission has started.
For more details, refer to Mission Execution.