Mission Scheduler
Scheduling missions
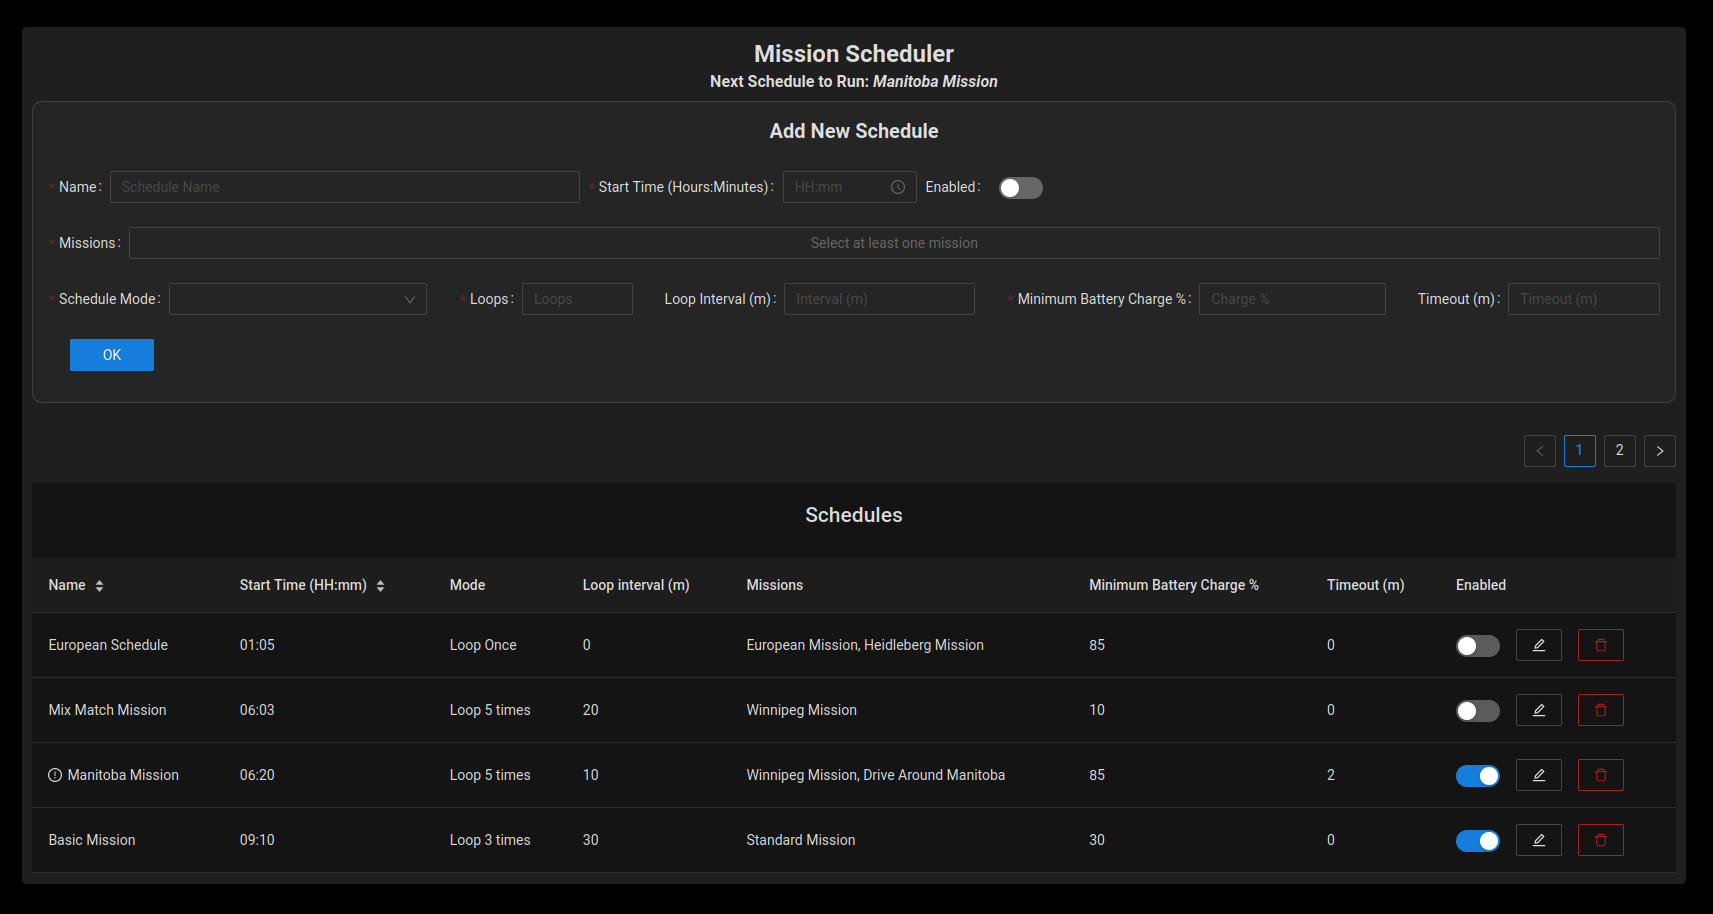
By selecting the "SCHEDULER" option from the upper left hand menu, the user can open the Mission Scheduler interface. This interface allows users to schedule groups of missions to run at a later time. These schedules can be set to run only once or to be looped over a period of time. For example, a user could create a schedule that will run 3 missions starting at 9 AM and run every hour 8 times. Once the last iteration is run, the schedule will disable itself and can be re-enabled to run again later. The view itself can be found in the image below and is elaborated further afterwards.

Adding/Updating a Schedule
The user can either create a new schedule by filling in the appropriate fields or edit a schedule by selecting the pencil icon for that schedule in the bottom table. The input fields are outlined as follows:
- Name: The name of the schedule.
- Start Time: The browser's local time that the schedule will start. This is stored as UTC time on the robot.
- Enabled: Enables/Disables the schedule. When schedules are completed they will disable themselves.
- Missions: The list of missions that will run. The schedule will run the missions in the order that they are added.
- Schedule Mode: Sets the kind of schedule mode to be either "Run Once" or "Looped". If it is set to run once, the next 2 inputs will be disabled.
- Loops: The number of iterations the schedule should run for. If for example it is set to Loop 5 times then the schedule will run 5 times (instead of run once and then re-runs 5 times).
- Loop Interval: The amount of time between the start of successive loop iterations. This is independent of the mission duration.
- Minimum Battery Charge: The minimum battery percentage that the UGV should be at to run the schedule.
- Timeout: The maximum amount of time to spend on running a single loop of the schedule. If a loop exceeds this timeout value the schedule is assumed to have failed and alerts the user accordingly. This can be set to 0 to disable the timeout feature.
Schedule Table
Schedules found in the database are displayed in a simple table at the bottom of the screen. Schedules can be enabled, edited or deleted from this table through the icons on the right hand side. The schedules can also be sorted by name or start time in ascending/descending order. The next schedule to run (if one is available) will have a small information icon next to it's name and will also be reported at the top of the screen.